
So you’ve come to the point in your cosplay career where you’re just dying to cosplay someone like Yoko Littner, Saki Nikaido, Darkness Dustiness Ford Lalatina, Sailor Jupiter, Bayonetta, or even Bowsette, but you have no idea how to put a high voluminous ponytail on a wig. Let me reassure you it’s easier than it looks.
Here’s what you need:
- One base wig
- A second base wig or ponytail clip(s) in the same colour as the first
- Galvanized wire
- Worbla Scraps (you only need about 1 sheet of printer paper worth)
- One Large Styrofoam Ball or Cone
- Acrylic Paint in a matching colour
- A handful of small elastics
- 2 thicker elastics (I like the ones that come on broccoli for this)
- Hot Glue
- Hairspray
- Wig Brush, Comb, Clips, and a Wig Head
So to start things off we’re going to talk a little bit about wig choice. One of the most important things for this kind of styling is to get one that is heat safe.
 I would also recommend a spiking wig because they have a lot of short layers that will do a really good job of hiding the cap when you pull the hair up and will help create maximum volume.
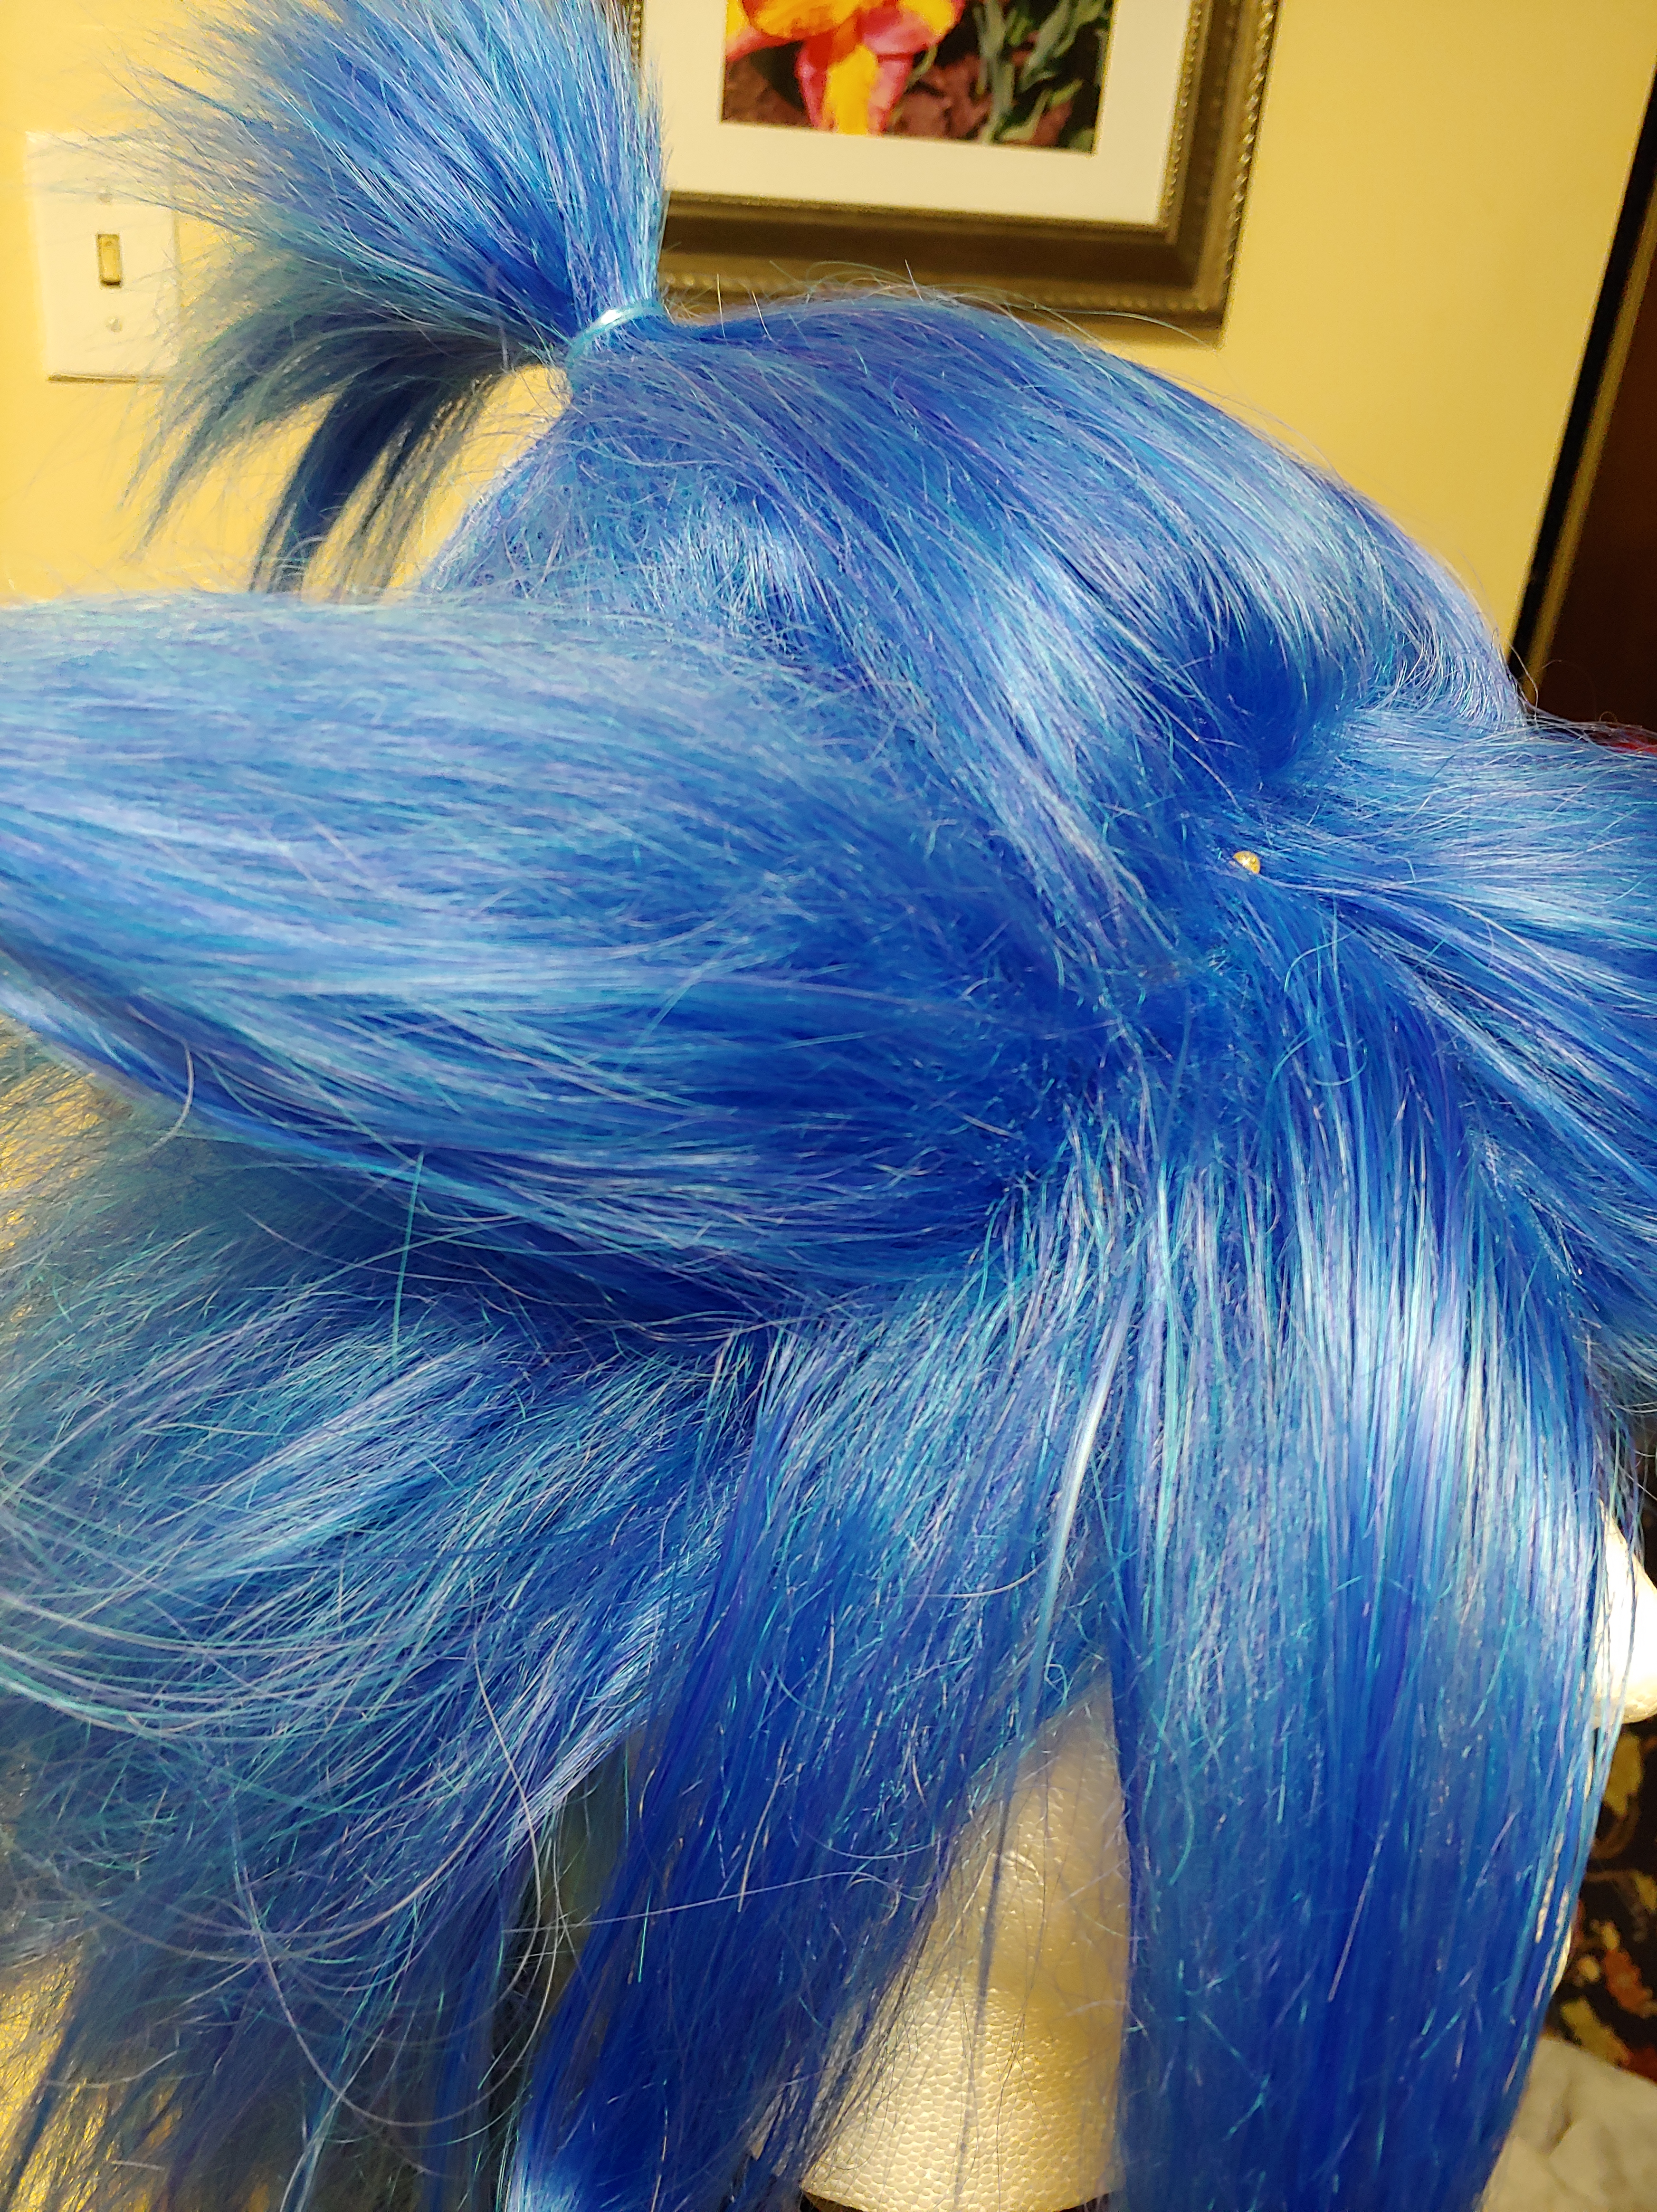
The next thing to consider is the length of the base wig. If you want it to be a really voluminous ponytail you will need to start with something a little longer so that when you make it big, you can still get all the ends of the fibers into the ponytail. For the second wig or the ponytail clips, you’re going to want something that is close to the length that you want your actual ponytail to be, or a bit longer so that you can easily trim it to the length you want. For this tutorial, I am using an Arda Wigs Jareth and 2 Silky Curly clips in Cobalt Blue and Sapphire to make my wig for the Neopets Tooth Faerie.
This is a close up of the roots of the base wig, all these fluffy short layers are going to help hide the wig cap when we start giving everything some lift.
 For the next step, you’ll need to get out your flat iron. If it’s the same one as you use for your own hair, wipe it clean with a cloth and some soapy water to get any of the oils from your hair off before using it on your wig, the oils from your hair can damage your wig fibers over time.
My wig says it is heat safe up to 420 degrees Fahrenheit but I’ve never felt the need to turn my straightener up over 310 degrees. Put the base wig onto your wig head and use a few straight pins to secure it in place.
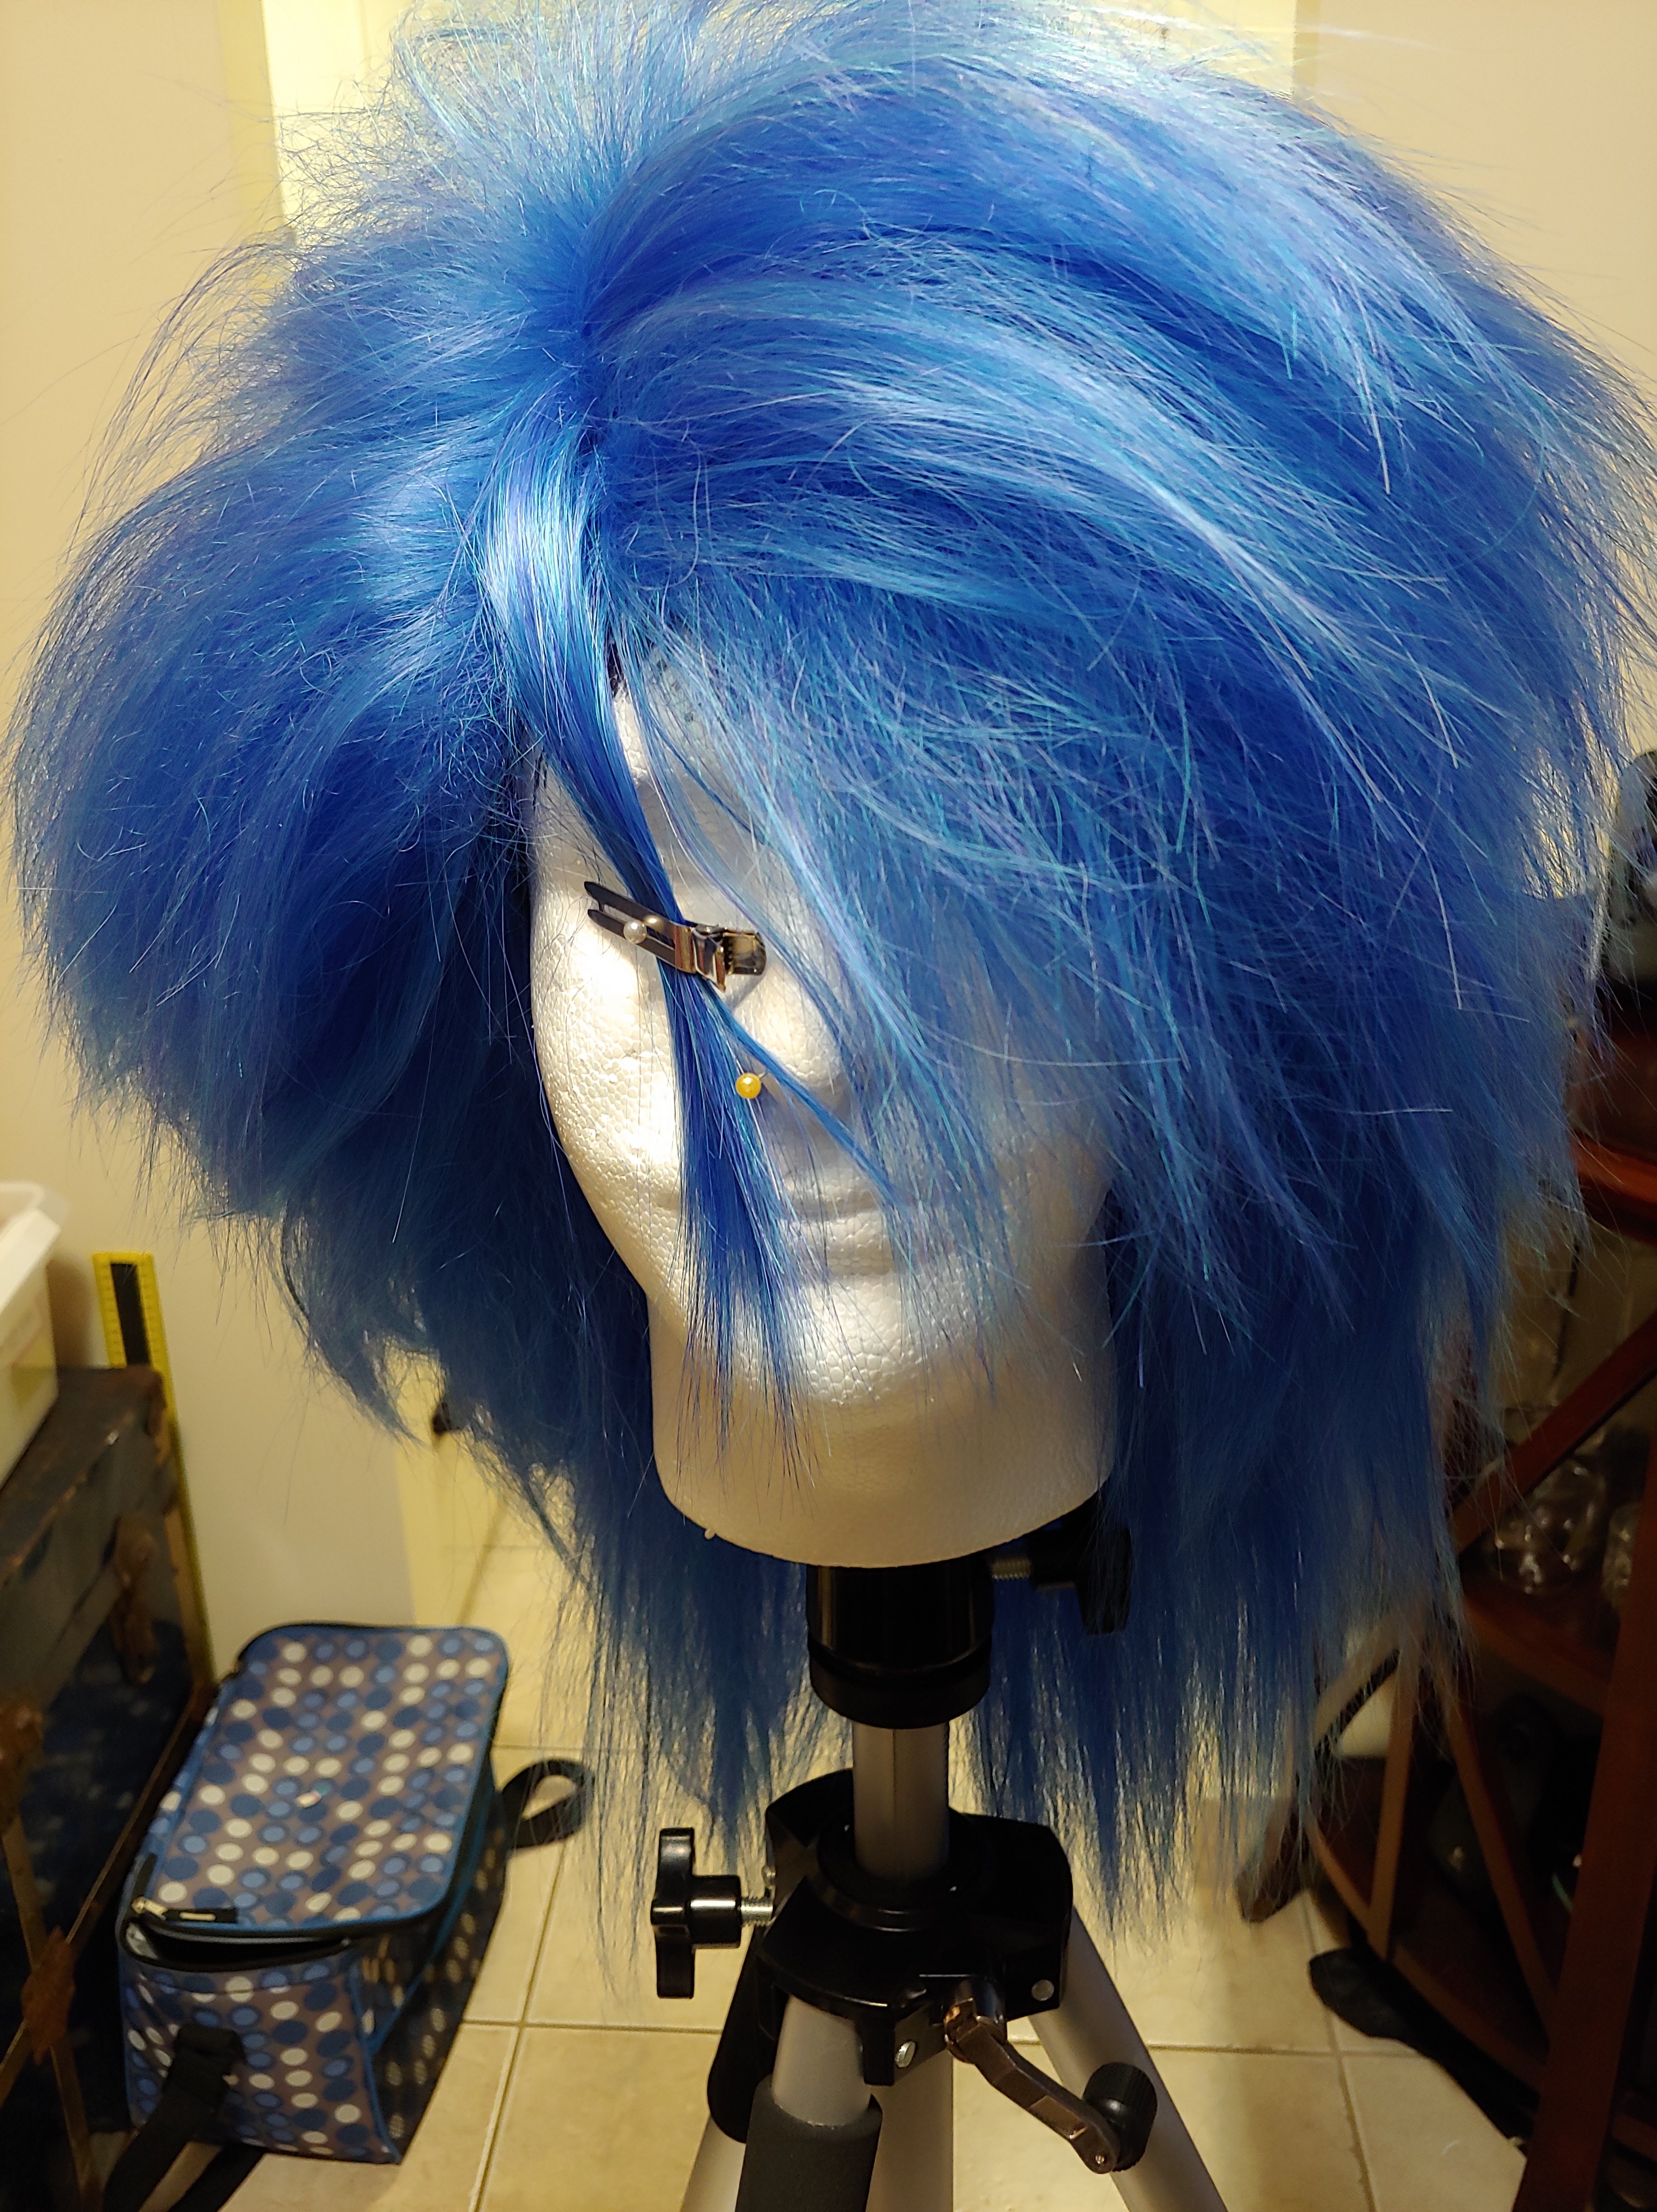
Once it’s pinned on to the wig head you want to start sectioning it off, I usually pull all the hair at the top of the wig up and clip it out of the way, starting at the bottom just like if I was straightening my own hair. Clip everything back, separate a thin section (no thicker than two wefts) and iron over it to get it nice and hot. Once it is hot, grab your wig brush and tease it, be aggressive it needs to look bad before it can look good. Leave it as a tangled rat’s nest to cool for a couple minutes.
 While that first section is cooling, you will want to start working your way around the rest of the wig. Once you’ve teased 2 or 3 more the first section should be cooled down enough to brush or comb out. Go back and carefully comb out all that teasing, and you will be left with a very frizzy section on your wig.
It looks like your nightmares in high-school but it’s what we’re aiming for.
You need to do this to the whole wig. It’s slow, and it’s not very much fun, just flip on some Netflix and power through. (I think this step took me about 4 hours).
If you are having trouble getting a section to tease properly, I sometimes find it helps to go over it with your straightener again to re-heat the fibers or to put a small amount of hairspray on the fibers to make them a little stickier.
 When you are working on the bangs, you may also find that it helps to avoid the area where you want to part the wig. You don’t have to do this but it will save you a small amount of work later on. That’s what the little section I’ve pinned out of the way in the front.
At this point, my wig was looking a lot like Thing 2 and Thing 1 from Dr. Seuss, and I was tempted to make this interim state into a quick and easy Halloween costume.
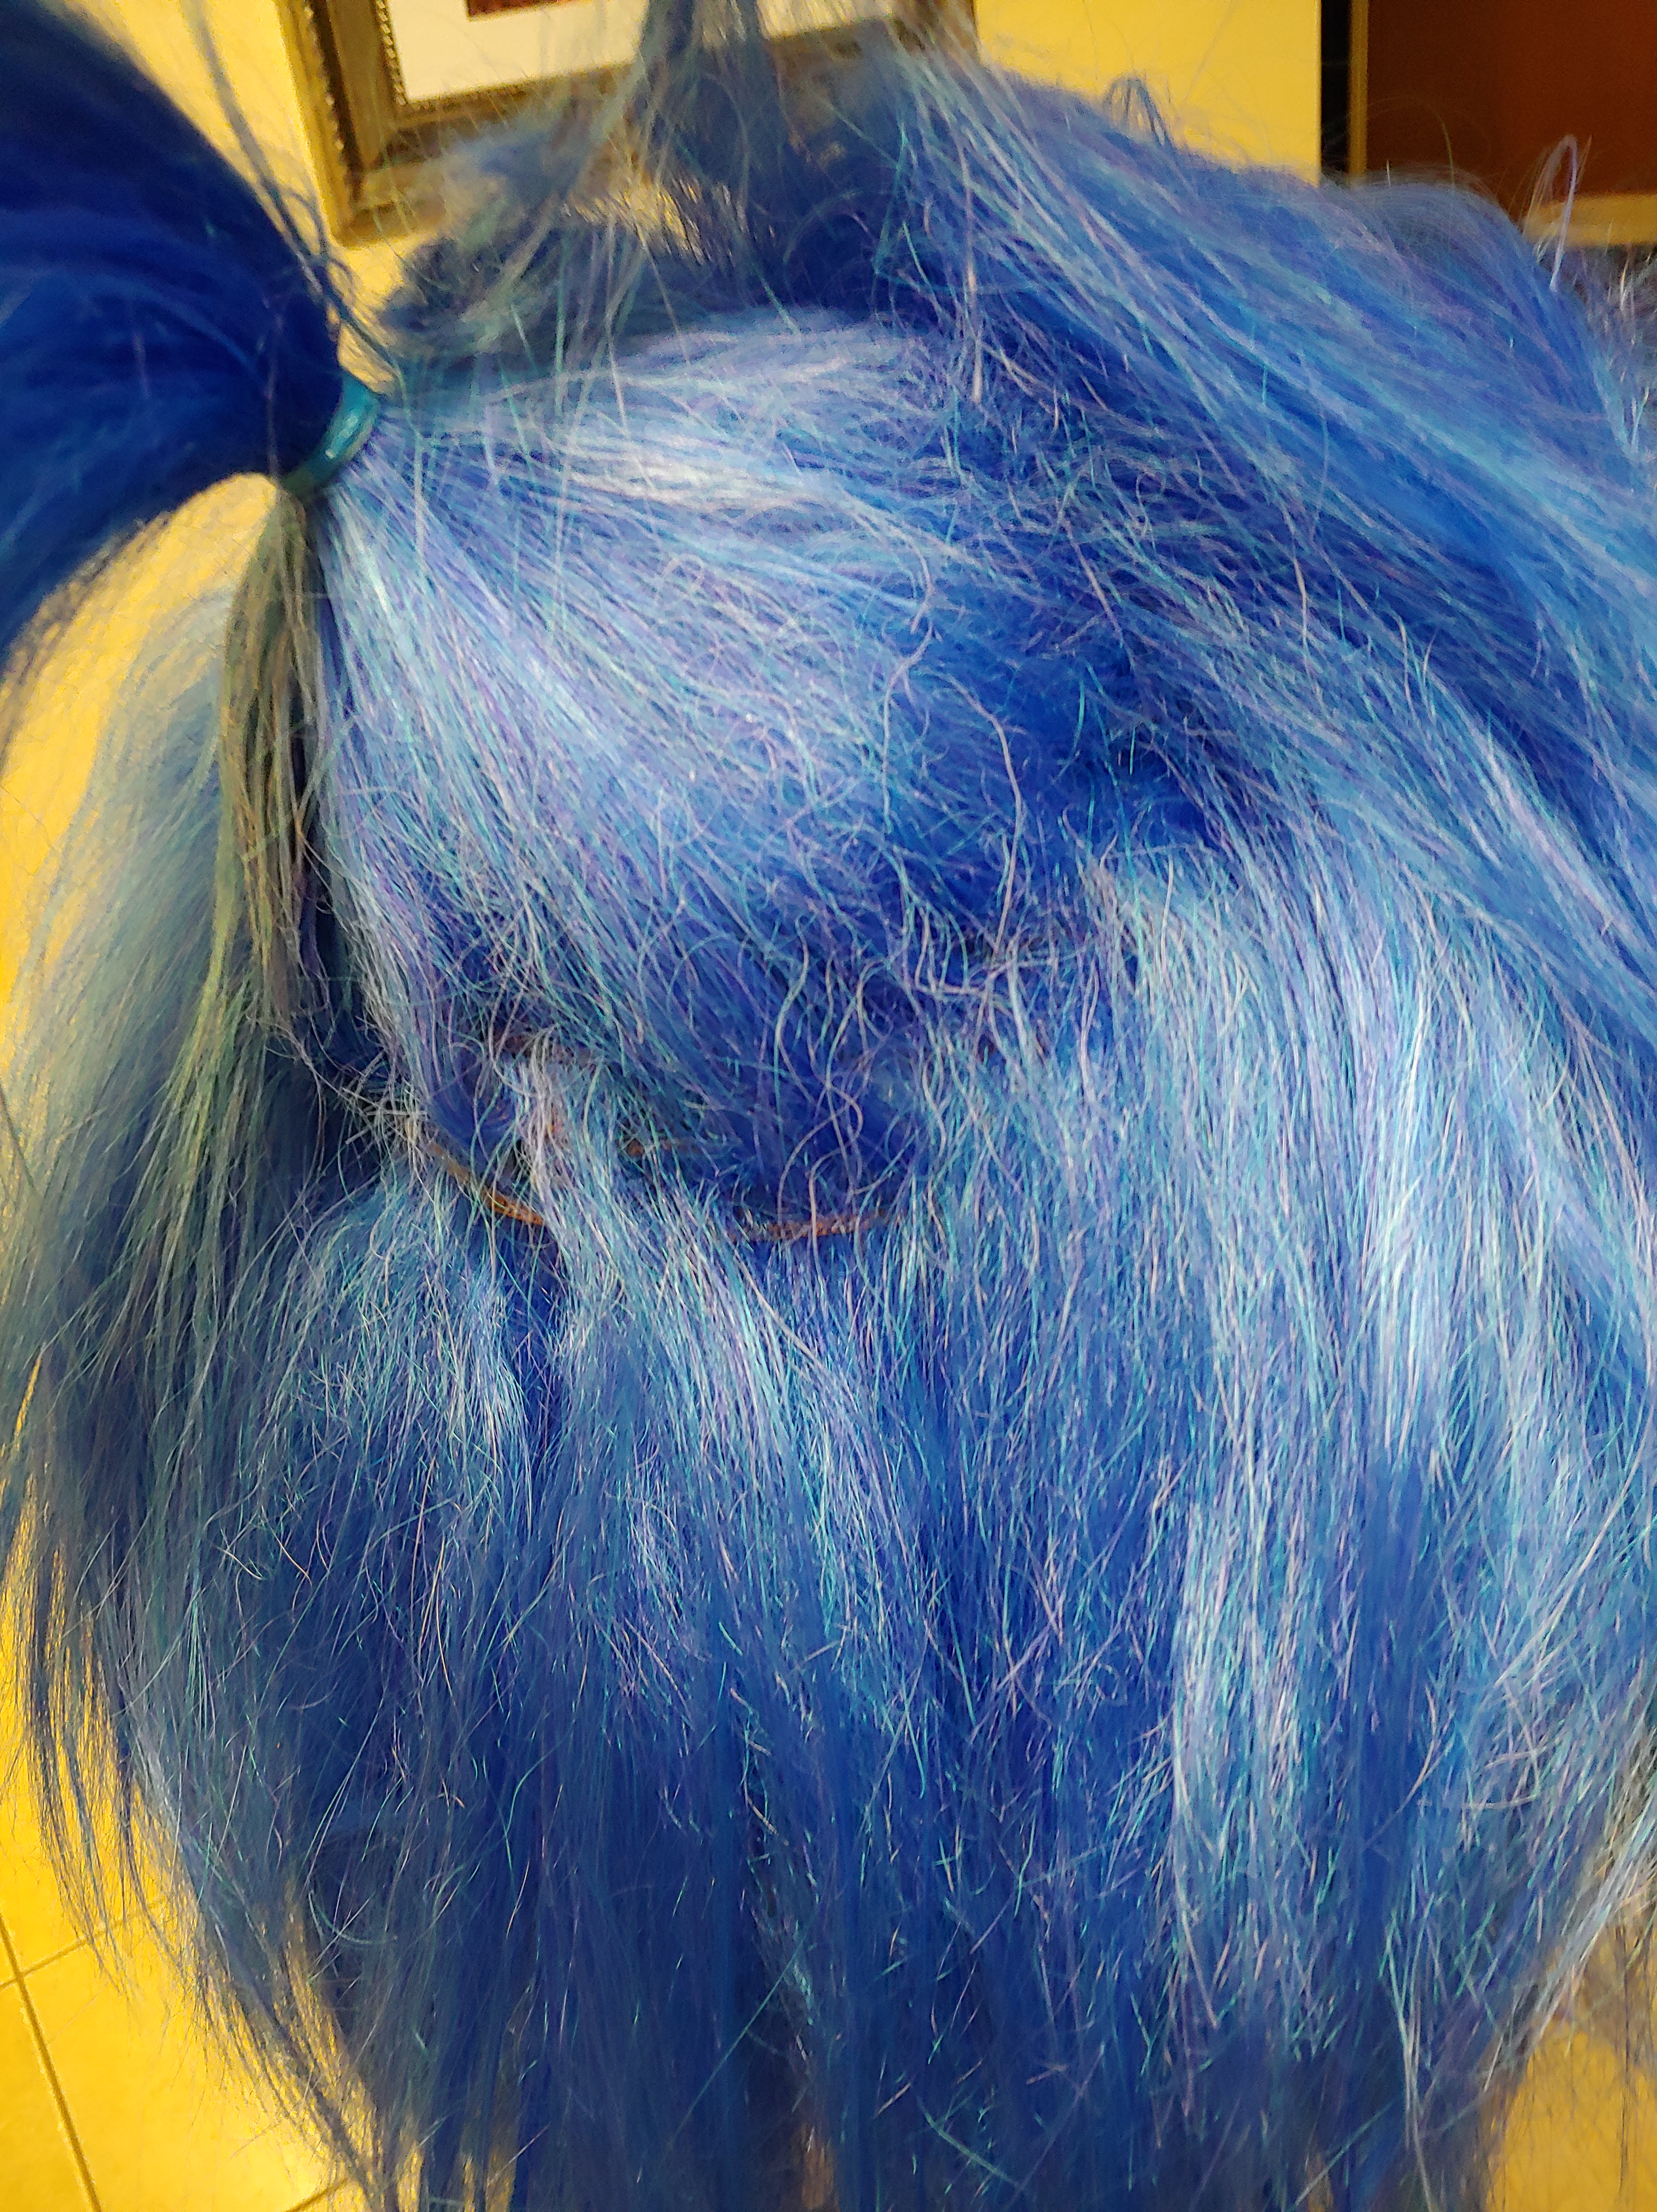
This is when you get to start figuring out where you want your ponytail to be, and how much hair you want in it.
I would recommend leaving some down loose around the base of your neck and by your ears to help disguise or hide any places where your own hairline might peek out.
 Grab a hair elastic and some clips and tie the hair back roughly where you want your ponytail to be, separating out the portions of the hair that you want to frame your face so that you have a loose messy ponytail.
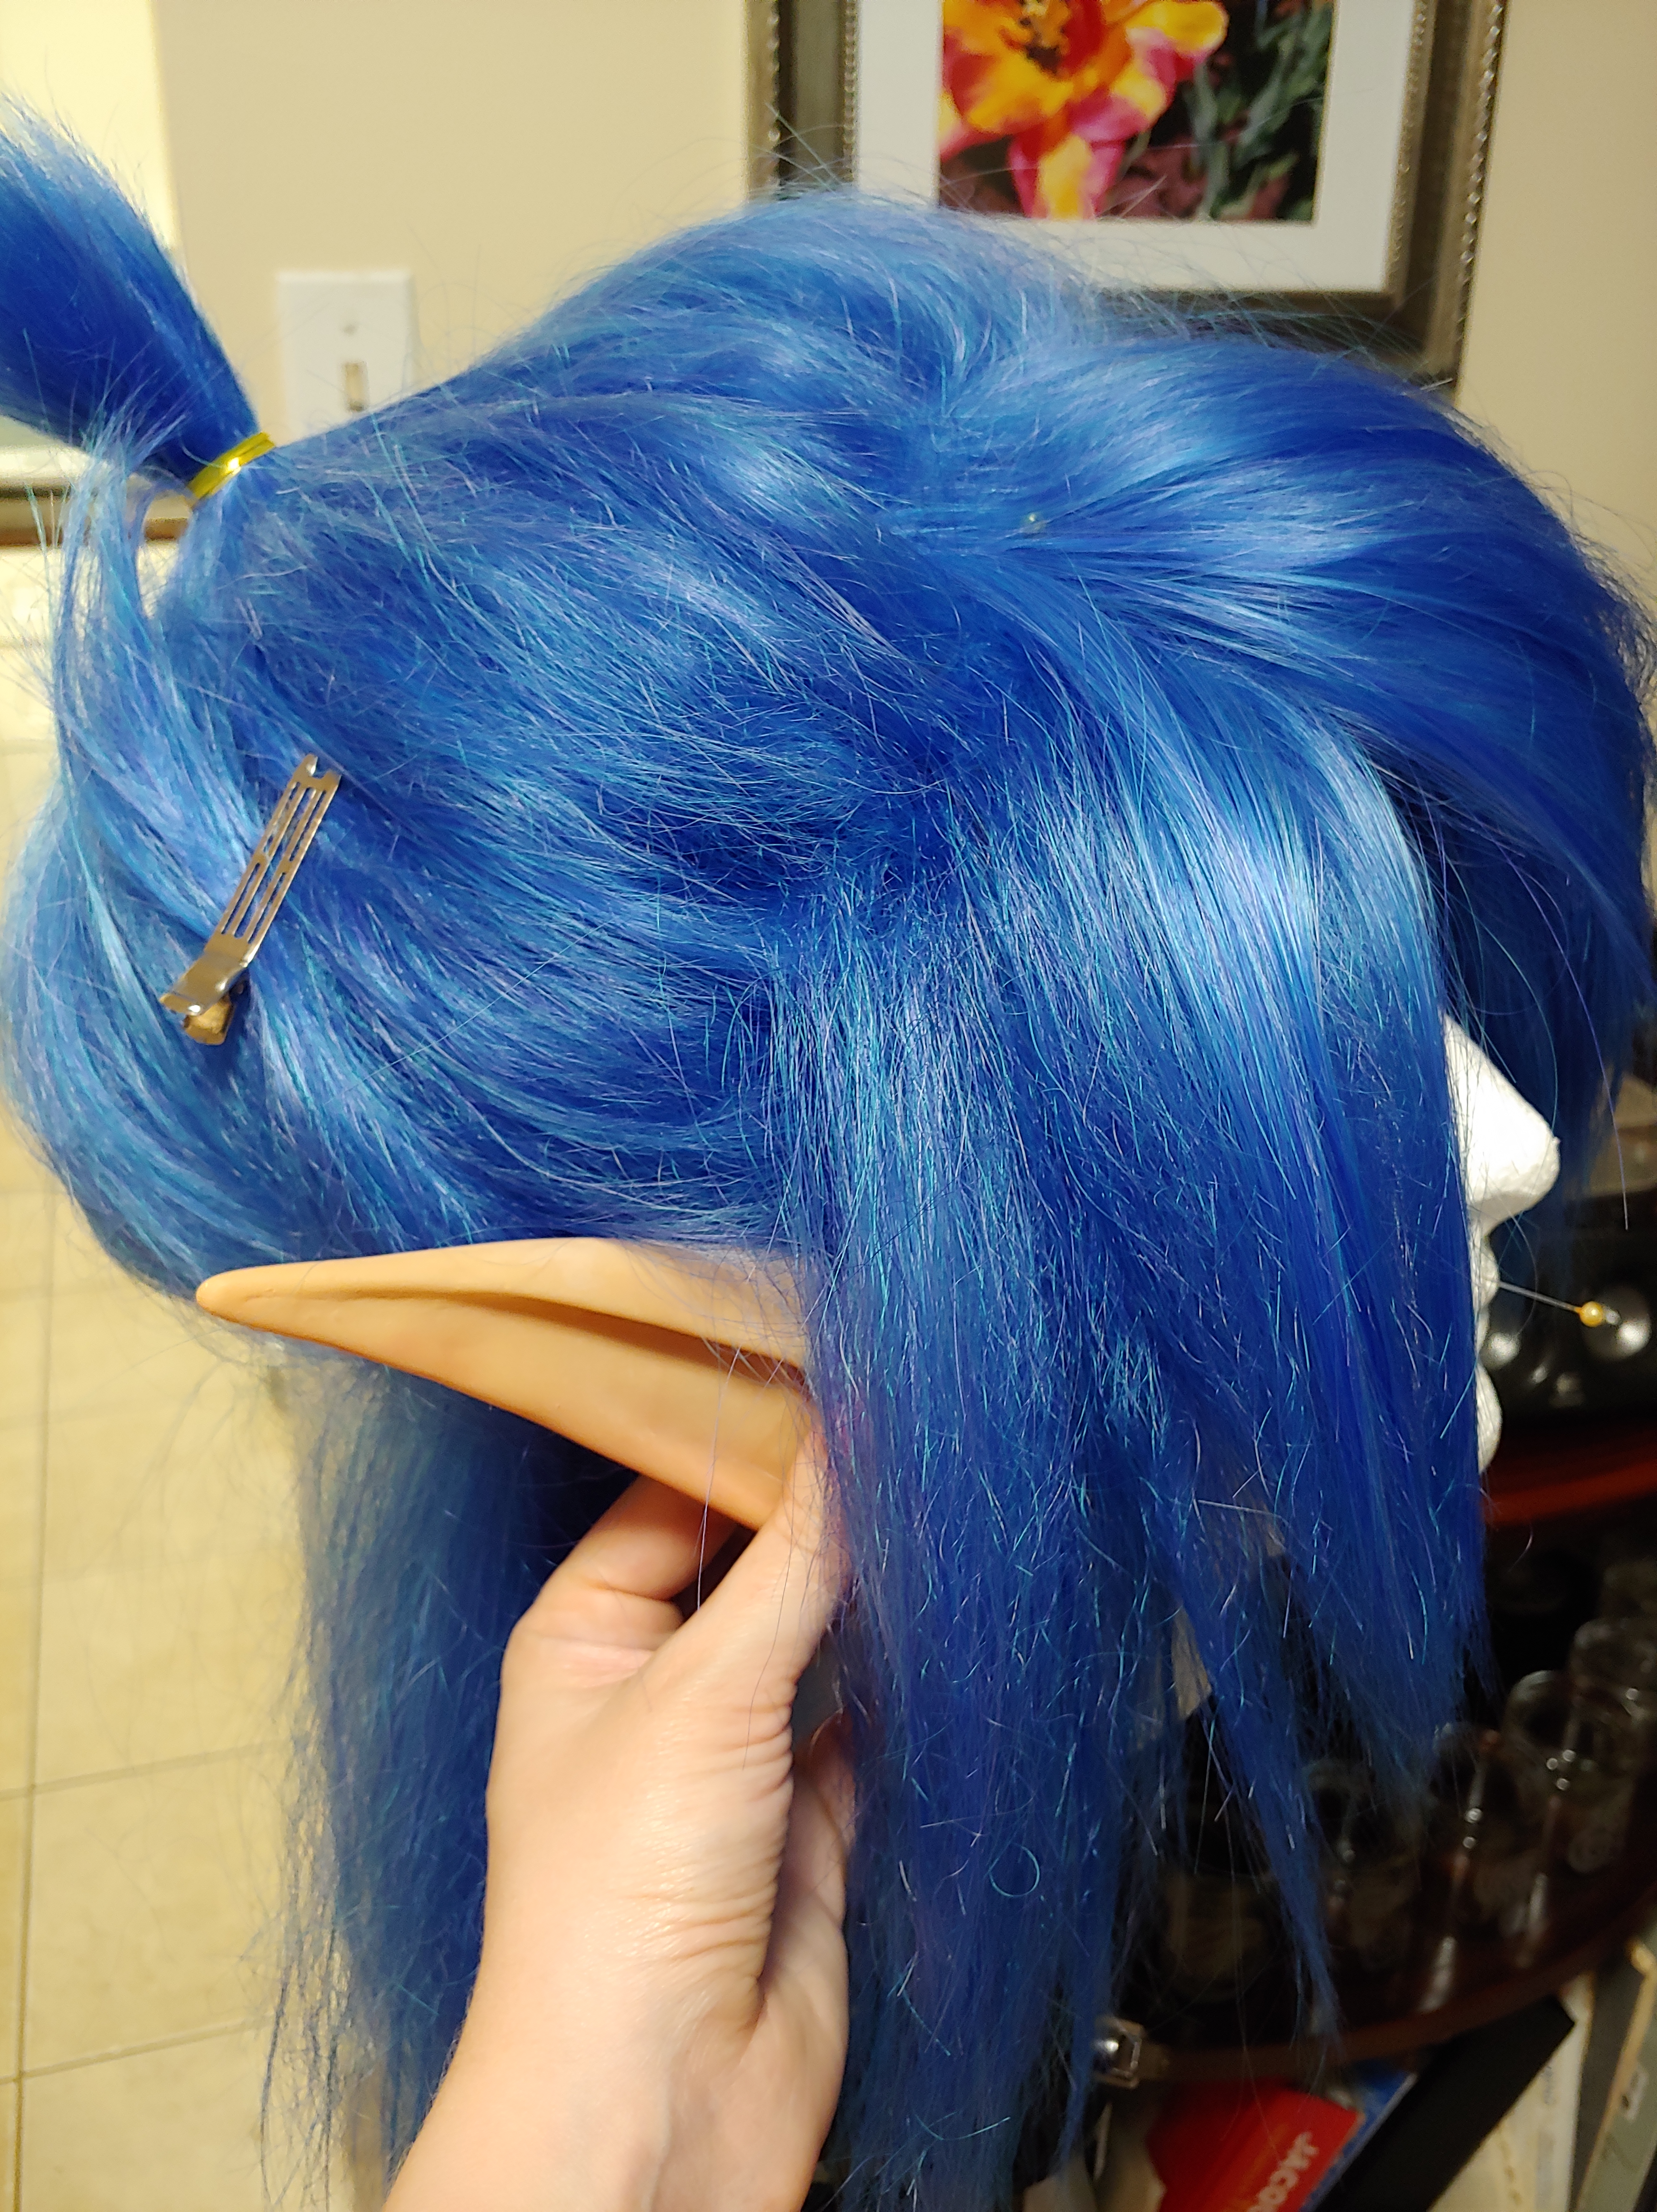
Since my wig is going to be for the Neopets Tooth Faerie I need to leave some free space around the ears for my prosthetic pointy ears, in this picture I am checking the placement to make sure that my wig won’t make them difficult to wear.
Once you have everything roughly mapped out, you should take it off your wig head and try it on. This will help you figure out if your ponytail placement is correct, and that you have everything that frames your face the way you want it.
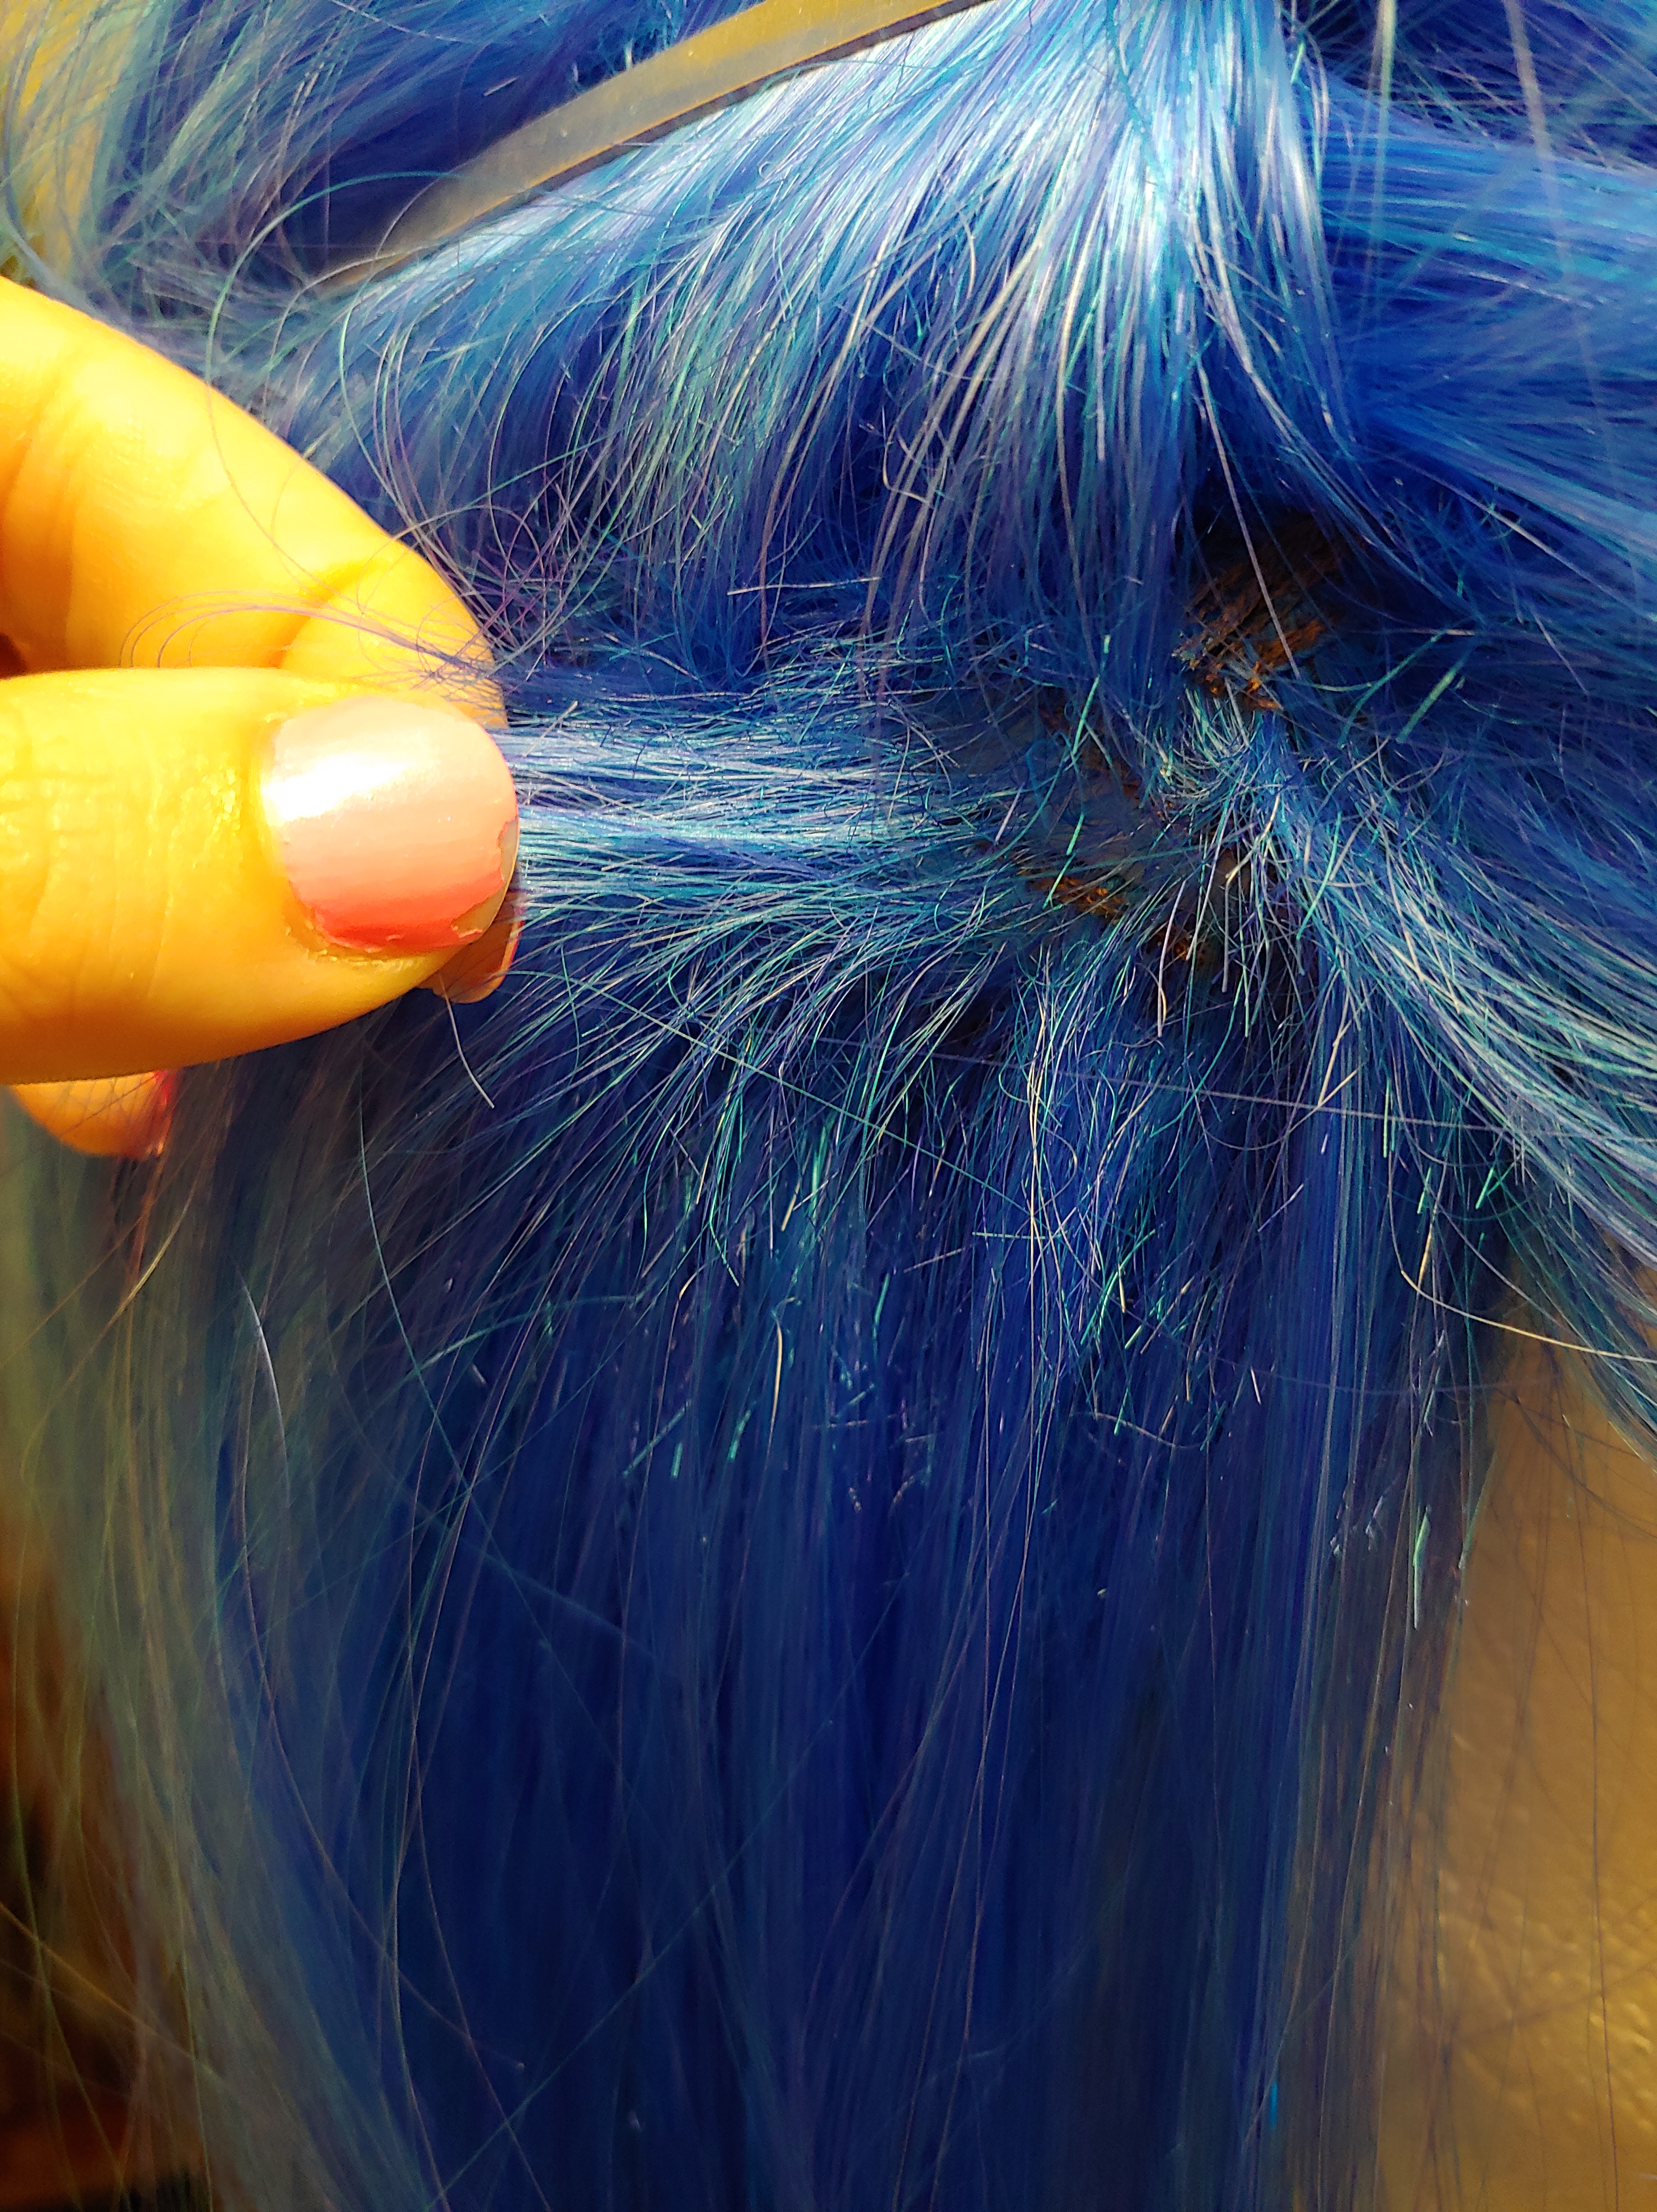
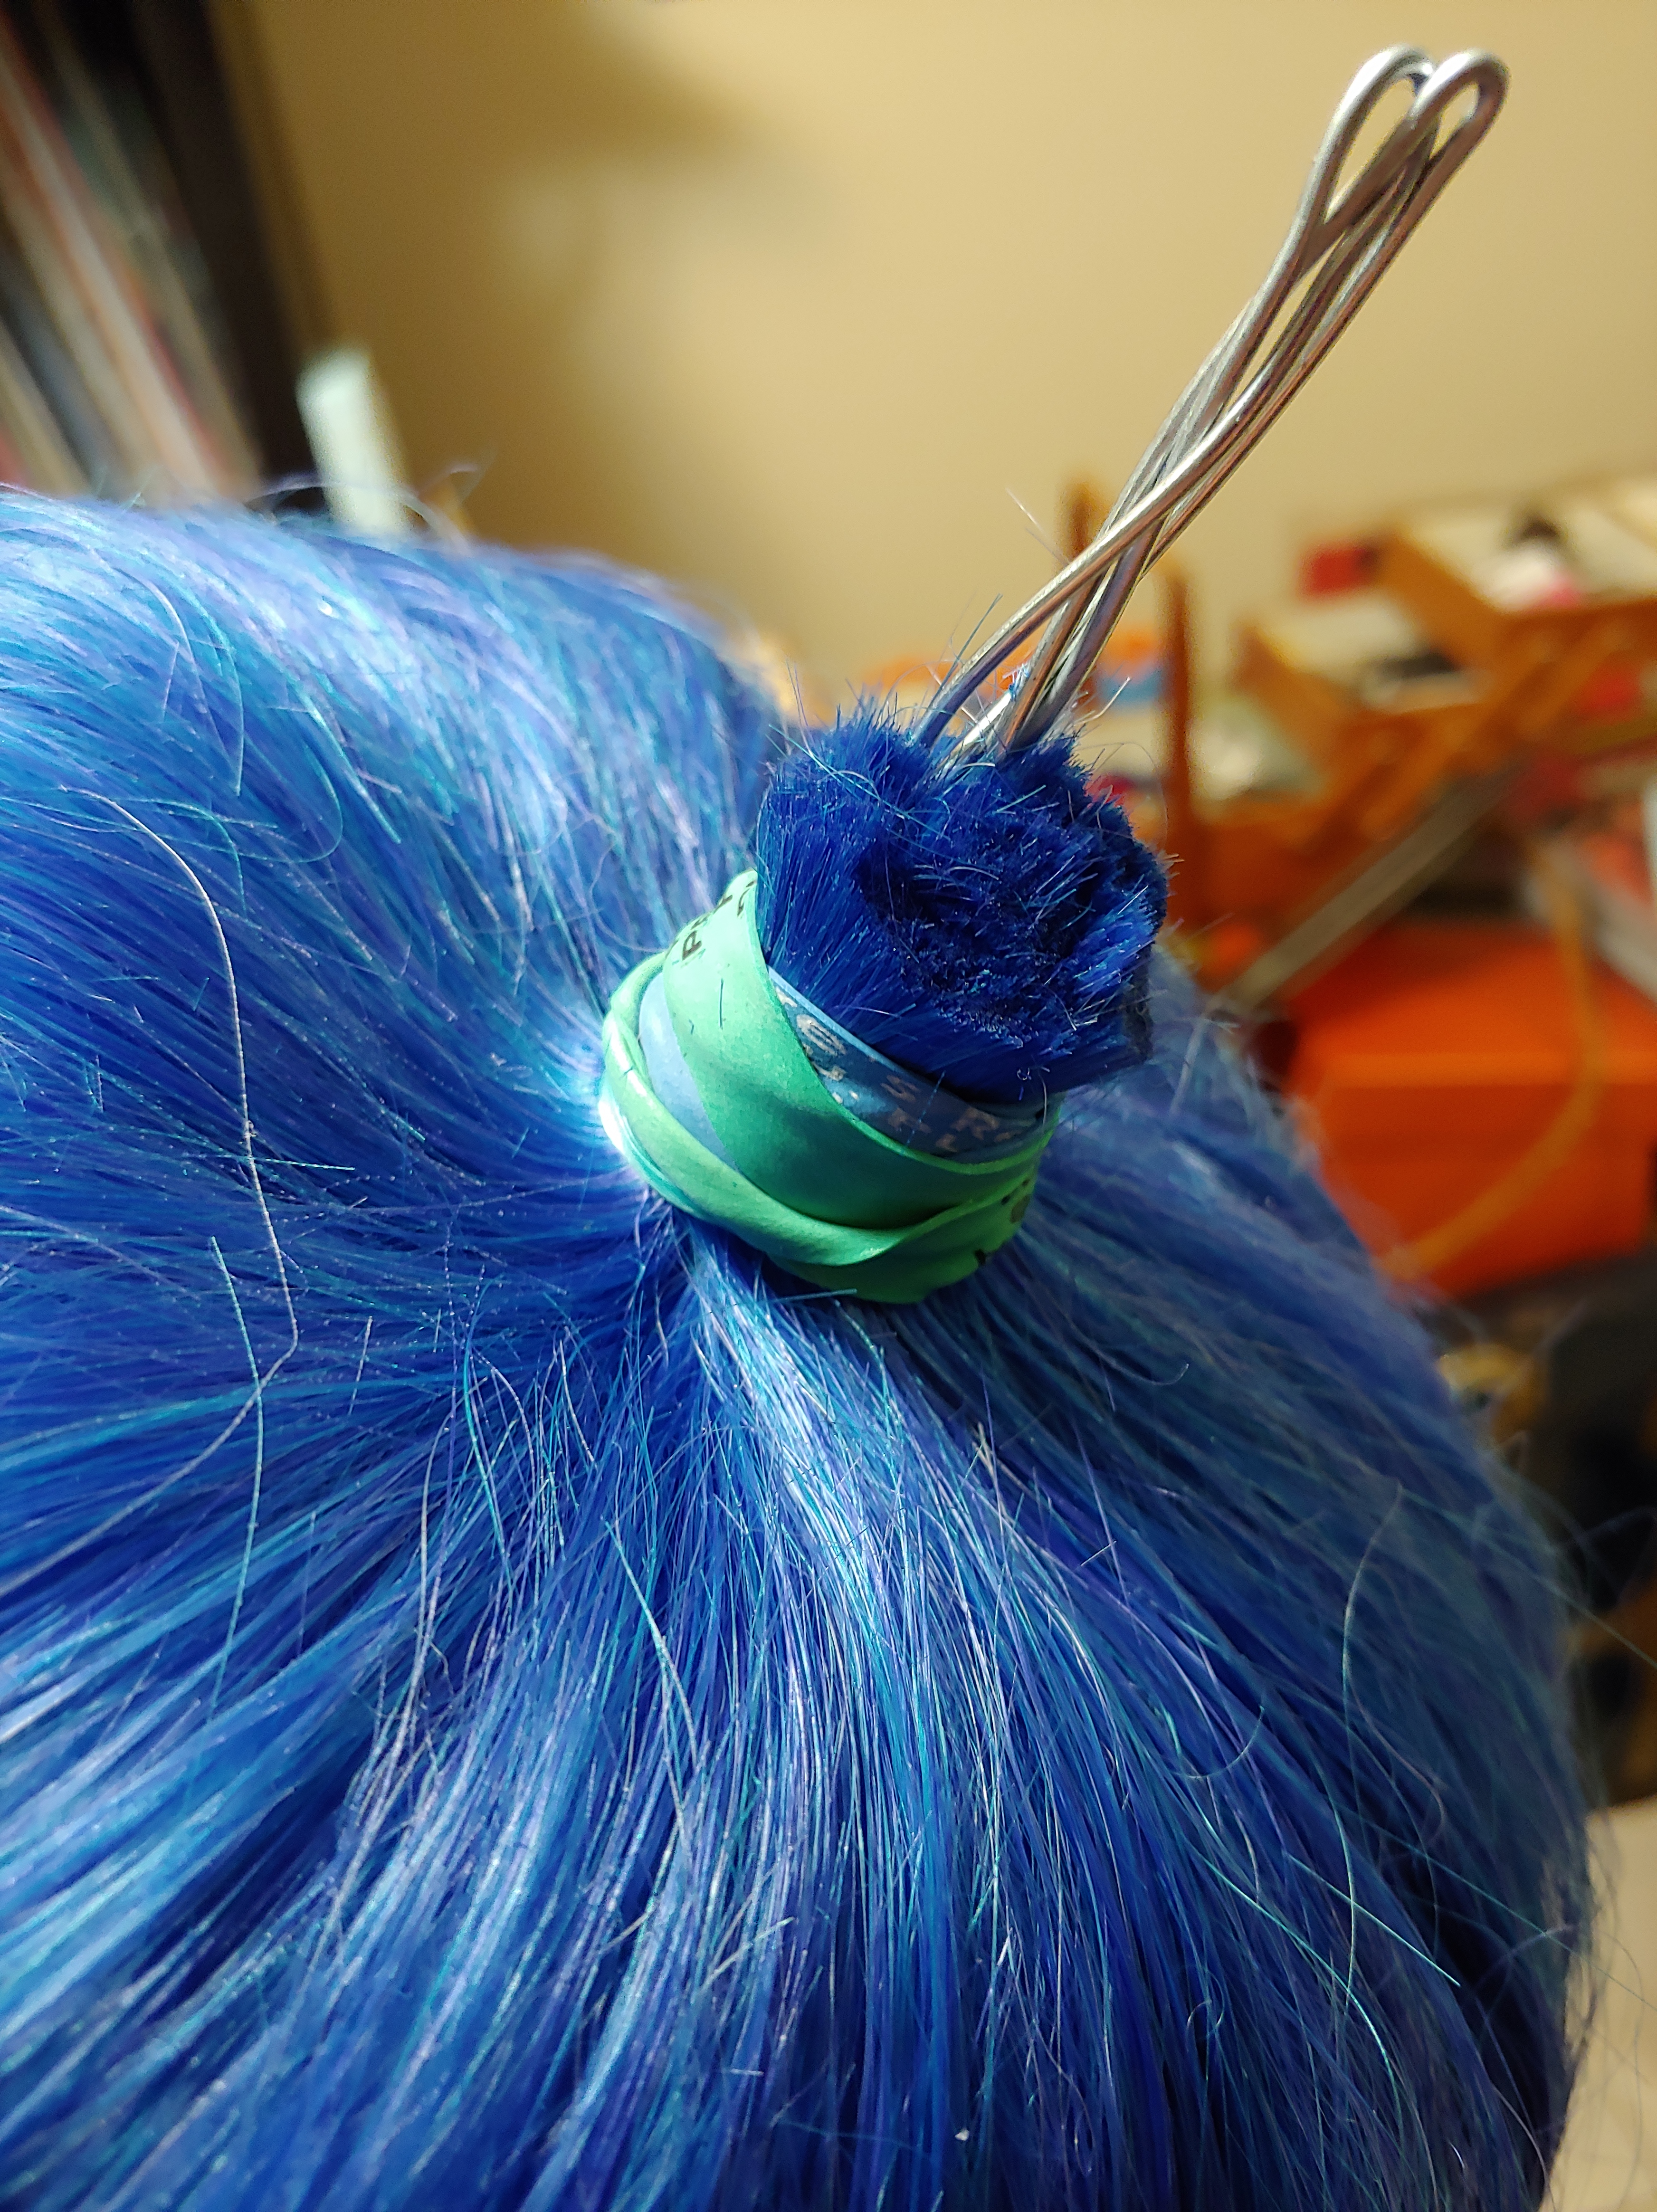
 Take the wig off and set it aside on your wig head, now we need to get into some structural work. You will need some galvanized wire and some Worbla scraps. Craft wire just isn’t strong enough for this job because the idea is to make a peg to mount your ponytail and distribute weight more evenly.
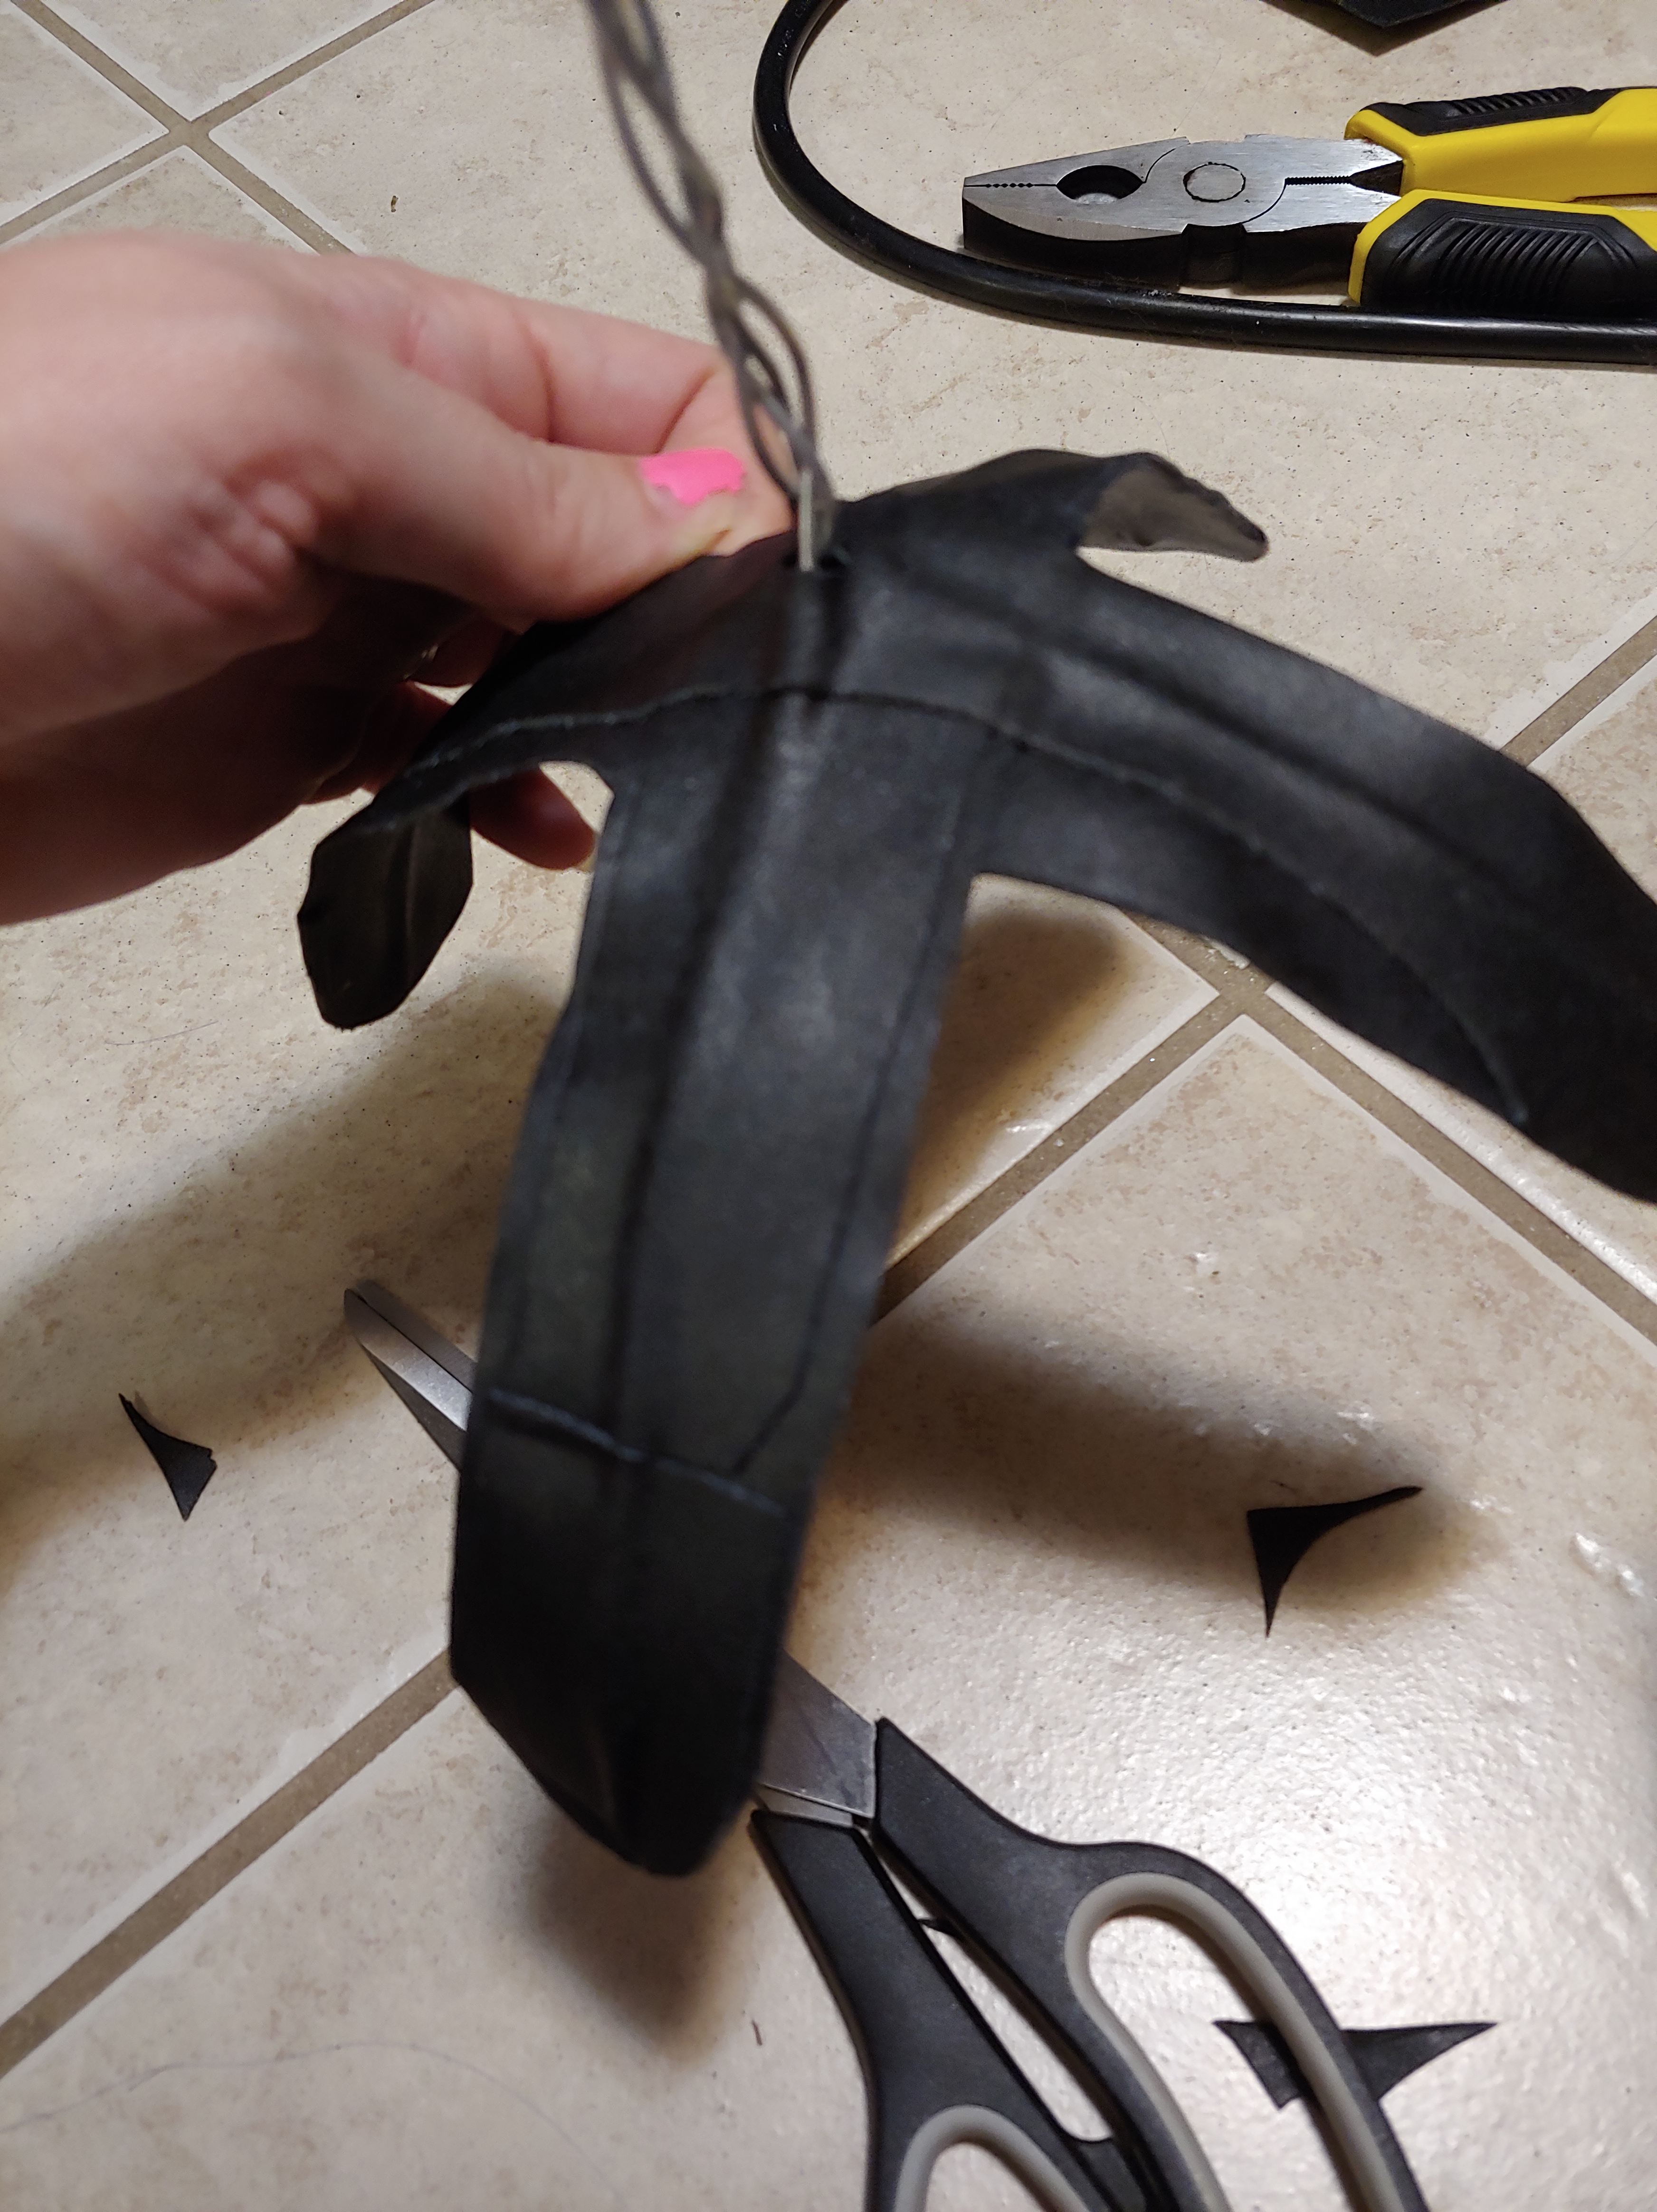
Using two lengths of galvanized wire folded in half, twist the tops together until you’ve got a nice little 4 legged alien.
Put the alien on your head, and shape his legs until they’re giving you a nice little hug being, being careful of the sharp edges where you cut the wires. Once you’re happy with the shaping you will need to get out your Worbla scraps and cut them into 4 strips that are a bit longer than 2 of your alien’s legs, and 3-4cm wide.
 They don’t have to be really straight or neatly cut because this is all going to hide underneath your wig.
Heat the strips up one at a time and carefully cool them by resting on top of your wire to shape them and to get an idea where the peg will go. Poke small holes in the centers of the two top strips to put your peg through. Carefully heat the strips to form Worbla sandwiches around all four of your alien’s legs squeezing the legs together to cement the adhesive, and making sure you’ve covered all the sharp wire ends.
Trim off any sharp corners and warm sections up to smooth them as well as you can. Place the alien on your head, and check the comfort of the fit, because this is your last chance to adjust it.
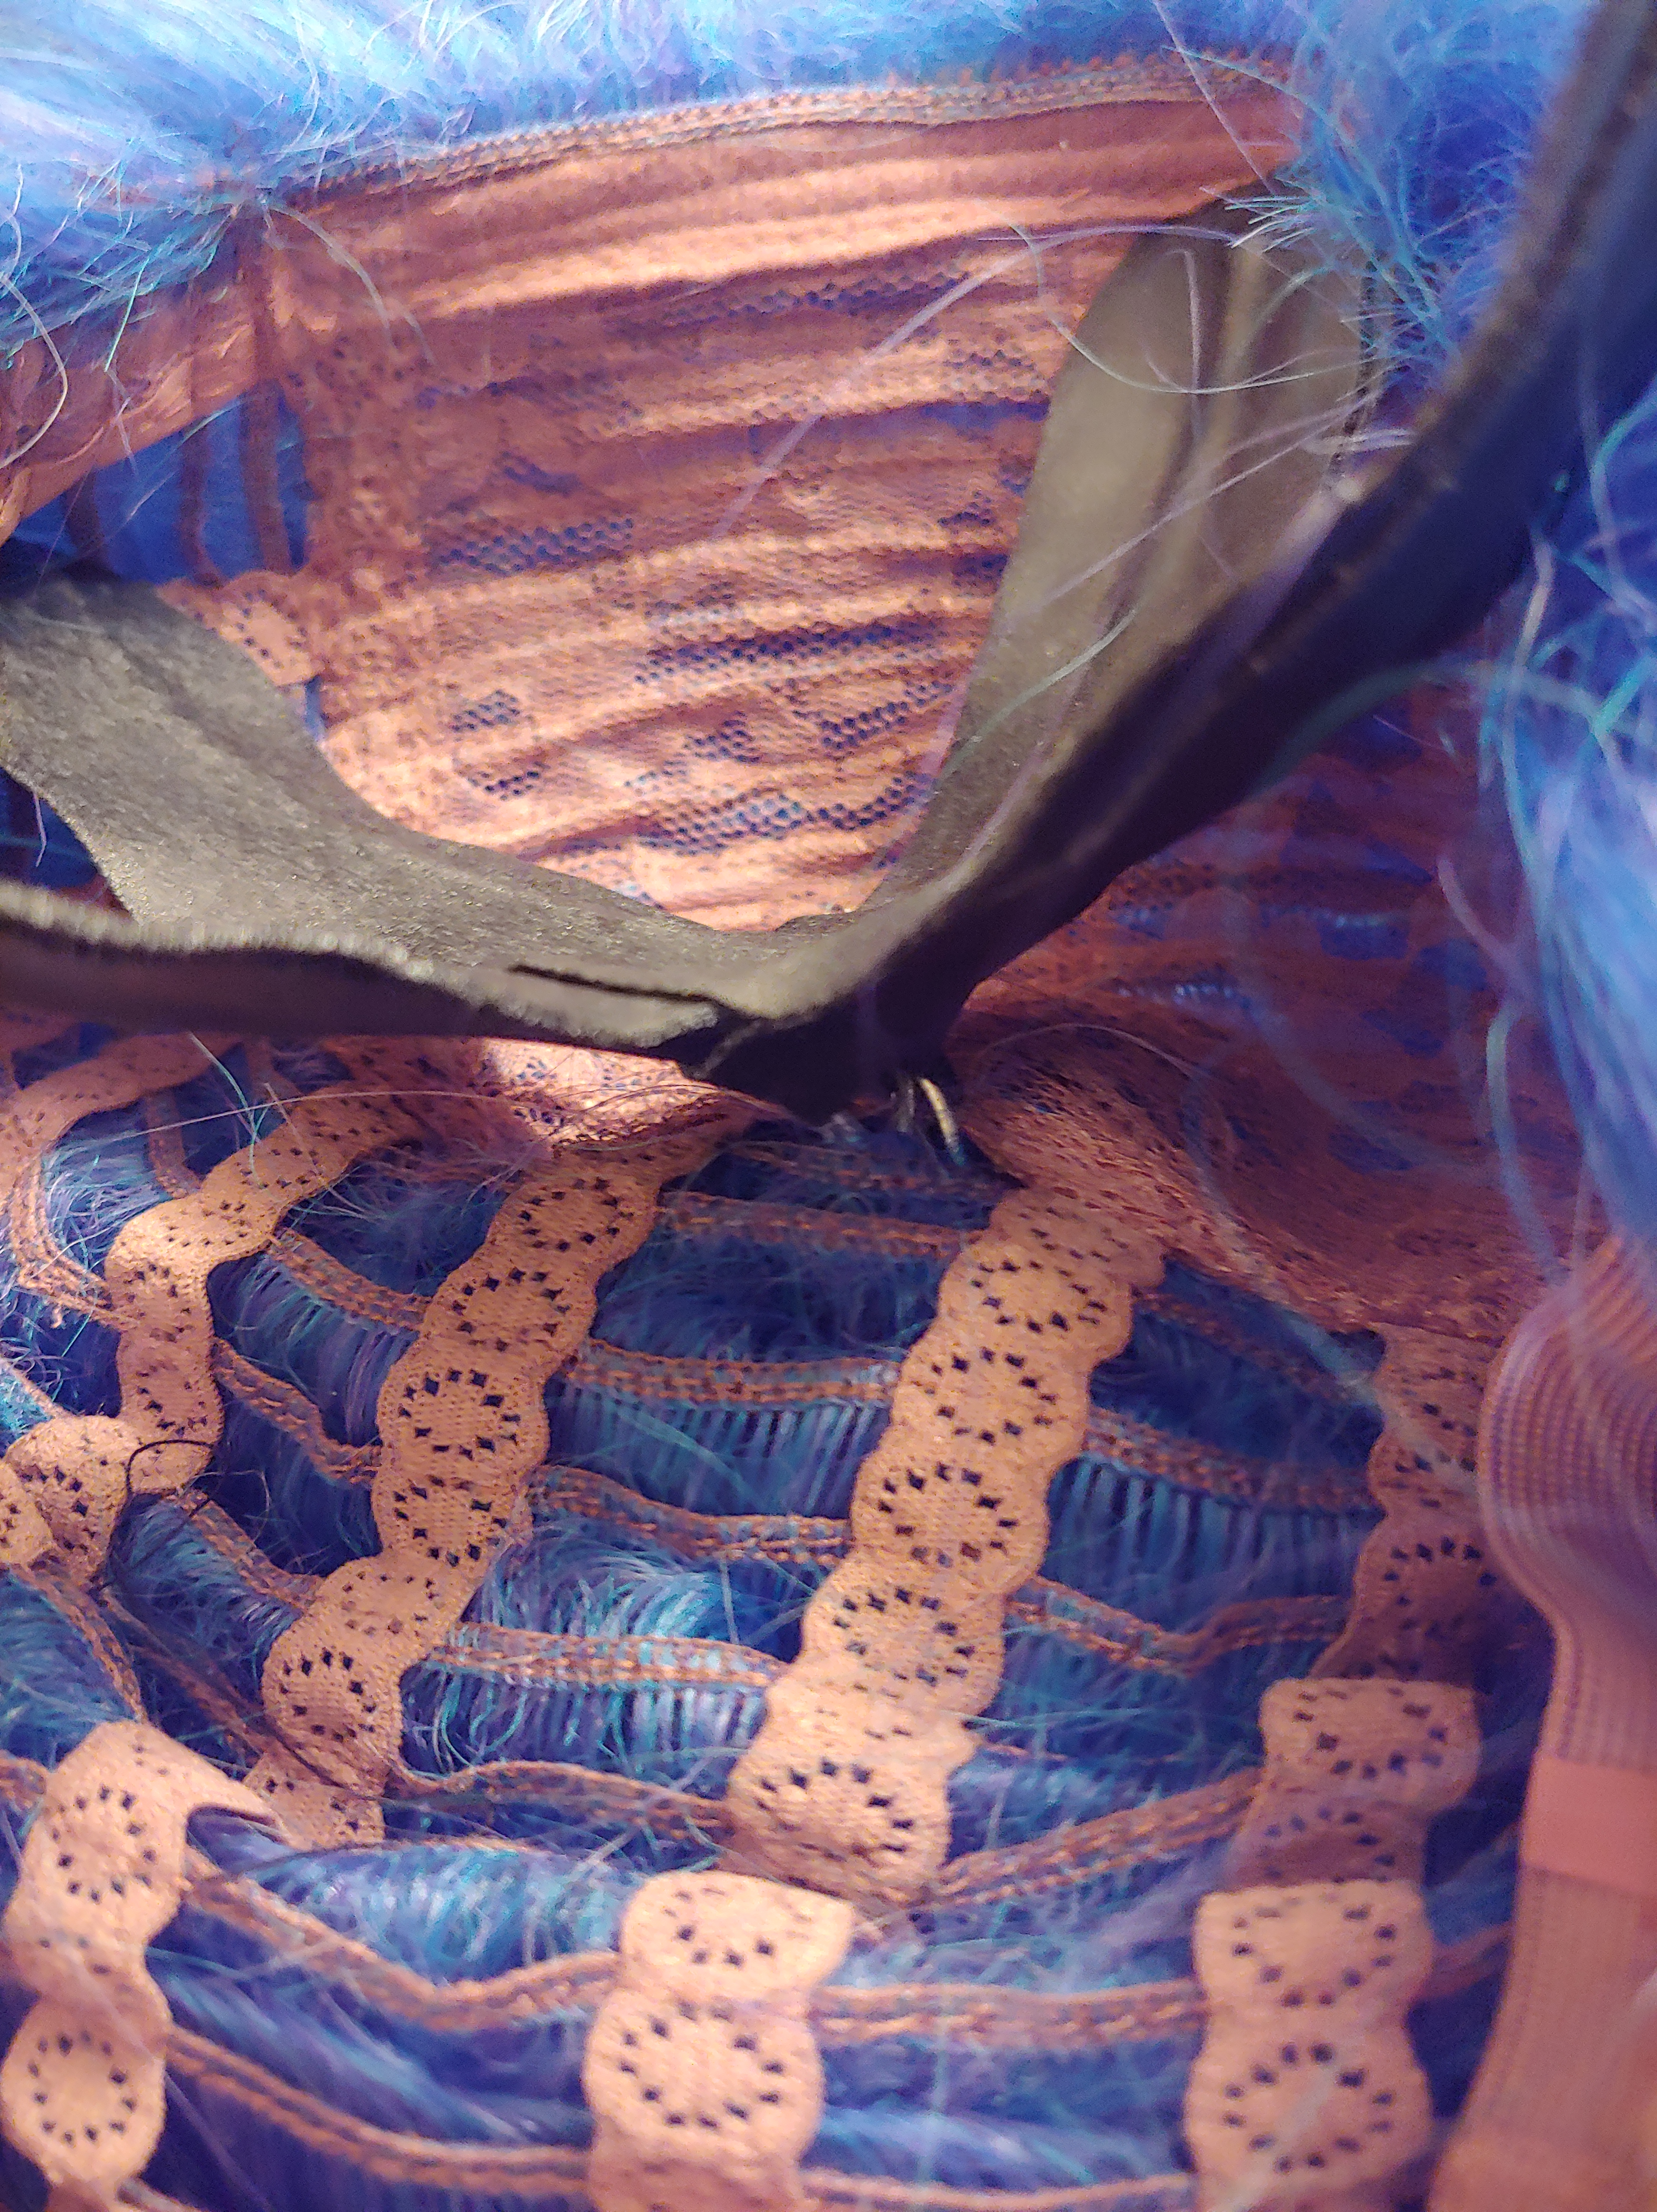 Grab your alien, and your wig. Flip your wig upside down and poke the alien’s head through your wig cap, so that his legs are on the inside of the wig cap, and the peg sticks out through the middle of the ponytail.
You might need to cut a small hole in your wig cap to put the peg through, but that really just depends on your wig, if you do just keep it small and you’ll have nothing to worry about.
This is a good time for another test fit because your peg and ponytail are going to become permanently attached together in the next step.
 At this point, we’re actually going to let most of our main ponytail down and we’re going to separate off a smaller ponytail, inside our big ponytail with the wire peg in the center. Secure it as tightly as you can with an elastic, or two or three.
Give that inner ponytail a good healthy coating of hair spray. I actually used a little bit of spray glue on mine for this part but it leaves a white residue so you need to be extremely careful if you try using it. I just happened to be really low on hairspray when I was doing this step and wanted to save what I had for the next part.
 Start dividing the rest of the hair that is meant to be in your final ponytail into sections, working your way around the inner ponytail. Take one of these sections and get your hair straightener back out. Use the hair straightener to smooth out the outermost layer of the section so it looks nice and silky on the outside, but frizzy on the inside. Then grab another elastic, hit the still frizzy of the section with a whole lot of hairspray and gently pull it down over your smaller ponytail and use a new elastic to attach it to the smaller ponytail while smoothing the outermost layer as best you can.
Continue doing this the whole way around the inner ponytail with all of the other sections you made. Comb your sections together with your fingers to try and hide the transitions. Use as many elastics as you have at your disposal. I am using little pastel coloured mini braid elastics that I buy at the dollar store for this part. Then once it’s all in: tie it off as tight as you can with some big thick broccoli elastics. Then, give that smooth outer layer a blast of hairspray for good measure.
 Next, we’re going to “stub” the wig.
As in we cut off the tail part of the ponytail, so that it’s just a little stub. You want to cut it off about 0.5cm from the elastic. It’s okay if it’s not super flat and even.
Old fabric scissors work really nicely for this job.
Plug your hot glue gun in to start heating up.
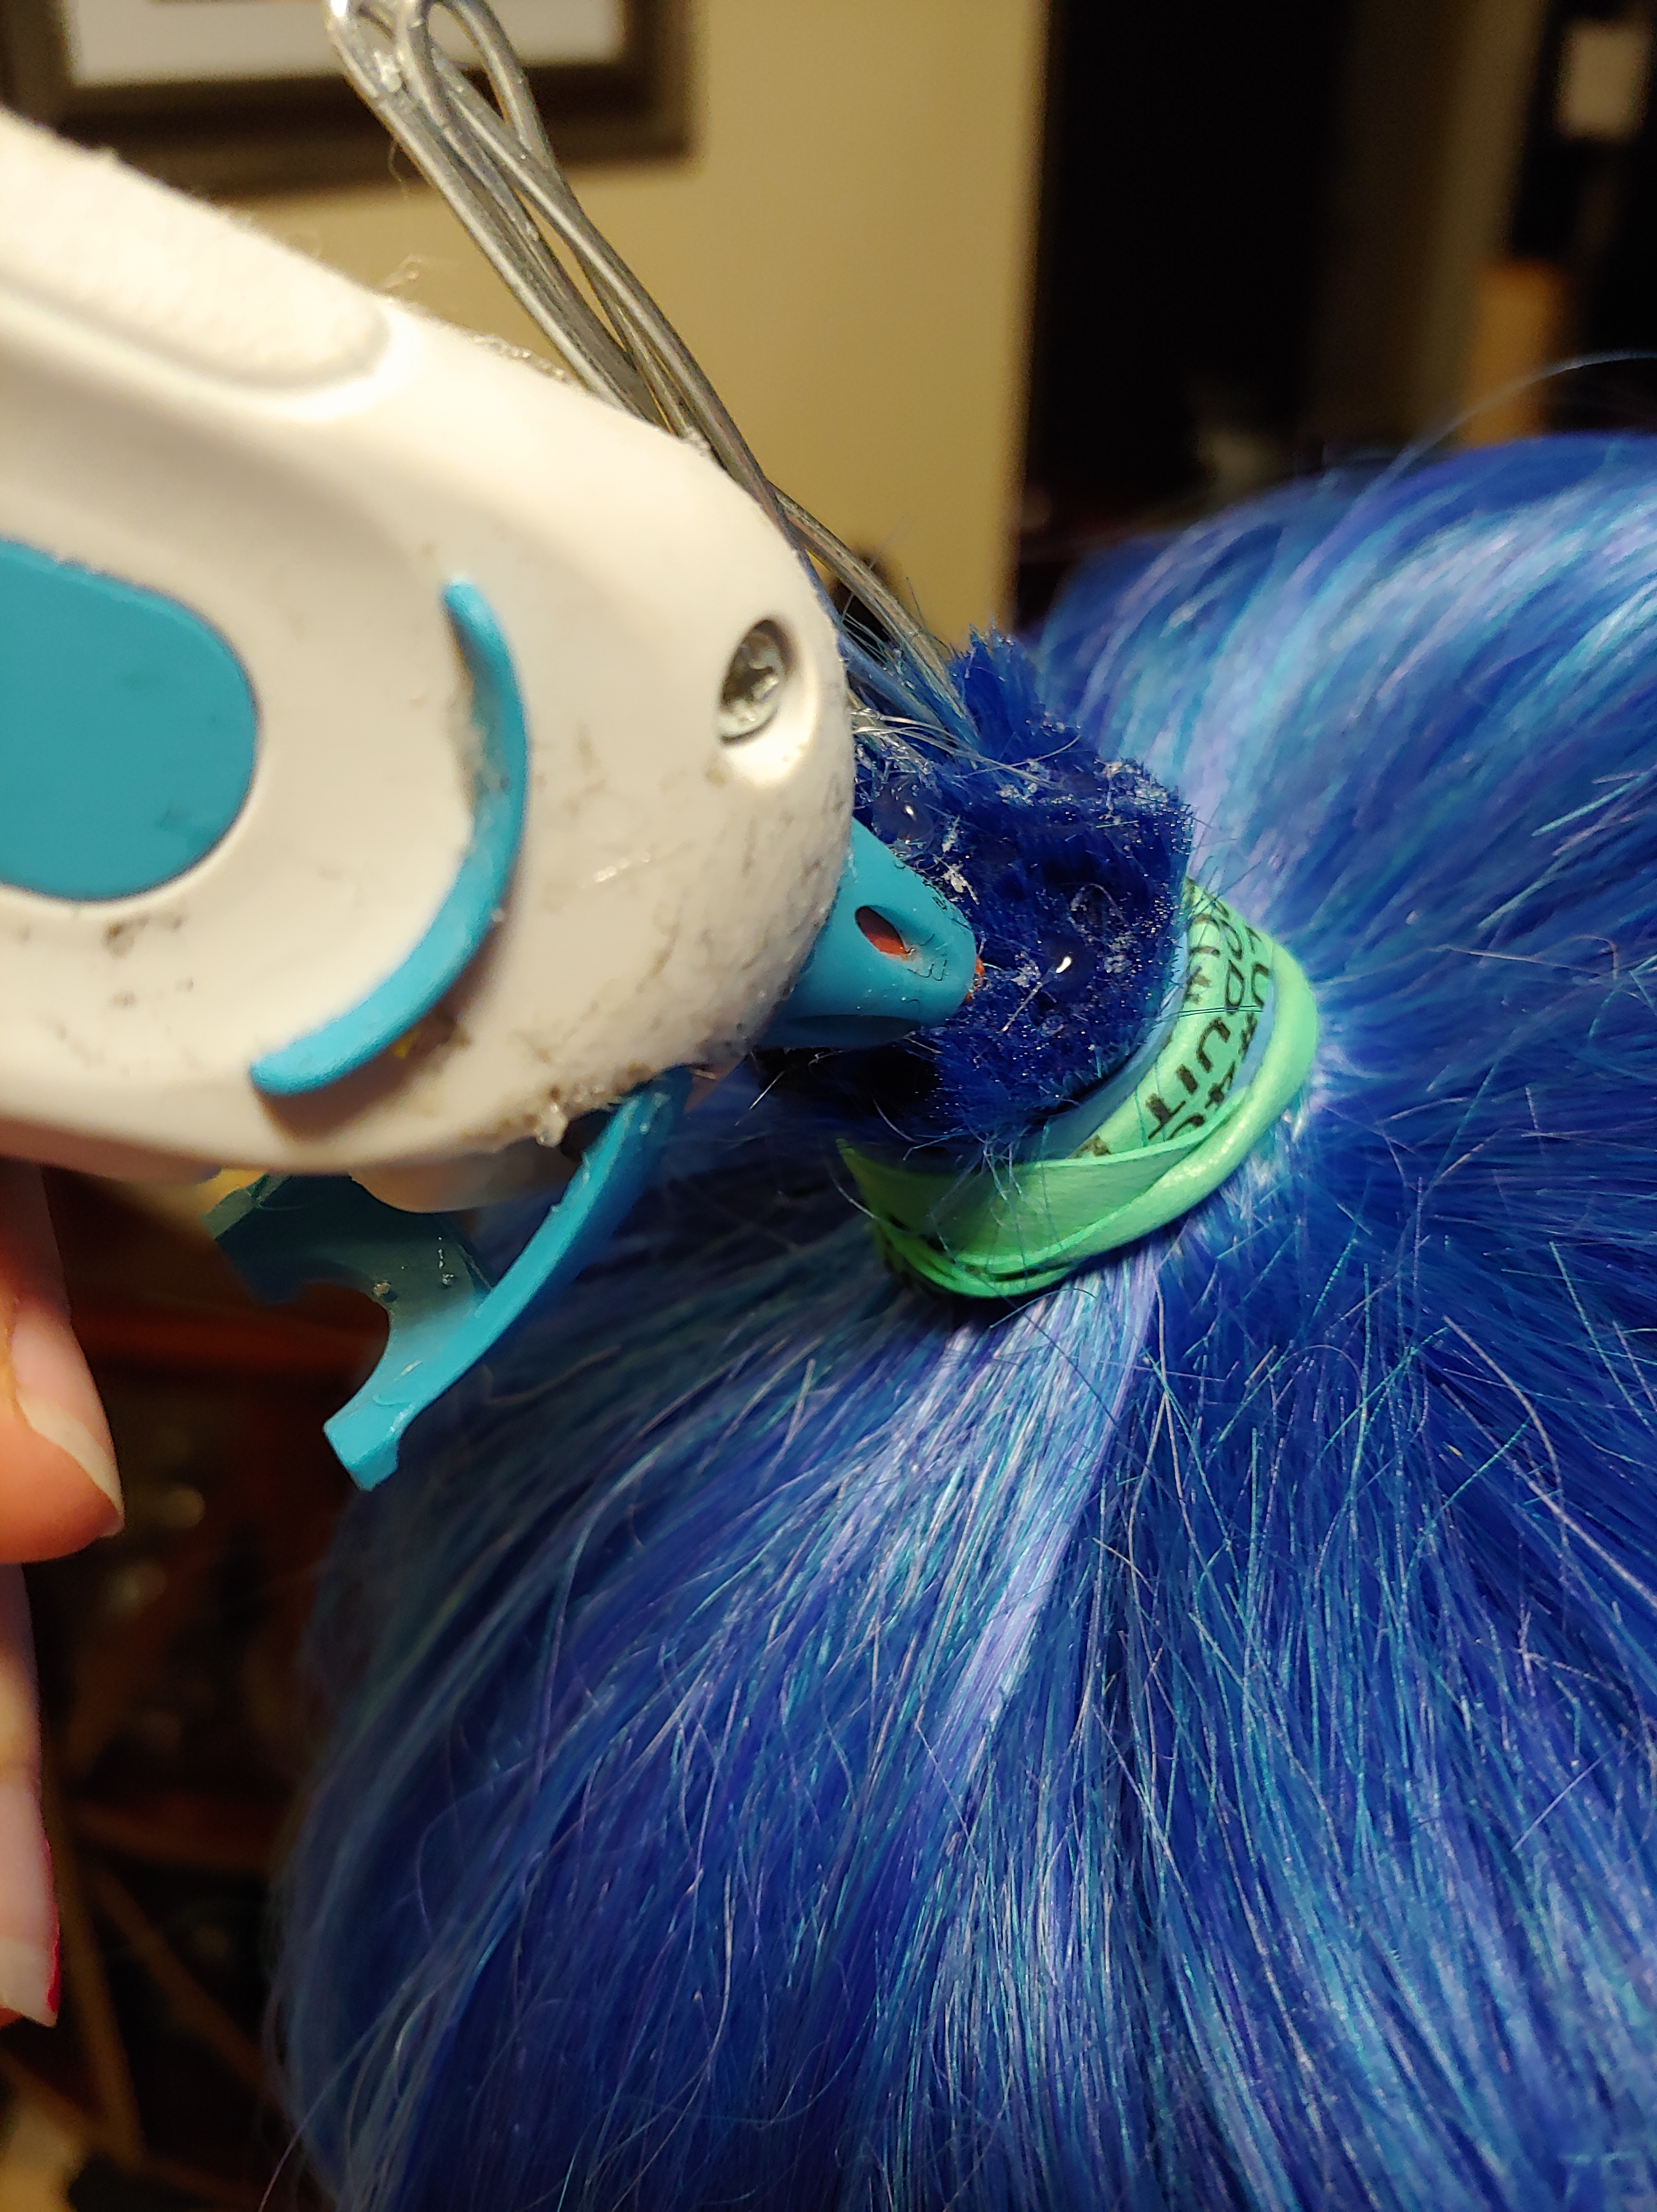 Once it ‘s ready to go grab that hot glue gun and shove the end right in among the little hair stump and start injecting glue in among the ends like they’re a little jelly donut. Next start working your way over the top of the stump gluing all the ends of the hairs together. This will prevent hairs from slipping out or coming loose if you brush up against something.
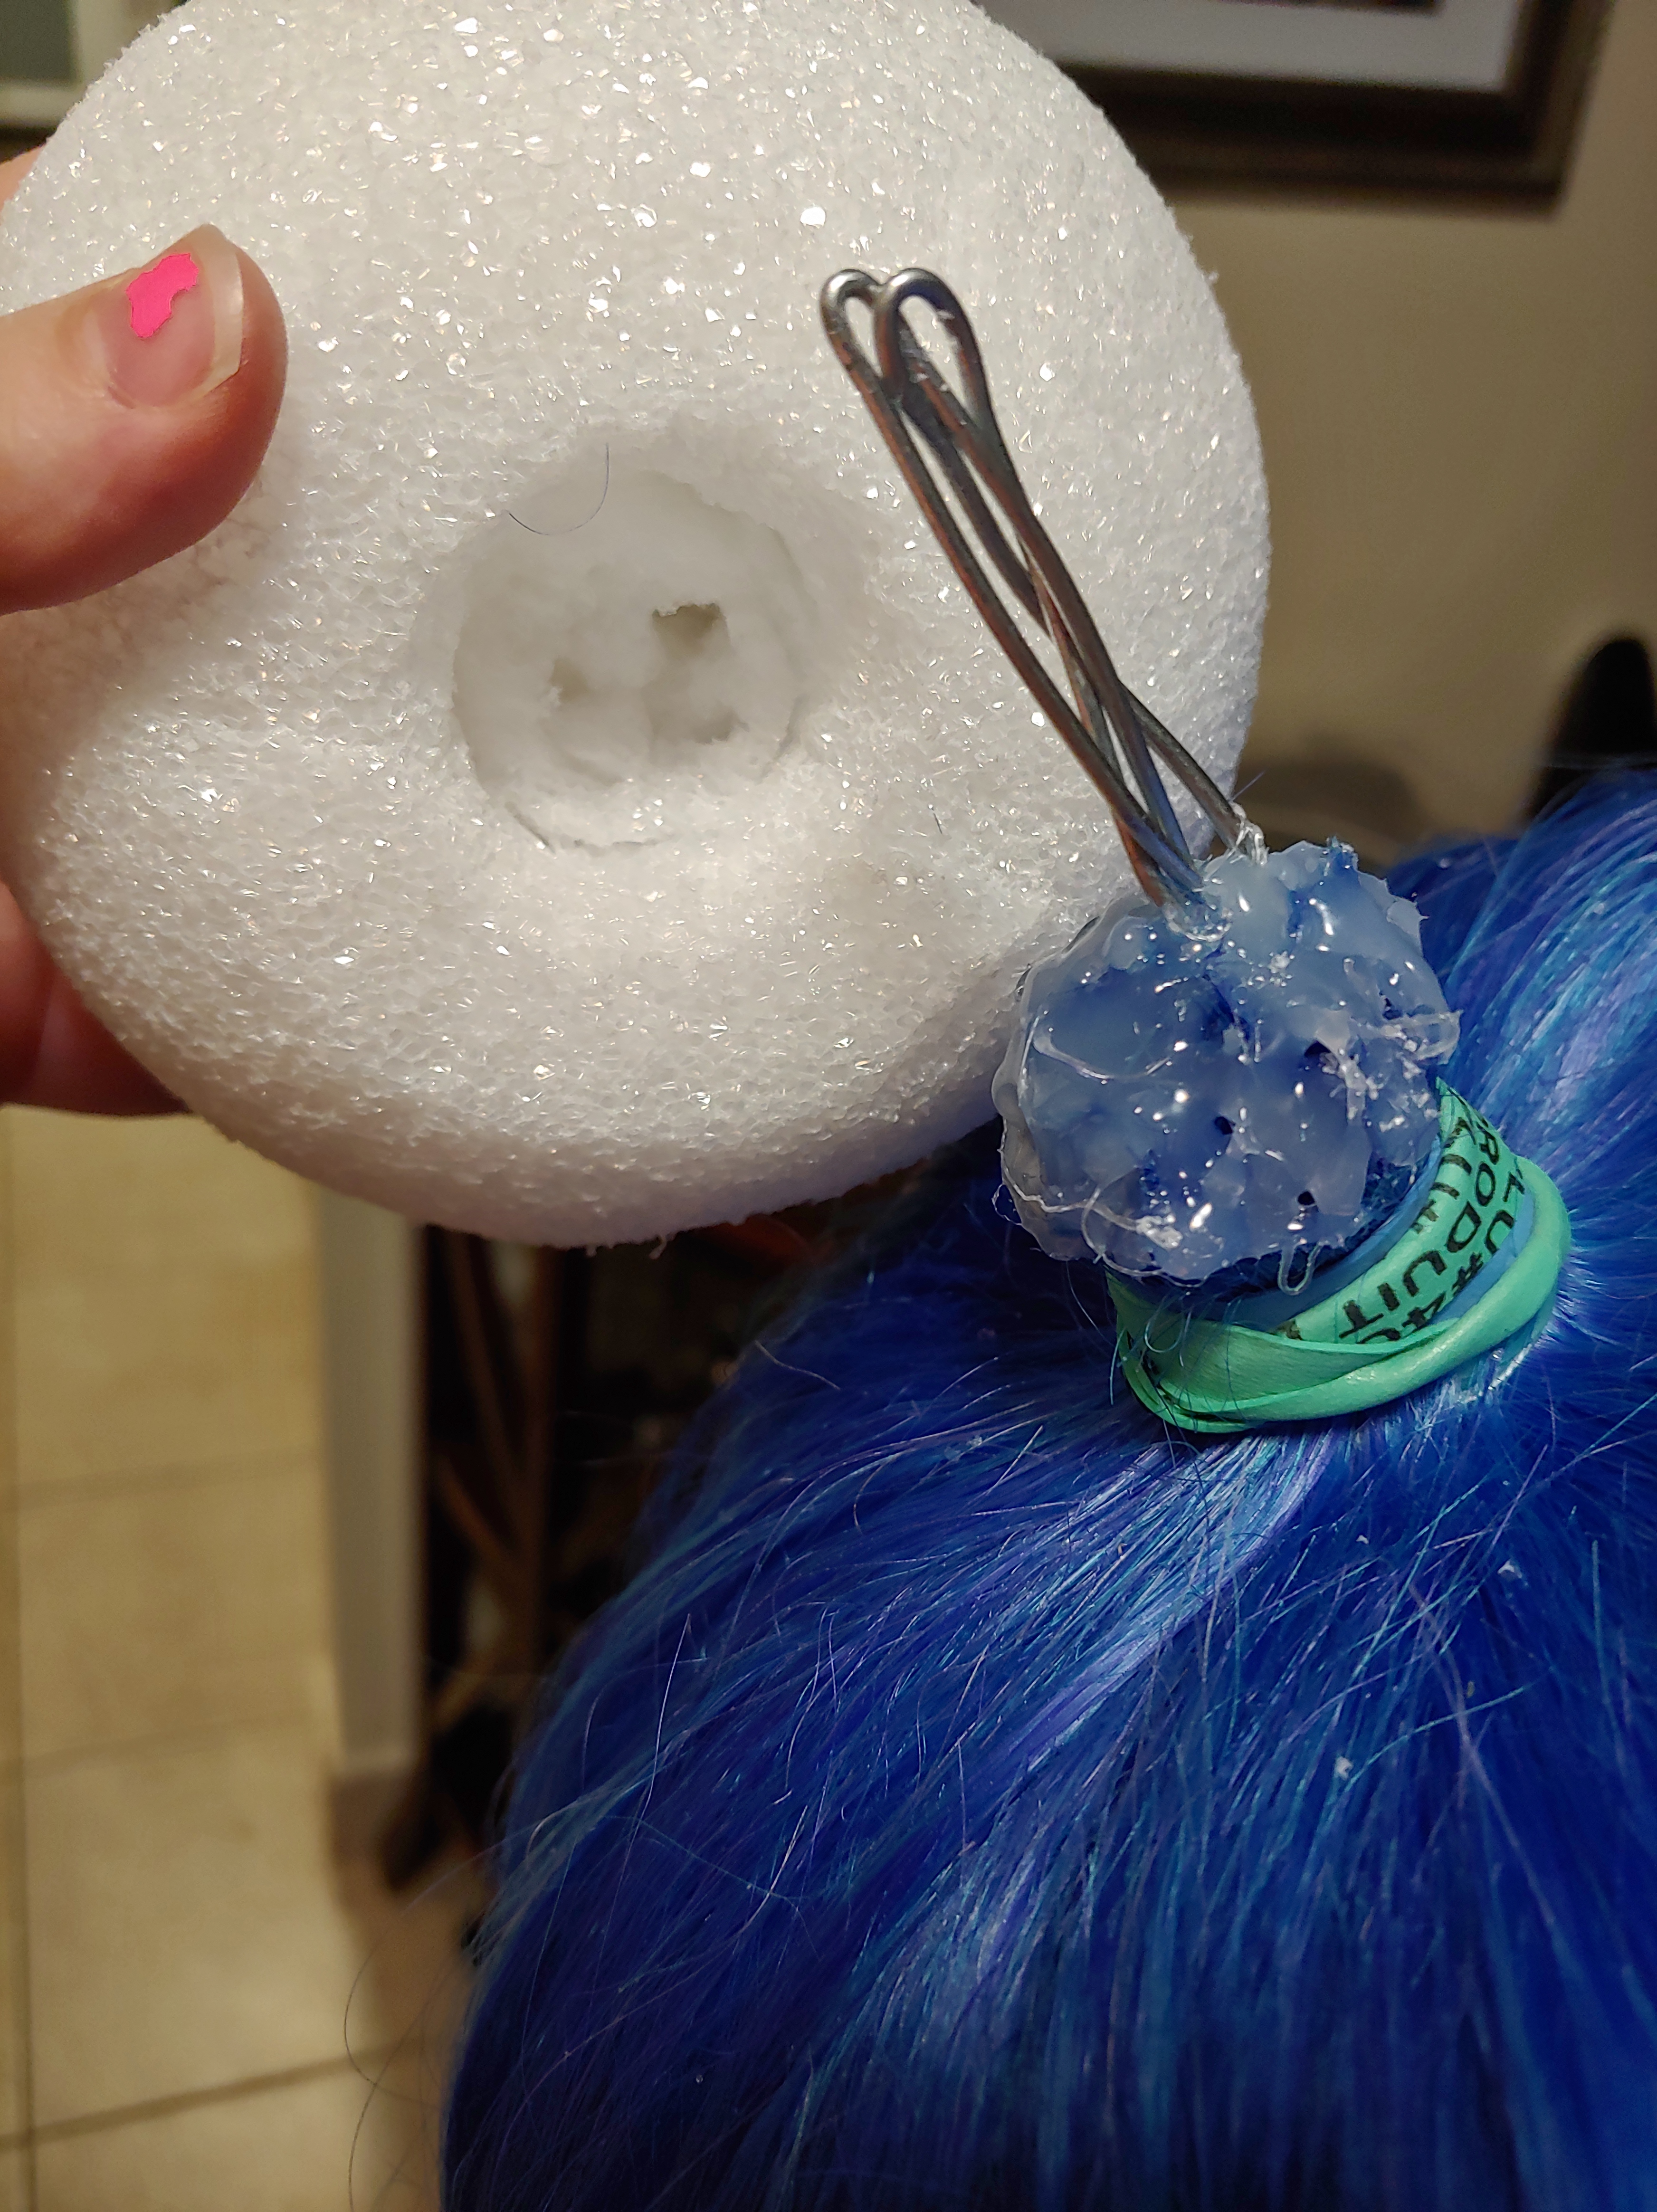 Next, you will need to grab your styrofoam ball and an Exacto knife or a box cutter. Start by carefully slicing one side off my styrofoam ball so that one side is flat. Then carefully press it down onto your peg with the flat side facing toward the stump of your ponytail.
At this point, I would recommend grabbing a permanent marker and tracing your stump onto the ball, then you can use it as a guide while you very carefully carve out a hole wide enough that you can press the styrofoam ball all the way down over your stump. The combination of the peg and your wig stump should make for a pretty secure hold on that ball.
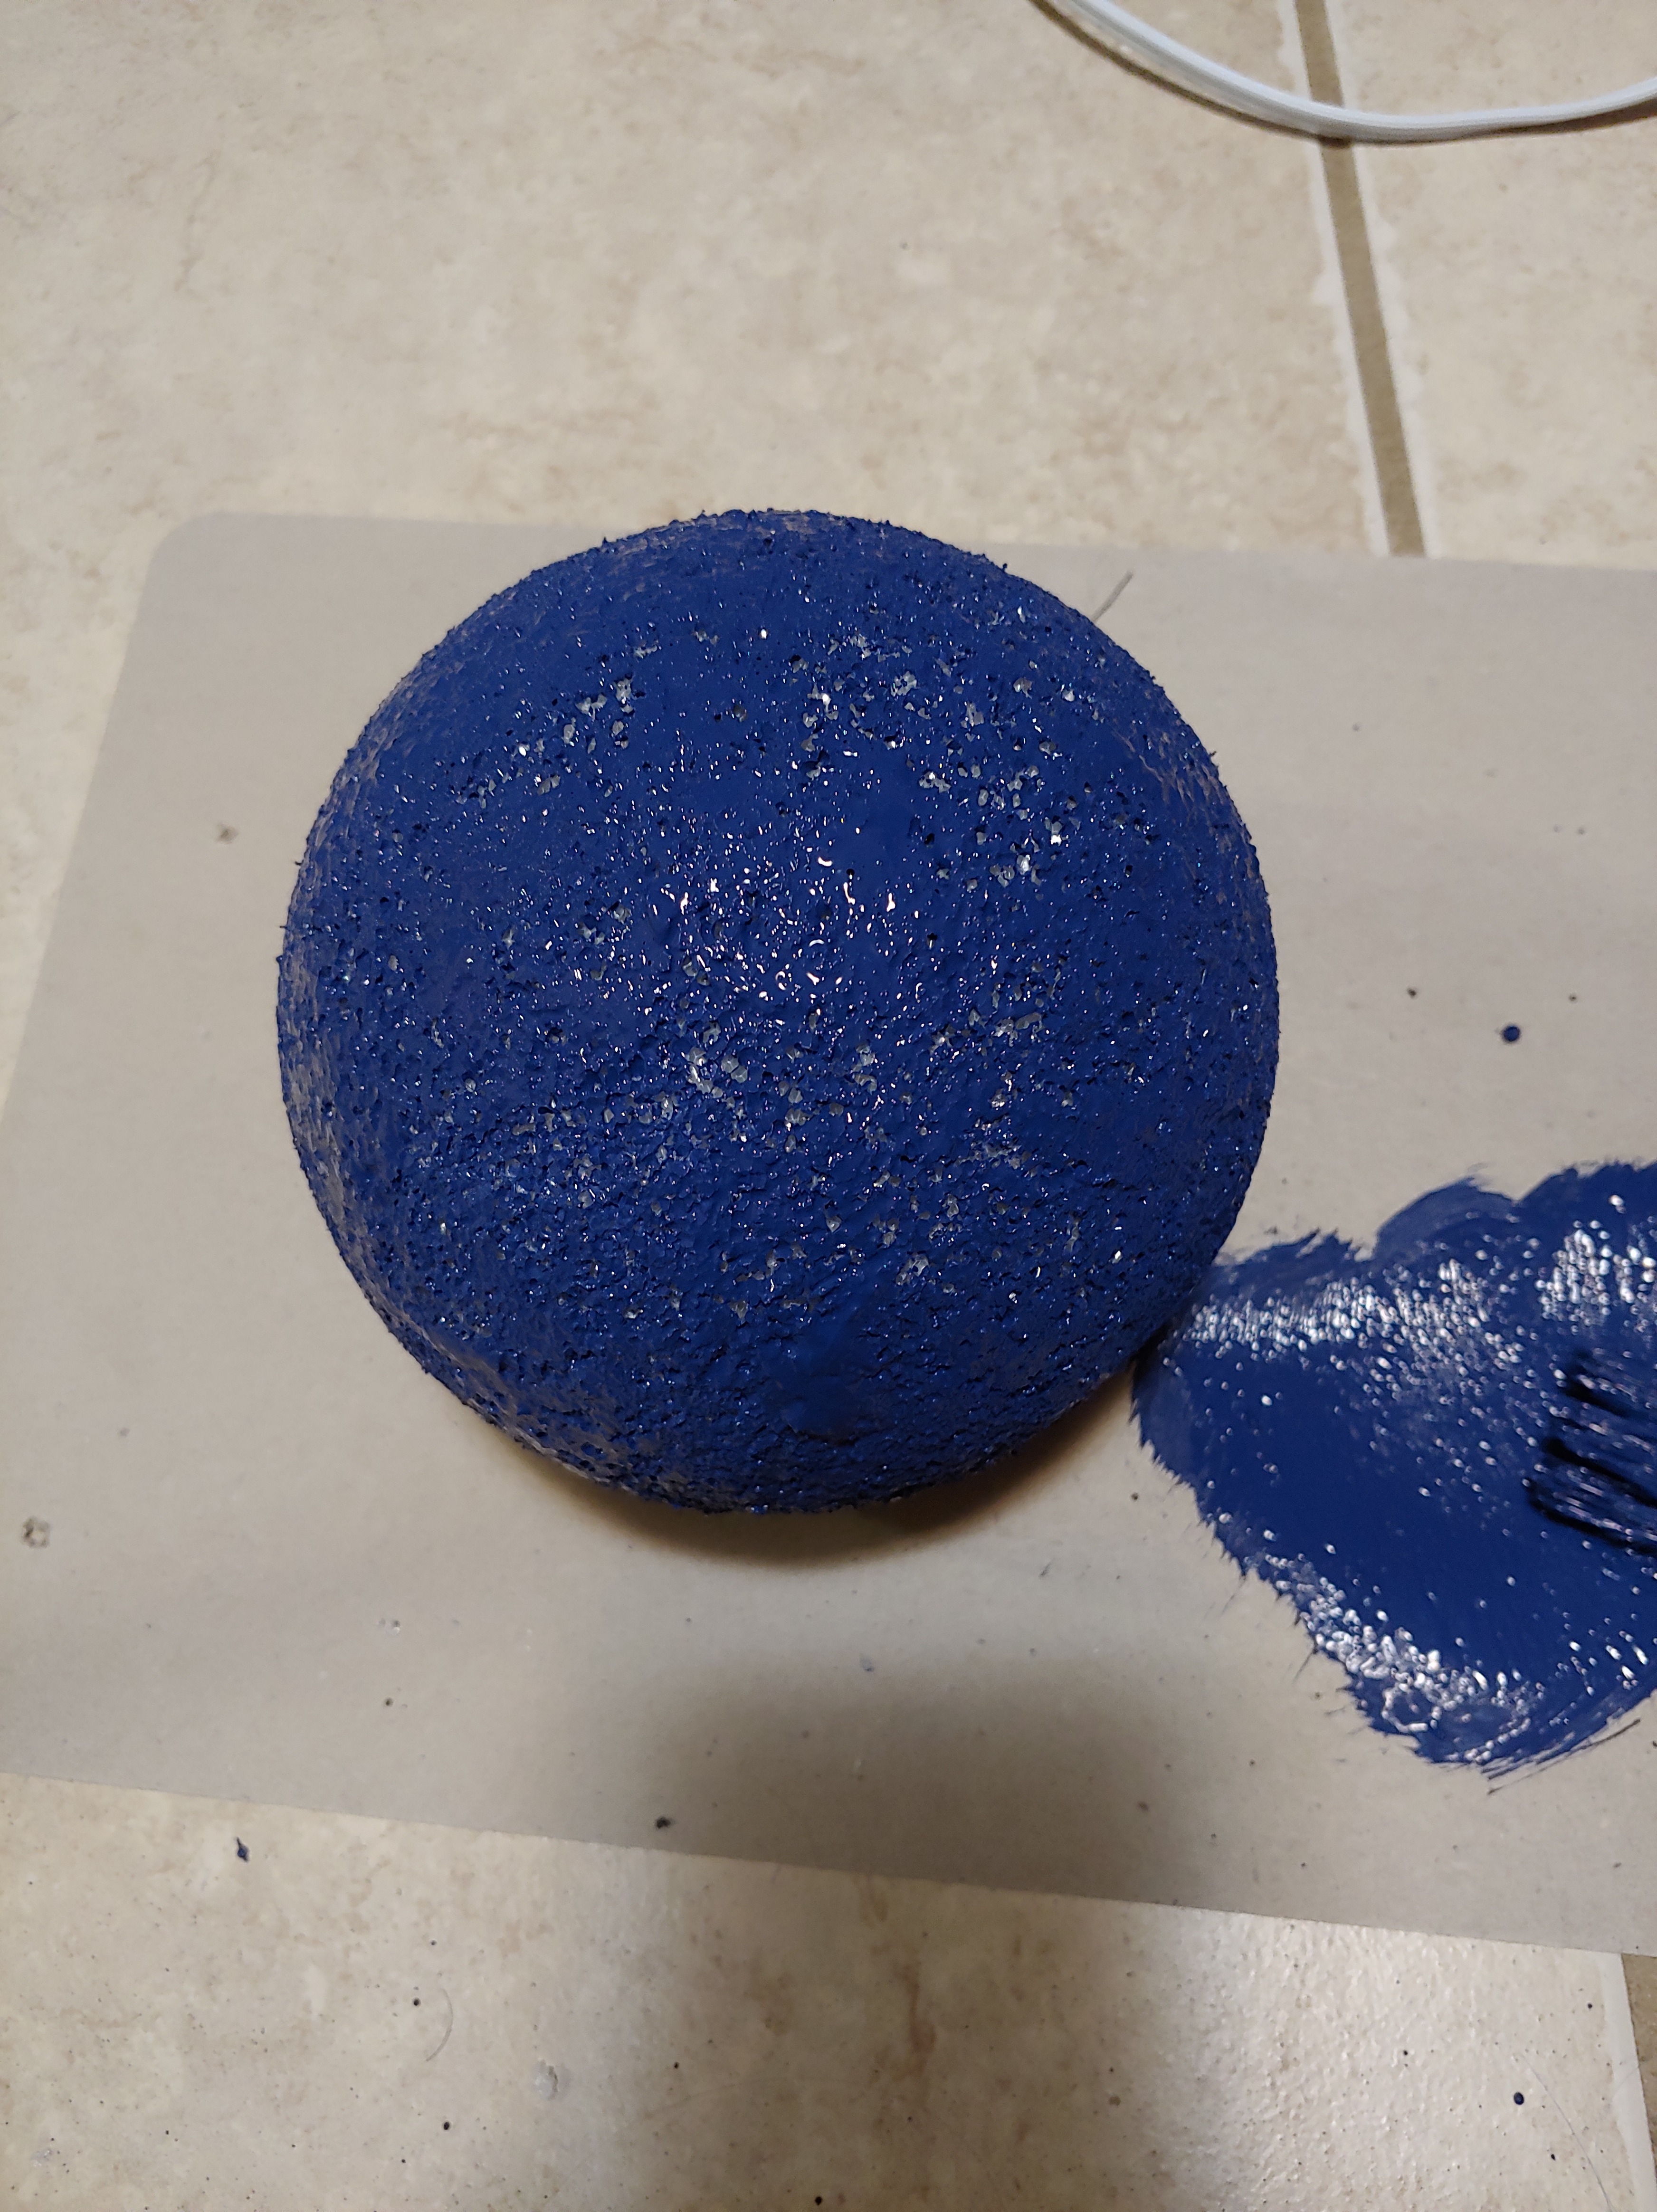 When you’re happy with the fit of your ball over the ponytail stub you will need to take it back off of the stub/peg. Grab some of the cheapest acrylic paint you can find in a colour that is close to your wig colour and start painting the ball. I specify the cheapest paint you can find because of the styrofoam’s porous surface, it likes to pool in the grooves and wastes a lot of paint (I think I used over a whole ounce) to cover and it’s most likely that nobody will ever see it. If your budget is tight and you need to save a few dollars on materials you could even skip this step.
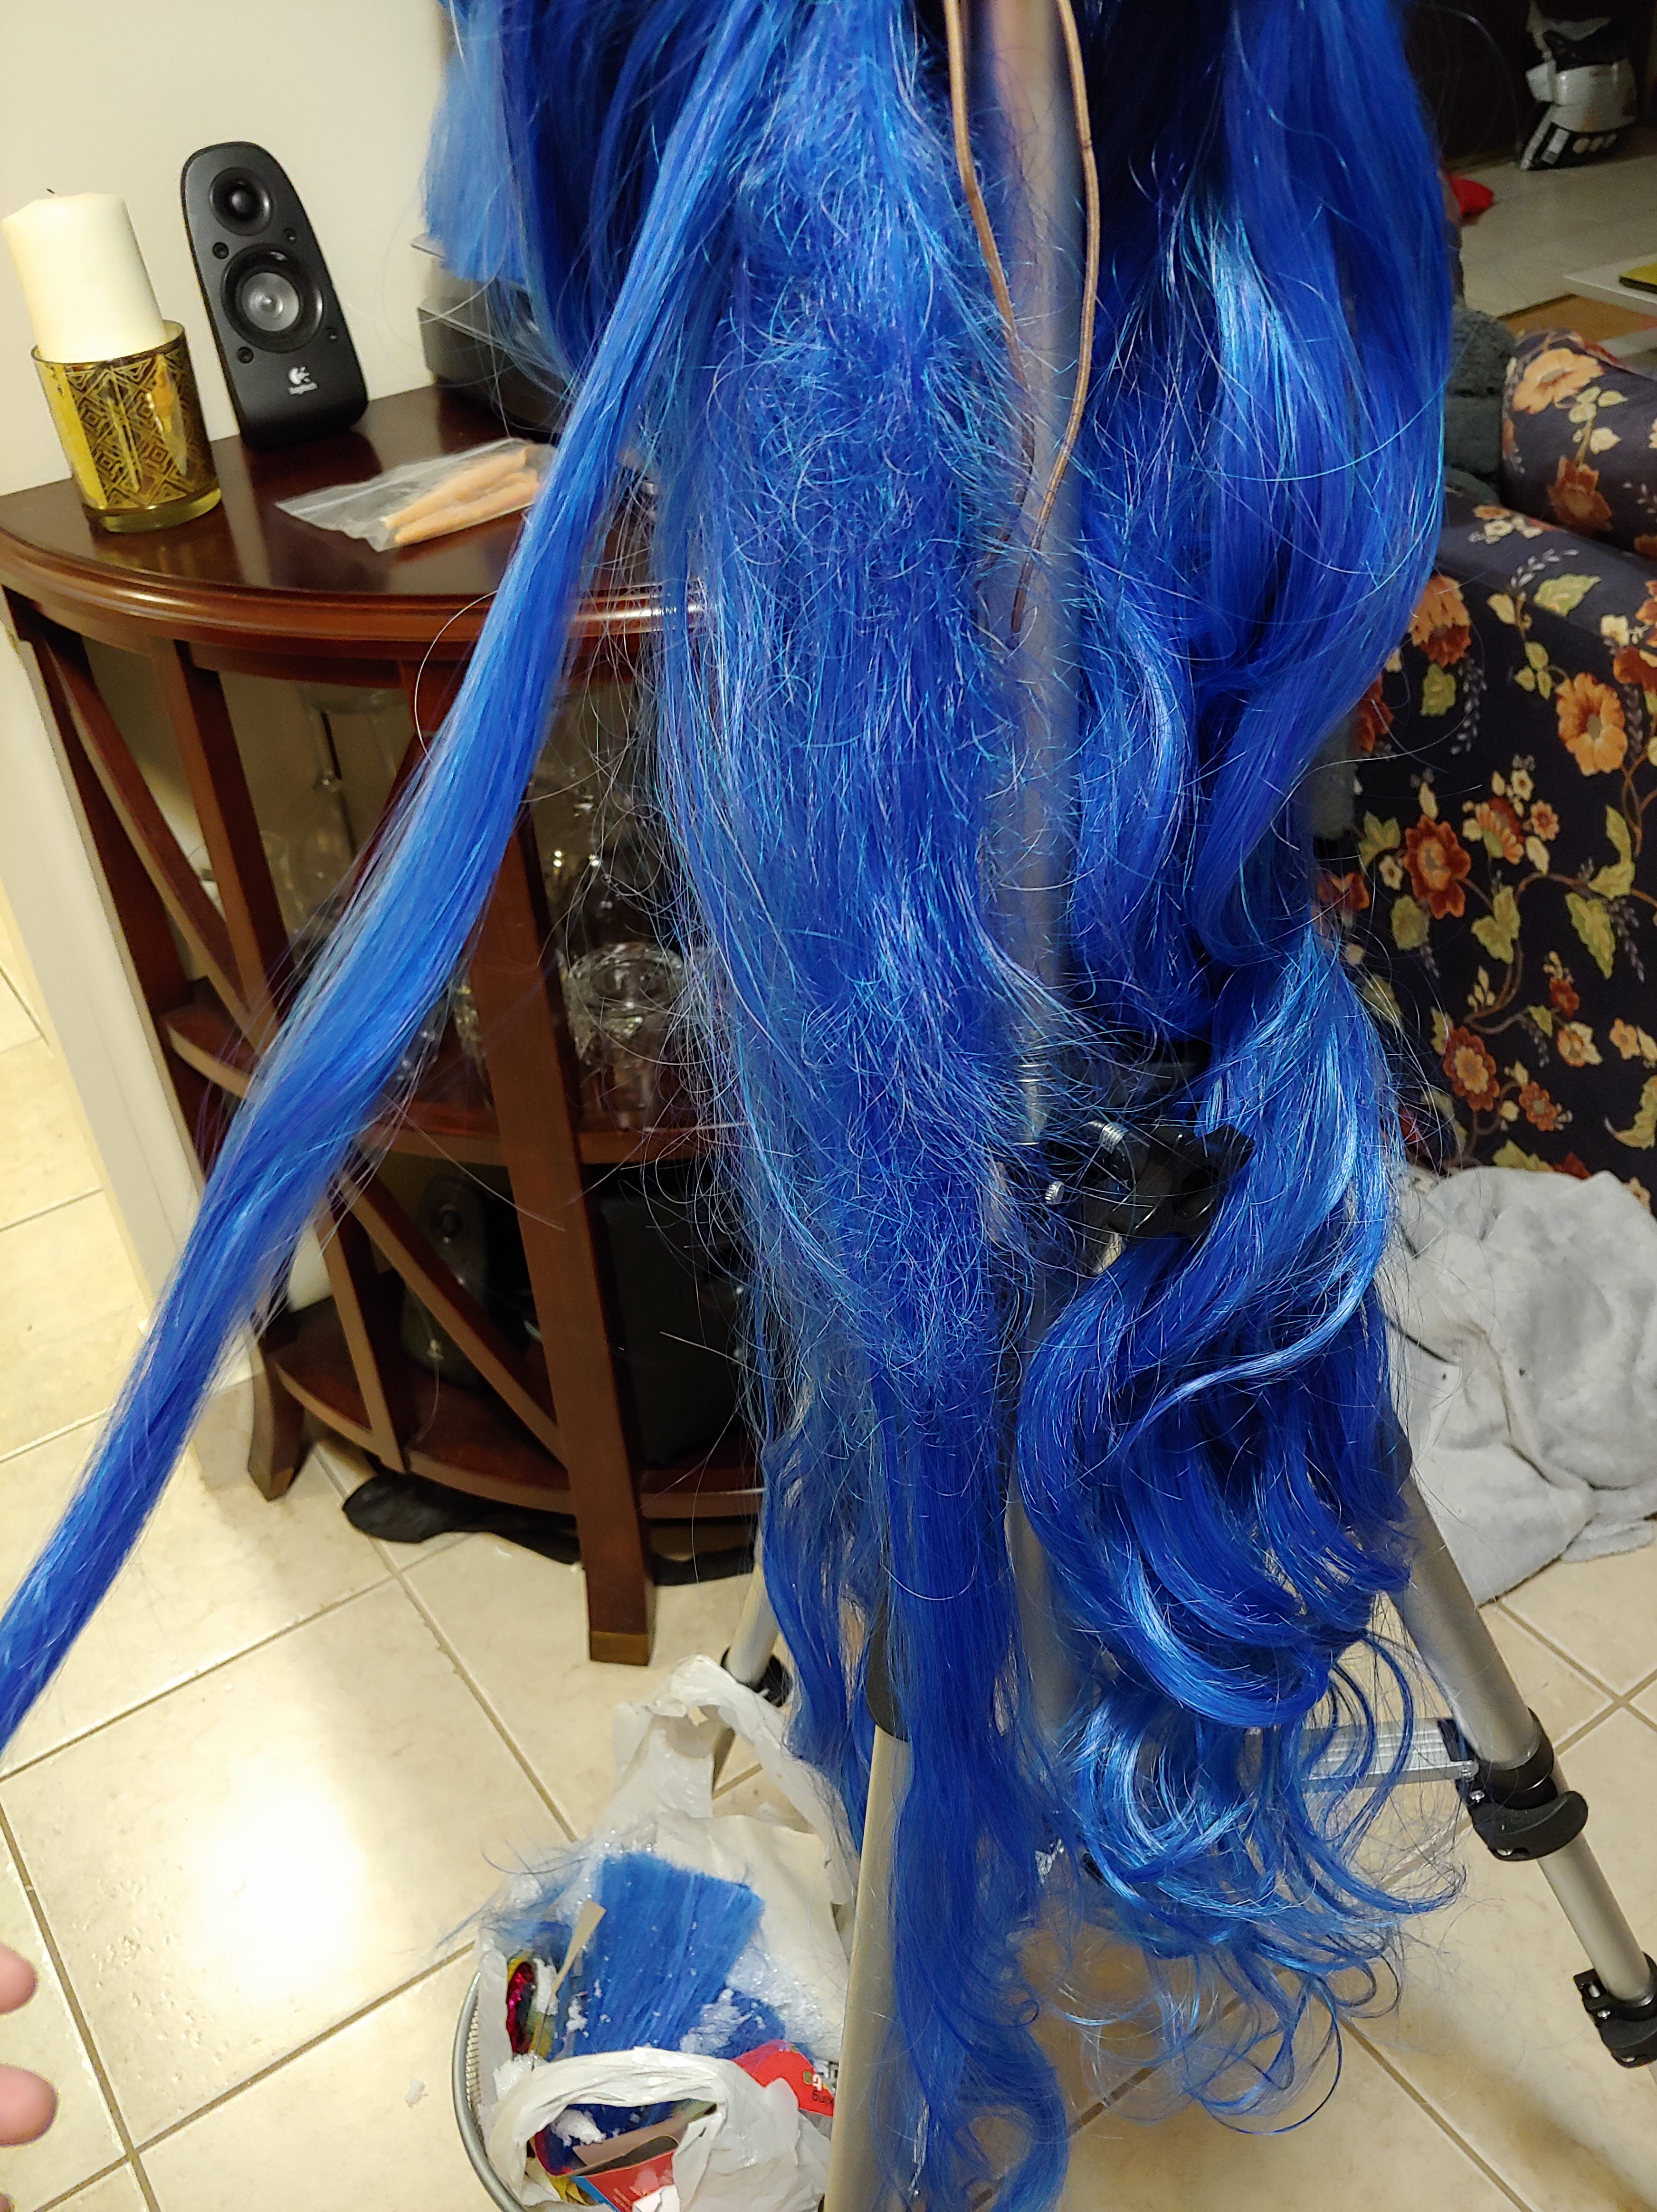
Set that aside to dry and grab the wig or ponytail clip(s) that you are going to use as the actual hanging part of your ponytail. Mine came attached to large hair clips so I had to take them apart.
 This part is optional, I just did it to add a little extra volume to my ponytail.
Getting the straightening iron back out I sectioned off the ponytail clip setting the top layers aside, repeating the process I did at the beginning where I heated and teased the fibers to make them fluffy. However rather than going the whole way down the fibers I only did the top half, so that the curls would not get ironed out.
I also left the shortest layers untouched to hide the frizzy areas created by all that backcombing.
Once I was done I did the same thing to my second clip.
 In this picture, the clip on the left has been heated, teased and brushed out while the one on the right has not. I’m just showing this to give a clearer idea of the amount of extra volume I was able to generate.
Also as another side note, I am pretty confident that with some clever hairpin placement I could have gotten away with one ponytail clip instead of two. So if you’re worried about the weight of the wig, or two clips are just too expensive, you could probably get away with one. Especially if you do a good job on this fluffing step, it’s really easy to make your wig or ponytail clip look two or three times as thick as it actually it.
 Once your ponytail hair is all fluffed up, and your styrofoam ball is all dry you will need to get your hot glue gun out again. Carefully glue your ponytail clips or wig to the styrofoam ball. You may need an assistant to help with this part.
I actually also used some E6000 glue on mine but that might have been overkill. The hot glue is really great for this job because it is very thick so it seeps into the mesh and the base of the wefts really well, and it dries super quick.
Be mindful that you don’t squish the glue through to the top layers of the hair.
Flip it right side up and place it back on your peg. Grab some hairpins and hairspray to secure the hair where you want it (you can shove updo pins right into the styrofoam) and apply a little bit of hairspray if necessary to hold stuff in place.
Finish styling your face and neck framing hair, and then you’re done.

Put it on for a wear test and go nuts because you look so much taller and you’re not even wearing high heels.
Did you find this tutorial helpful? Do you have questions or think I could improve it?
Leave me some feedback!

I am continually searching online for ideas that can help me. Thank you!
Hi there! I’m basically trying to make exactly the same wig as you’ve made in this tutorial. In this one, you’ve used multiple different wigs/pieces and assembled them as one. Do you have any advice on where to purchase them so that they’re a consistent color? I’m having trouble doing that, especially with blue ;-;
Hi!
I got all the parts I used from Arda Wigs, as long as you stick to one colour name with them you’ll have a match.
( Europe: https://ardawigs.eu/ US: https://arda-wigs.com/ Canada: https://ardawigscanada.ca/)
Epic Cosplay Wigs also lets you shop by colour, https://www.epiccosplay.com/
Those are the only brands I can speak for though
Oh, thank you so much!