I always loved playing dress-up as a kid, that’s probably why I still play dress-up as an adult. Sharing this with my own kids is something I’ve been looking forward to for a very long time. So I was really excited to put together a little family One Piece group for my baby’s first game of dress-up. The character I chose for her was Momonoske from One Piece because his little yukata robe looked comfortable for her, she has dark hair, even had a bit of a bald spot on top at the time, and pink is her colour.
I got really lucky in the fabric section at my thrift store, they had some linen in the lighter pink that I needed, and some cotton broadcloth in a darker pink. If I didn’t get lucky in the fabric section, I was going to check for pillow cases, because at 2 and a half months old, it doesn’t take much fabric at all. I also bought a roll of 1 and 1/2-inch purple ribbon to be the belt.
Making the Pattern
So the basic pattern was modeled off my memory of the top from McCall’s M7525 pattern. I grabbed one of my baby’s little long-sleeved bodysuits to reference for sizing and some paper and started drawing. This is what I came up with:
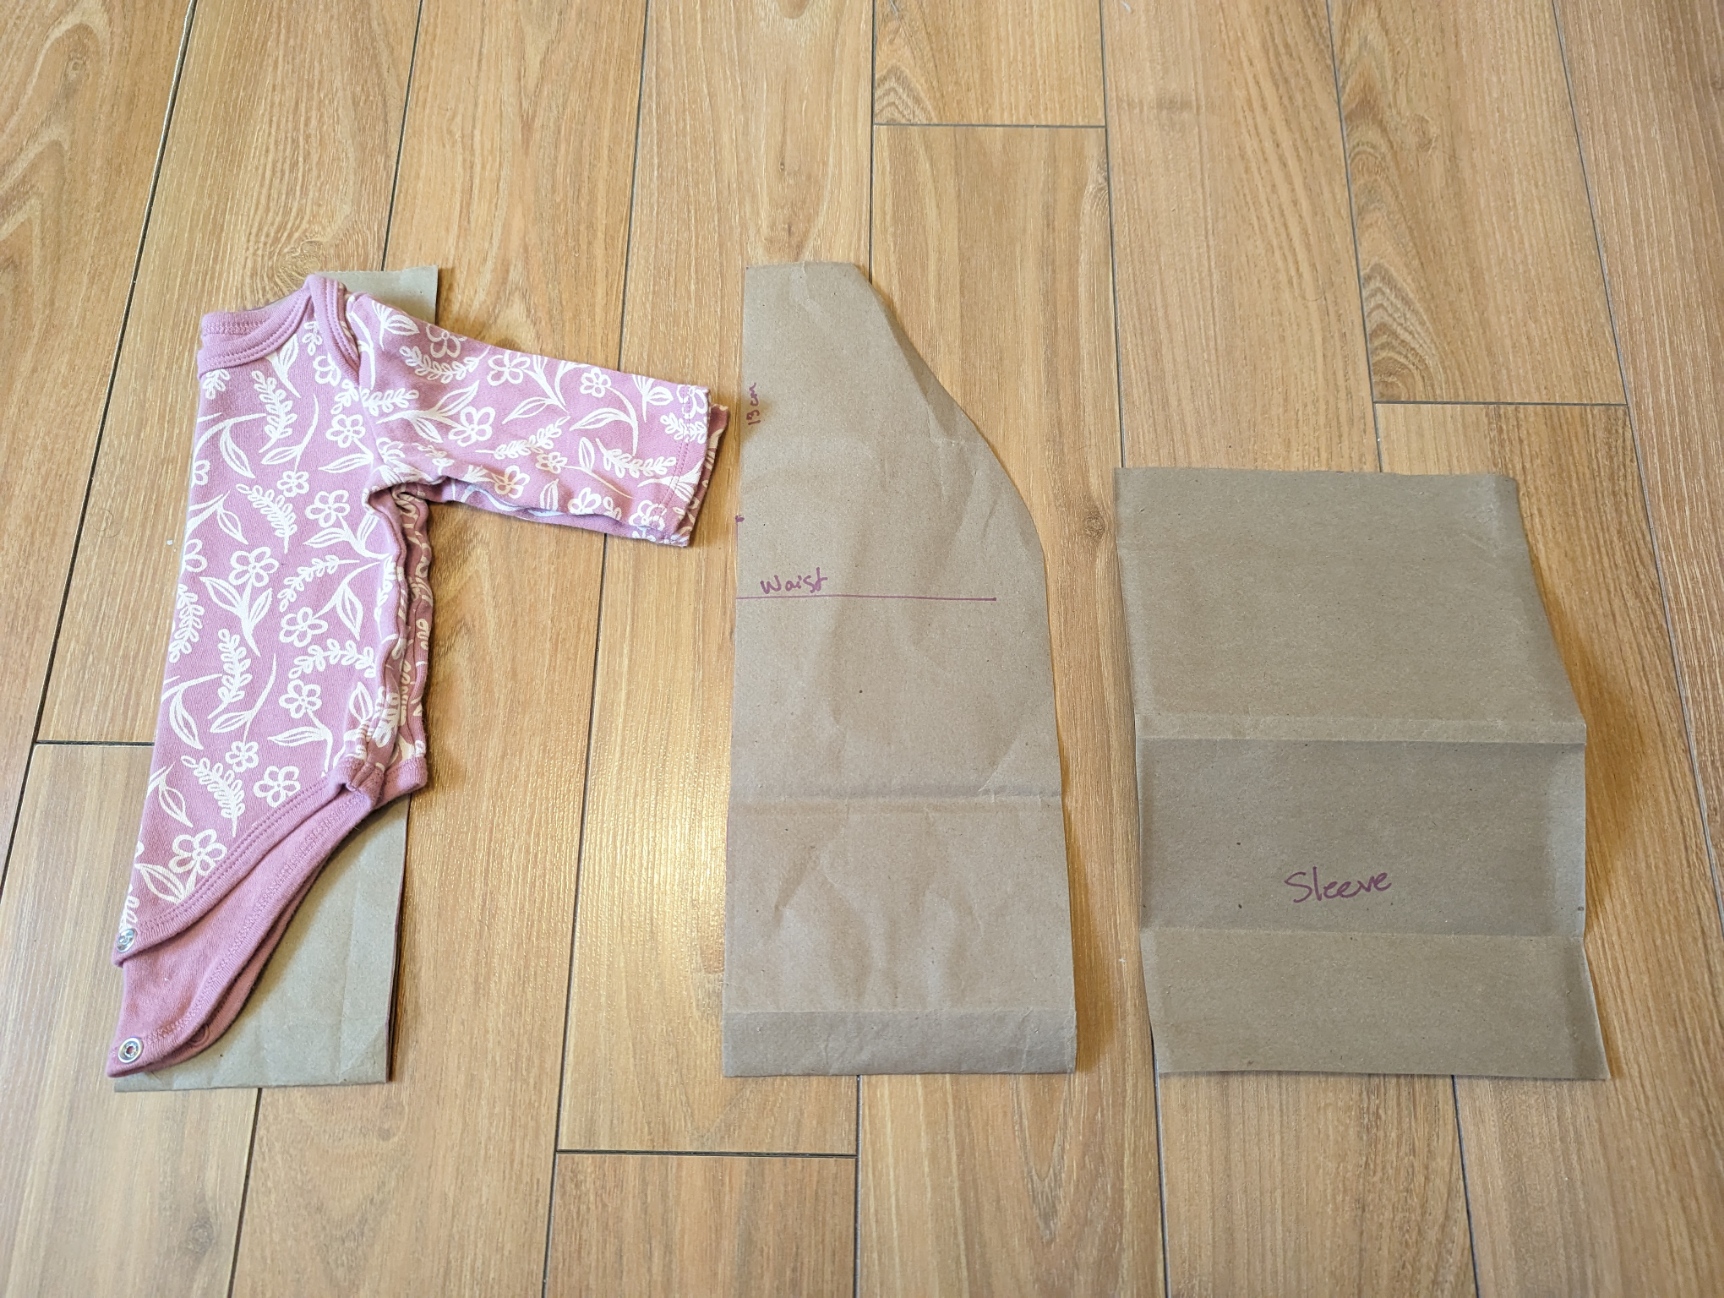
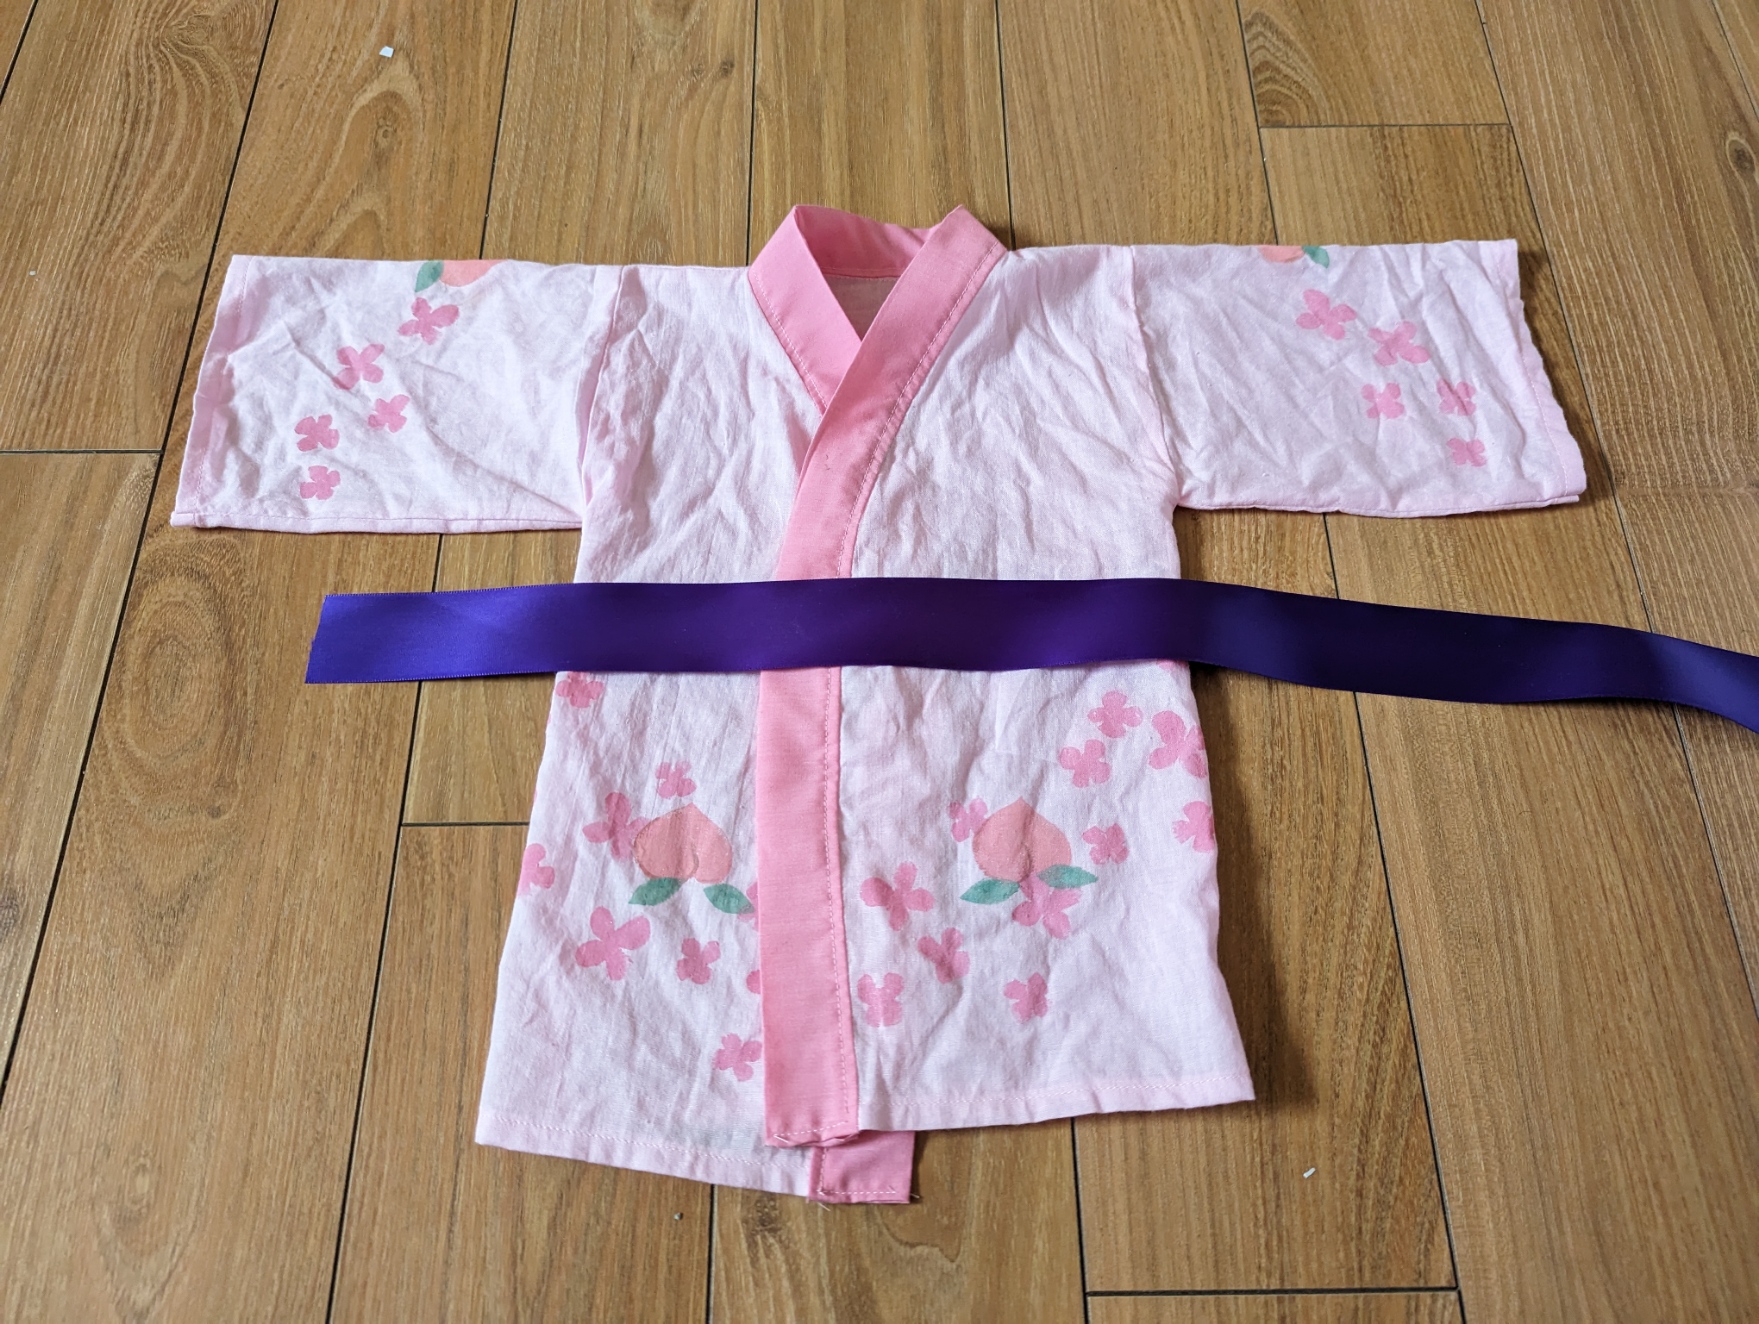
Here you can see that with the body suit folded in half, I drew a rectangle around it, traced the neck hole curve, and marked it under the armpit to make the back. What I did get wrong here was the length, as you can see in the picture I only went about a centimeter longer than the onesie, as a result, the robe only went to her knees, I should have added another 5cm of length. The final robe was a bit more snug than I liked too, so I would also draw a centimeter wider than the onesie if I was to re-make it. This pattern piece gets cut on the fold.
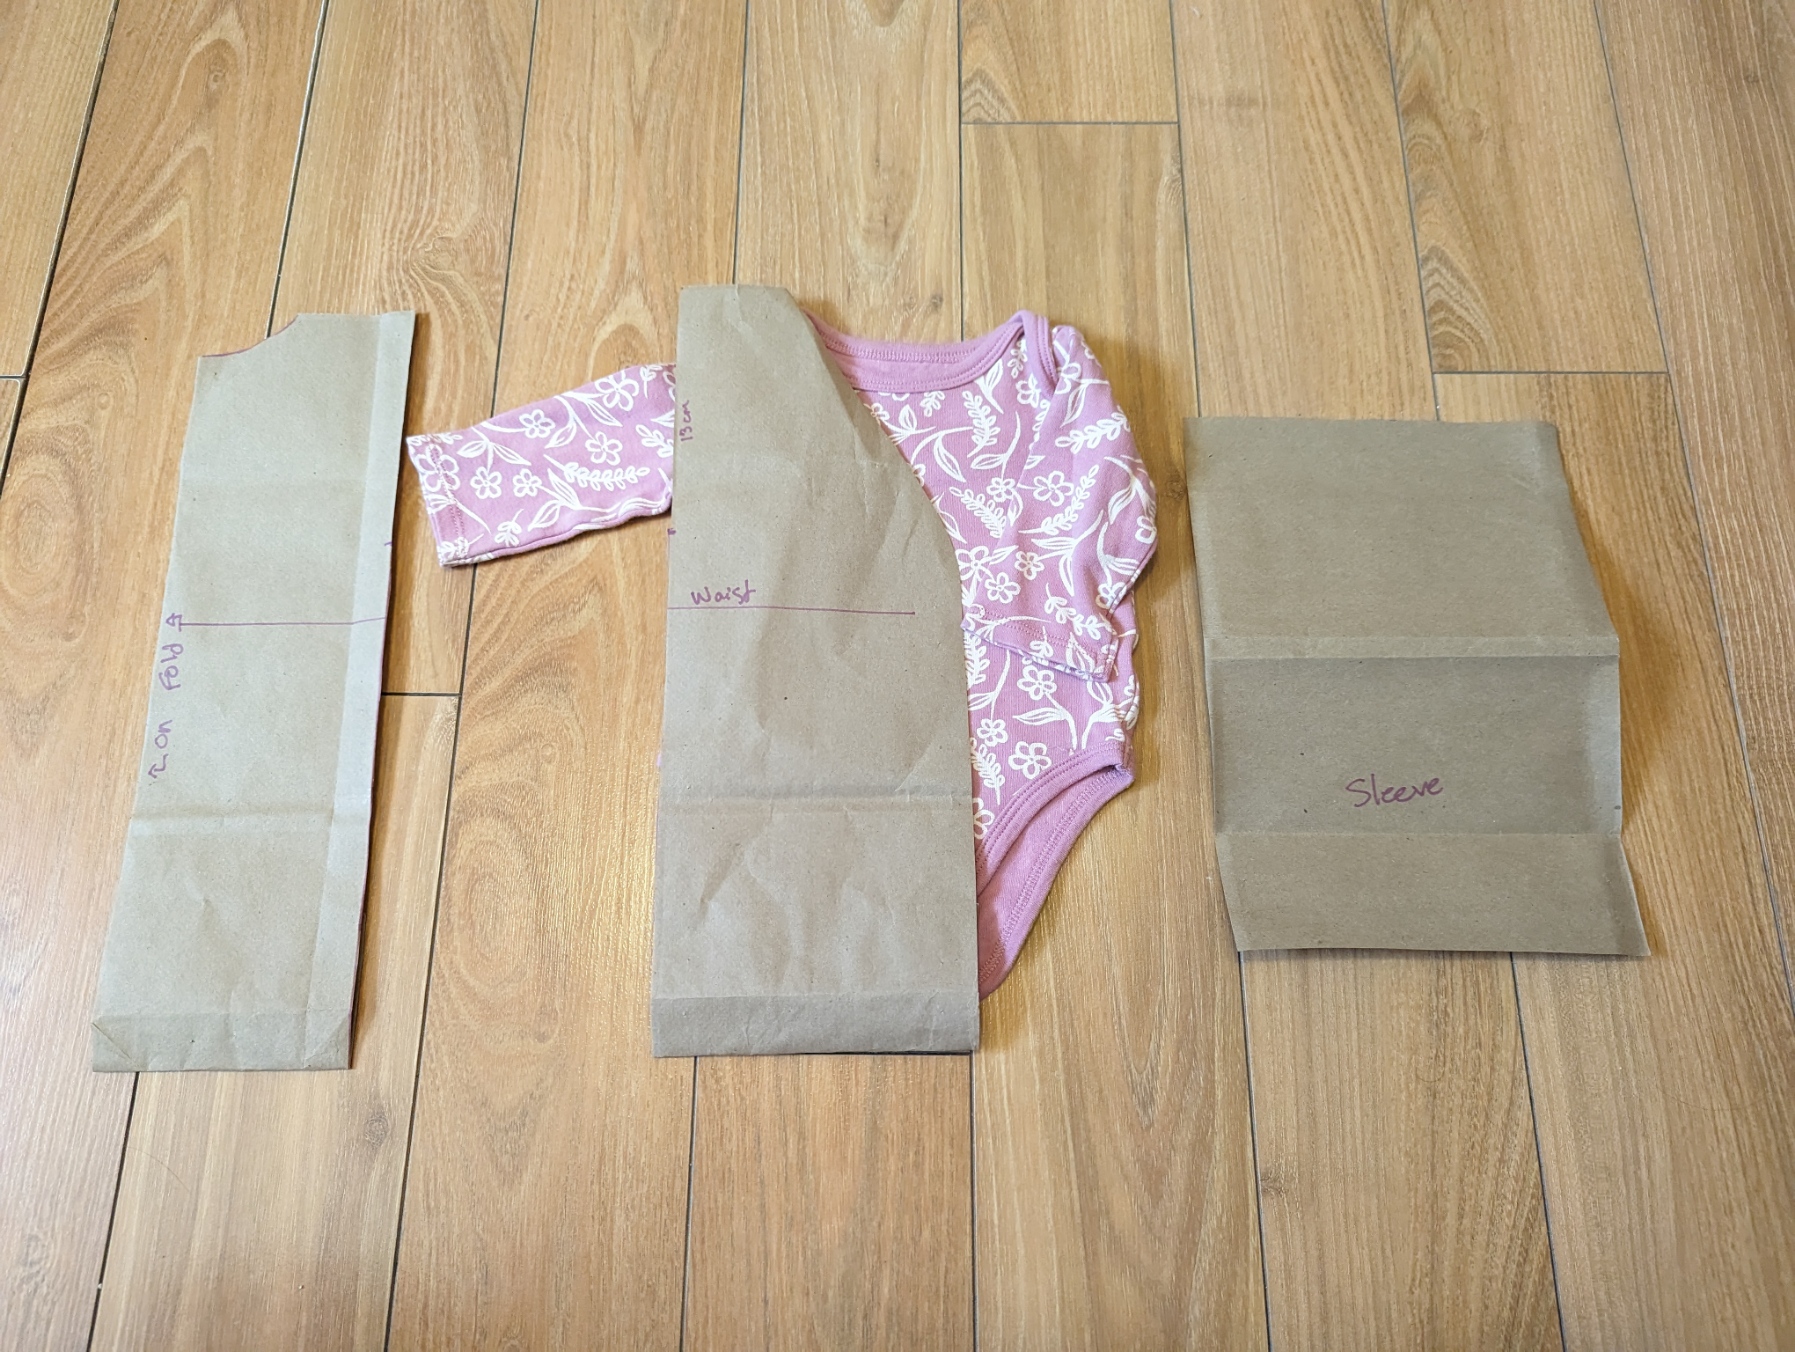
To make the front panels I cut a rectangle that was the same length as the back panel, but roughly 30% wider. Next, I placed the back panel on top of the front panel, lining up my top left corners, and copied the armpit marking and the neck hole markings to the front panel. I also made a waistline marking. Then to shape the front of neck-line, I drew a diagonal line starting from the outermost edge of the neck-line I had traced from the back panel to end just a little above the waistline and cut the resulting triangle away, and rounded off the sharp corner that was left at the waist.
The sleeve pattern was the least complicated, it’s just a rectangle. To get the dimensions, I measured from the shoulder to the armpit mark on my other pattern pieces (13cm in my case) and multiplied that number by two (so 26cm) to get one side measurement. To get the other, I measured the sleeve of the onesie (18cm in my case). This resulted in a 26cm x 18cm rectangle, for the sleeve panel.
The collar was also a rectangle 8cm wide, about 1m long in my case, I didn’t make a pattern piece for it I just picked a width and cut a strip that I knew would be long enough. I did not cut it on the bias, but I wished that I had, it would have been easier to attach and looked nicer in the end.
Once everything was cut out, I sewed only the side seams of the back and front panels together before painting.
Making Stamps
I used stamps to paint the peaches, the leaves, and the peach blossoms onto the panels. To make the stamps, I cut my shapes out of some scrap 2mm EVA foam, and used super glue to attach them to some handles. For my handles, I used some 3D printed test cubes because that’s what I had, a thicker piece of EVA foam some small blocks of wood or a few squares of cardboard glued together would work great too, the purpose is just to have something easy to hold. I made 3 different sized flower stamps, one peach stamp and one leaf stamp.
Painting
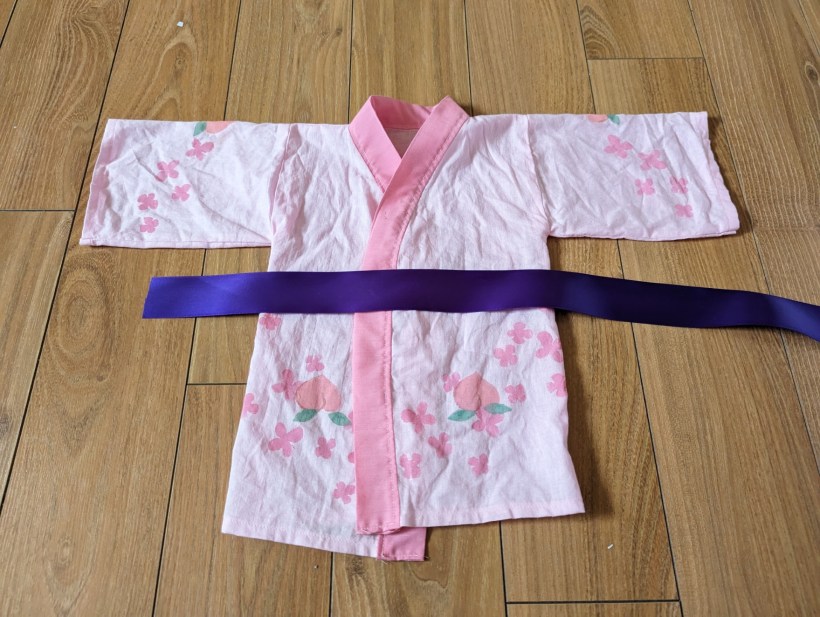
I used coloured acrylic paints, and white fabric paint to mix the soft pastel colours I needed, pink for the flowers, a light orange for the peaches and a minty green for the leaves. I laid my main panels (only side seams sewn together) out flat, and drew an arch across them in chalk that peaked at the center back panel. I used the chalk line to guide the flow of my painting. First I did all the flowers trying to get a nice scatter, while keeping them somewhat clustered near the line. Next I placed my peaches, and last my leaves. Then repeated the process on my sleave pattern pieces, making sure the peaches were centered for best visibility. I also went in with a little bit of grey on a paint brush to add a bit of extra definition to the peaches.
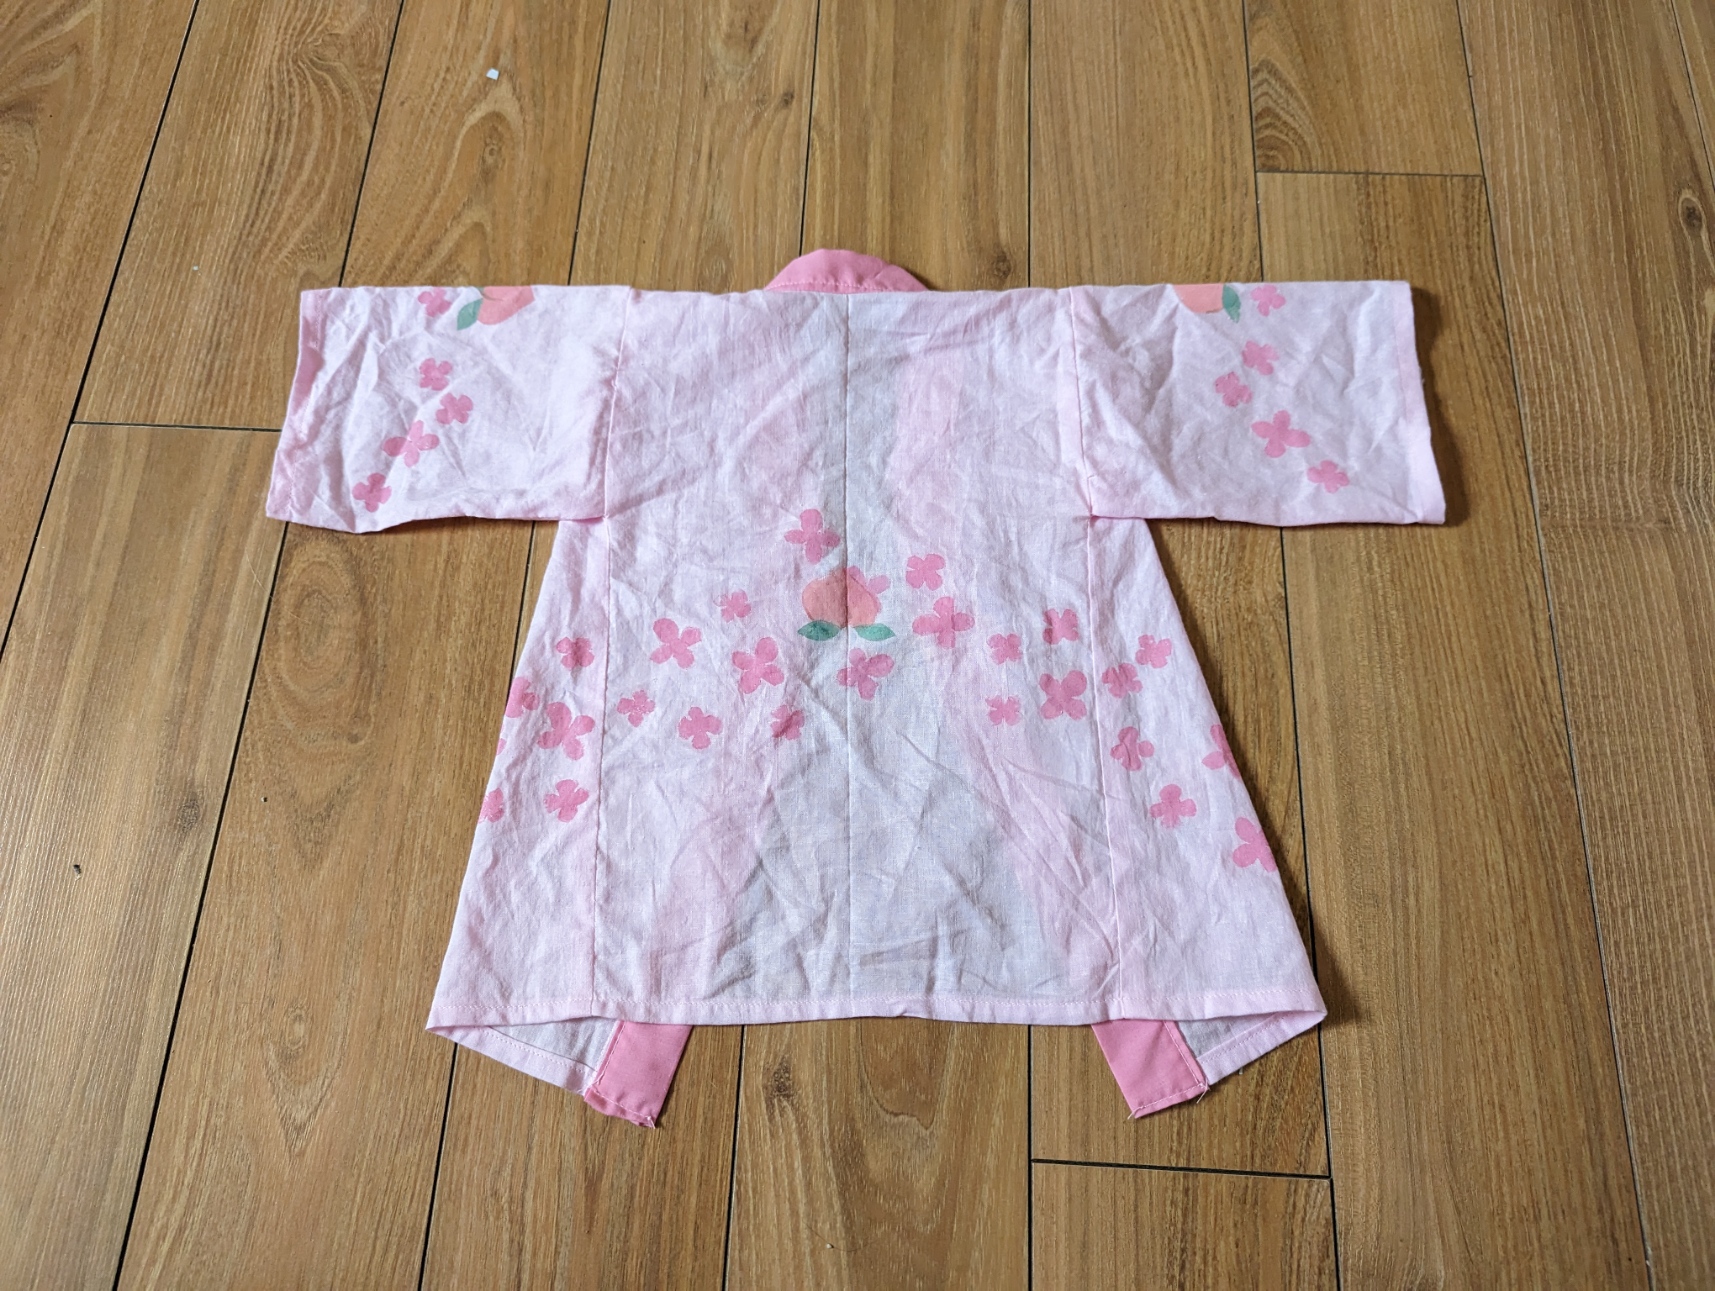
Finishing Up
Once all the paint was dry I was able to go back to sewing, I closed the shoulder seams next, then sewed the sleeves into tubes before pinning and attaching to the main robe. I love doing this style of sleves, because they are so much easier to attach than ones with the curved seams. Last the collar attachment, which is a little trickier. Fold the collar rectangle in half longways (so it’s like a really long hot dog bun), and iron it to get a nice crispy folded edge. Then it gets attached a lot like a bias tape where you would pin the raw edges together on the outside of the garmet, stitch with a 1cm seam allowance and iron the seam open, then fold under a slightly narrower seam allowance on the other side so that you can top-stitch it down from the front for a really pretty finish. Make a rolled hem on the sleaves and the bottom seam and it’s done. I used satin ribbon for a sash instead of making one.