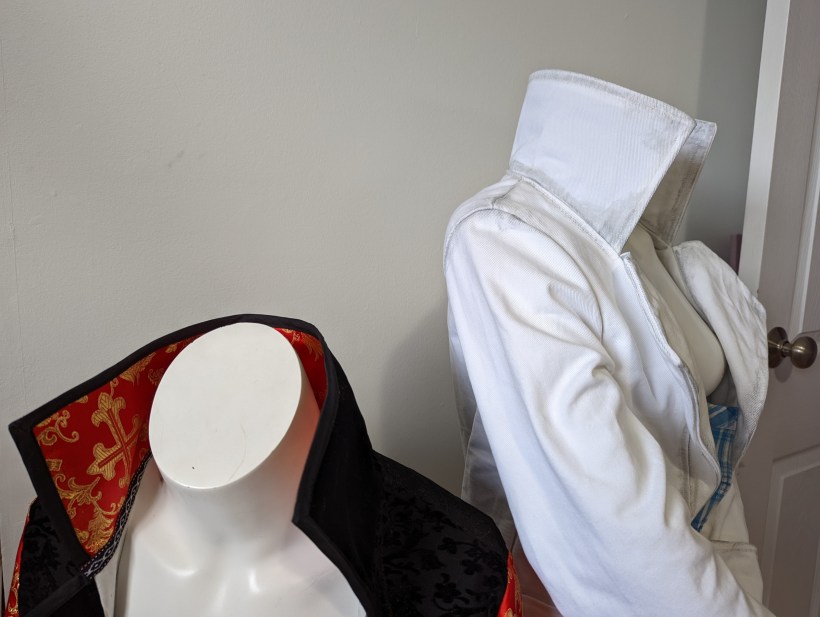
One of my favorite things to make when building cosplays is a cool jacket. Fancy jackets (especially long ones) are like character design catnip to me. One common problem I have run into while trying to make these cool trench coats and dusters or any other kind of crazy jacket that strikes my fancy is forcing the collars to stay in place without sacrificing size, and without needing to re-pop the collar over and over to keep it up.
This tutorial will teach you how to build a structure layer, that can be hidden between the layers of most sewn collars.
Supplies
- Rigilene Polyester Boning
- Scrap Fabric (something stiff like twill is ideal)
Building a Structure Layer
The first step is to trace your collar pattern onto the scrap fabric. In this instance, we want to cut the fabric without including any seam allowance on the top and side edges of the collar, leaving any interior seams and the edge that will attach to the neck of the jacket intact with seam allowances. Cut only enough pieces for one layer.
If your collar has a few different pieces now is a good time to sew them together so that the whole structure layer is one piece.
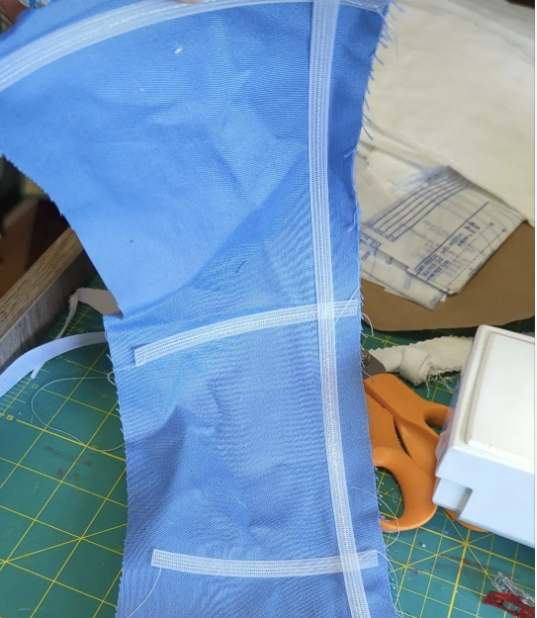
Rigilene boning is very lightweight, and you can sew right through it instead of making boning channels. It can also be heated with an iron and then cooled down again to flatten or curve it into the shape you desire. This makes it perfect for holding up big collars. So get out the boning and you will want to start cutting it into strips that are the same height as the portion of your collar that needs to stand up. You will need enough strips to place one vertical strip approximately every 2.5 – 3 inches along the seam that will be sewn into the neck hole. Using a straight stitch sew all of the strips directly to the scrap fabric. Once the vertical strips are sewn down it’s time to add horizontal. In most cases, you will only need one horizontal strip, but if it’s a really tall collar or is wider at the top than the bottom you may need 2 or three. It’s the same as with the vertical strips but cut to match the width instead of the length. Again, sew using a straight stitch.
Putting it all Together
Great! Now that you have a structure layer all you have to do is put it inside the collar when you assemble it. Remember we cut without seam allowances? This was to eliminate bulk, sew your collar’s fashion layers right sides together as normal, and then insert the structure layer you just made into the resulting pocket. For a really crisp-looking finish, iron flat and then top stitch the exterior edges.
