
I can think of around 6 different ways to make a Sailor Scout crown, they’ve all got pros and cons but in the end, they all yield almost exactly the same results. I want to write about all of them someday but today we’re just going to talk about working with good old craft foam.
Supplies List
- 1 sheet of 2mm craft foam
- 1 oval craft jewel
- contact cement
- Flexible Primer and Top Coat
- Acrylic Paints
Before I get into the meat of this tutorial I am just going to take a quick minute to talk about where to find some of this stuff, if your like myself and have most of these supplies lying around your craft space, feel free to scroll on through!
2mm craft foam is available at most large crafting stores, here in Canada I usually get it at Walmart or Michael’s and it usually costs around $1/sheet. There are fancier options from dedicated cosplay supply stores, which are supposed to be safer when working with heat but 2mm foam is so thin and flexible that we don’t need to heat form it, so just use whatever is easiest to get your hands on.
The jewels are usually the hardest material to source for these crowns, I have had some luck buying bags of mixed craft gems at regular craft stores, but then I usually have 49 leftover gems that may never get used. There are also lots of sellers on Etsy who offer fancier resin gems with glitter or even polished stones, just be sure to confirm the size before you order online.
For a Flexible Primer, I usually use Plasti-Dip when working with foam, Flex Bond and Mod Podge are also both popular options. I just get Plasti-dip at the hardware store, that’s where I get my contact cement too. Mod Podge is a nice option because you can use it as a primer as well as a topcoat, and it’s really cheap.
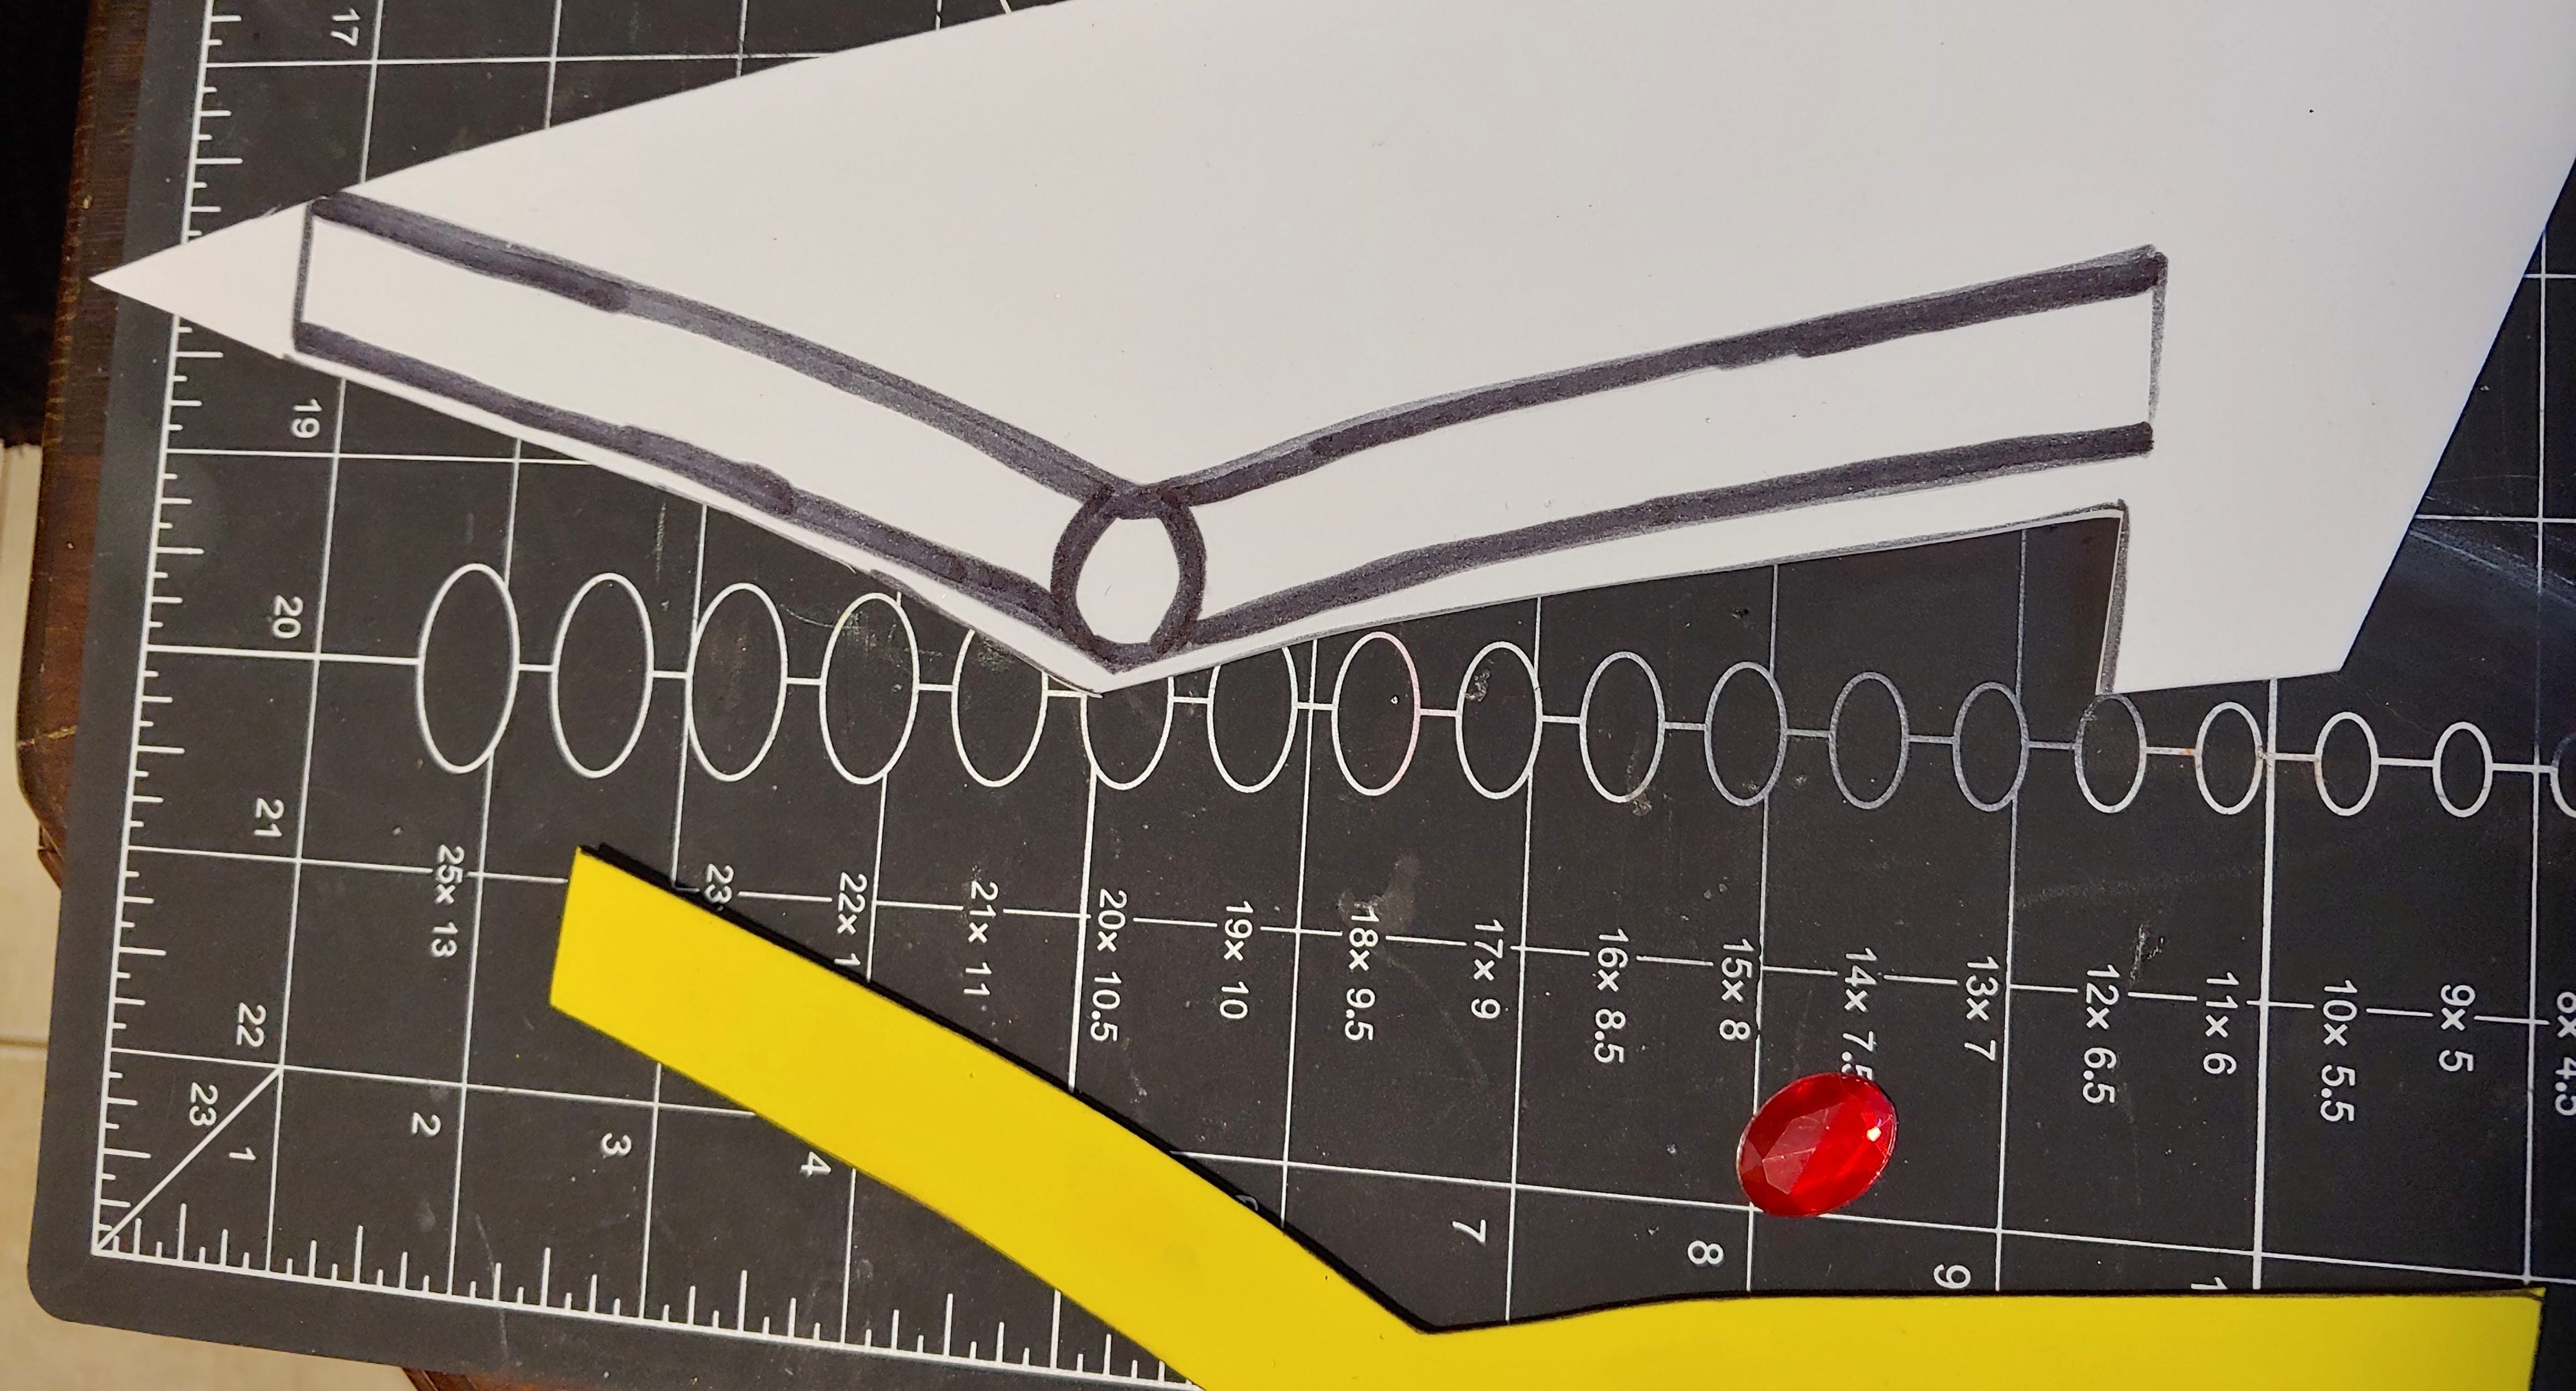
Past me had the foresight to save a template that I created for my first Senshi Tiara so I turned it into a .pdf pattern that can be printed off to make your own. Make sure you print it scaled to 100%, then go on ahead and cut it out. If you have a larger head you will need to lengthen the ends a little bit.

Double-check that the tiara is slightly wider than your gem, cut out the pattern and trace it onto thin foam twice.
Before cutting them out a few adjustments need to be made to one, grab a sharpie and use it to thicken the upper and lower edges of the tiara on the inside of the lines. Mark the position for the gem and make a thick line around where it will sit as well. It’s okay if they’re not perfect, they’re just cutting guides. (don’t attach the gem until after it’s all painted, mine is just sitting there to help visualize how everything comes together)
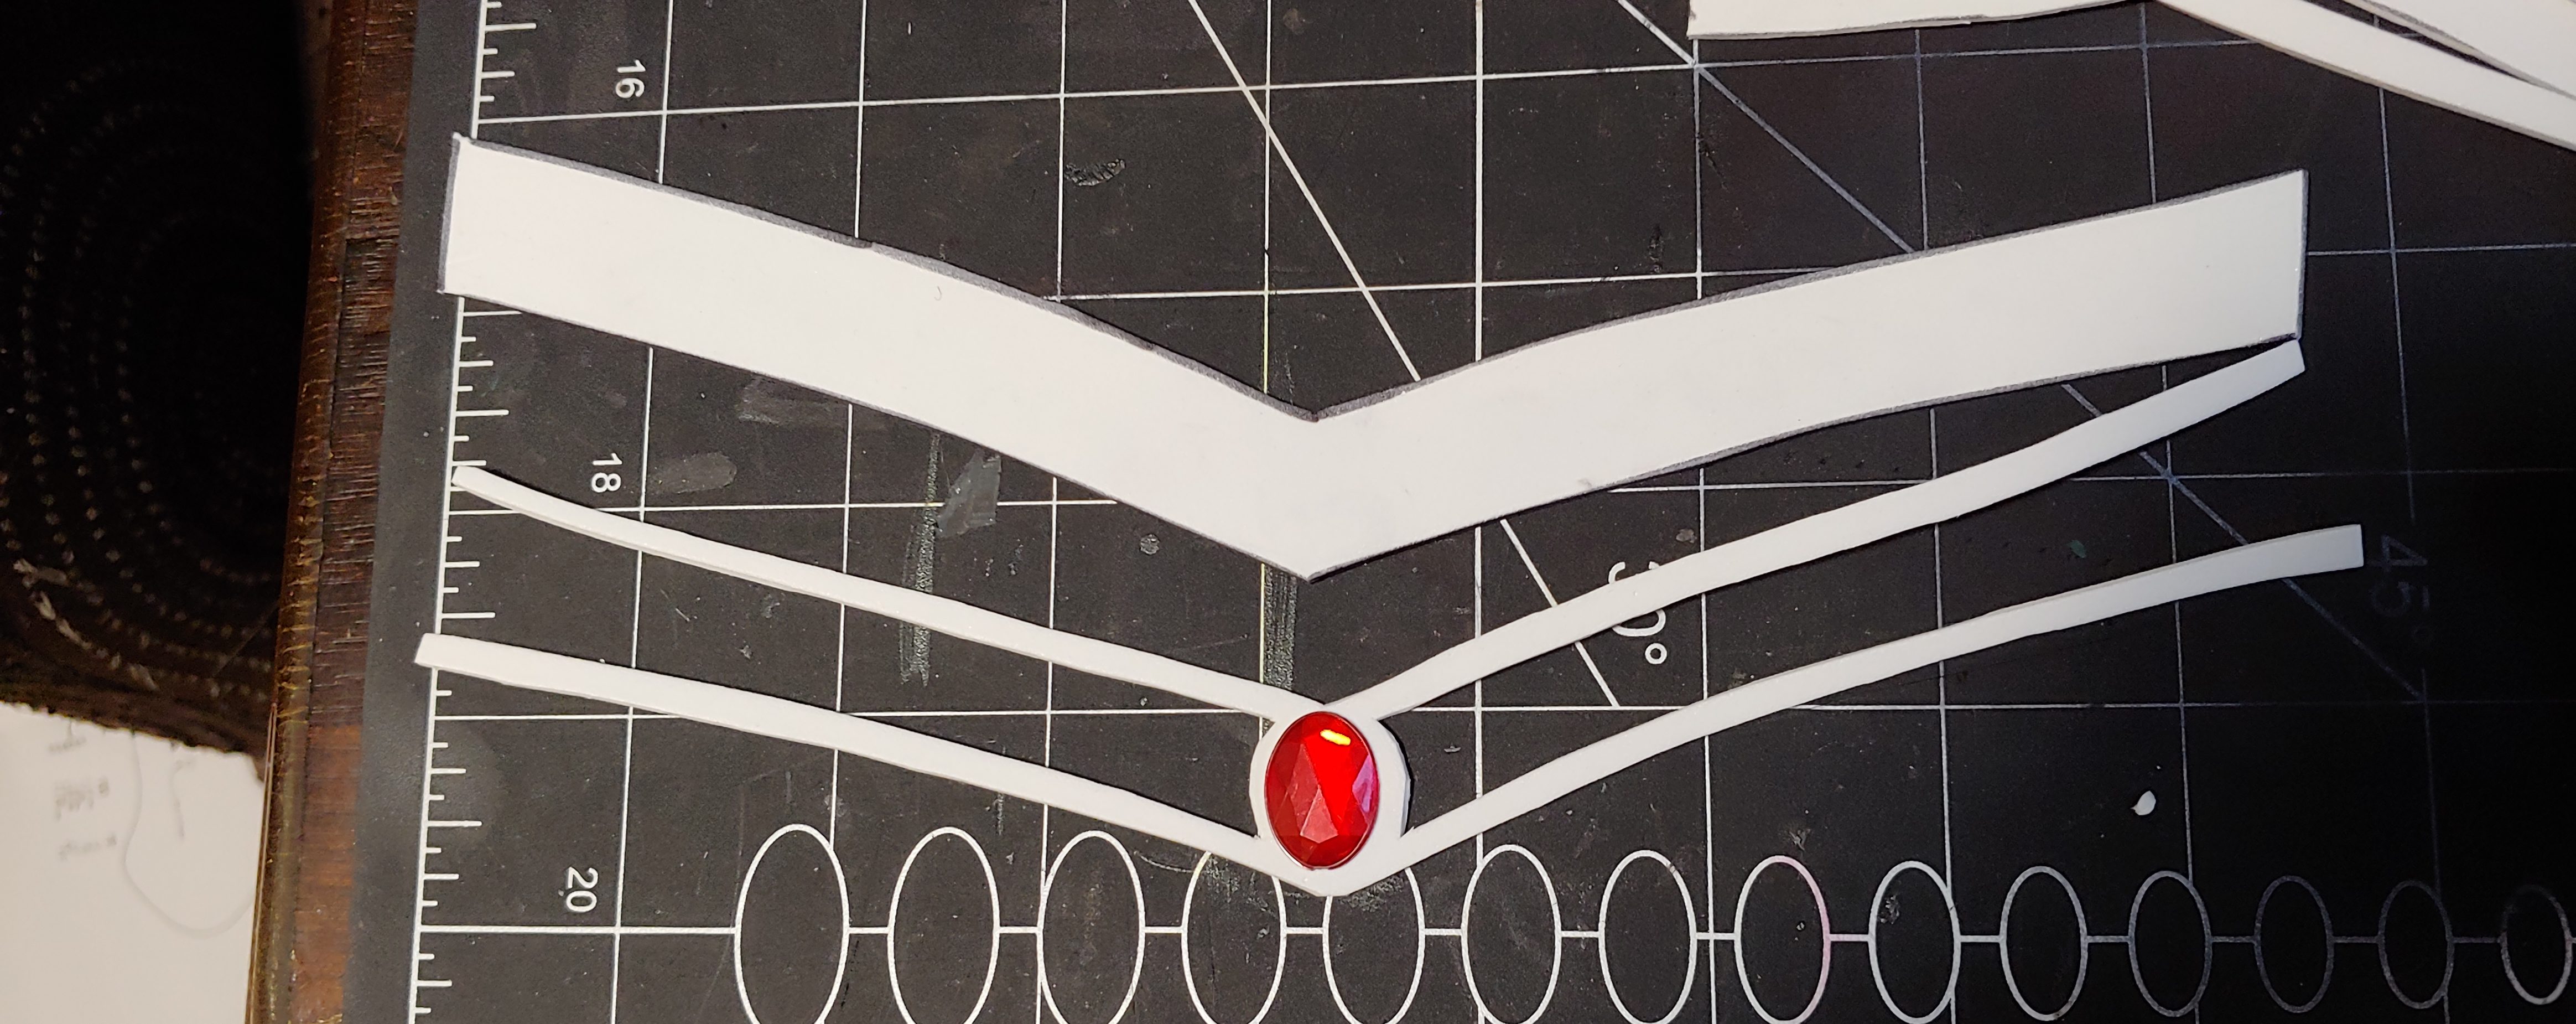
Cut it out using the thick lines as a guide, and leaving the spot where the gem will sit filled in. Cut the other one out with no modifications to the pattern. Glue the layers together with some contact cement and then prime for painting.
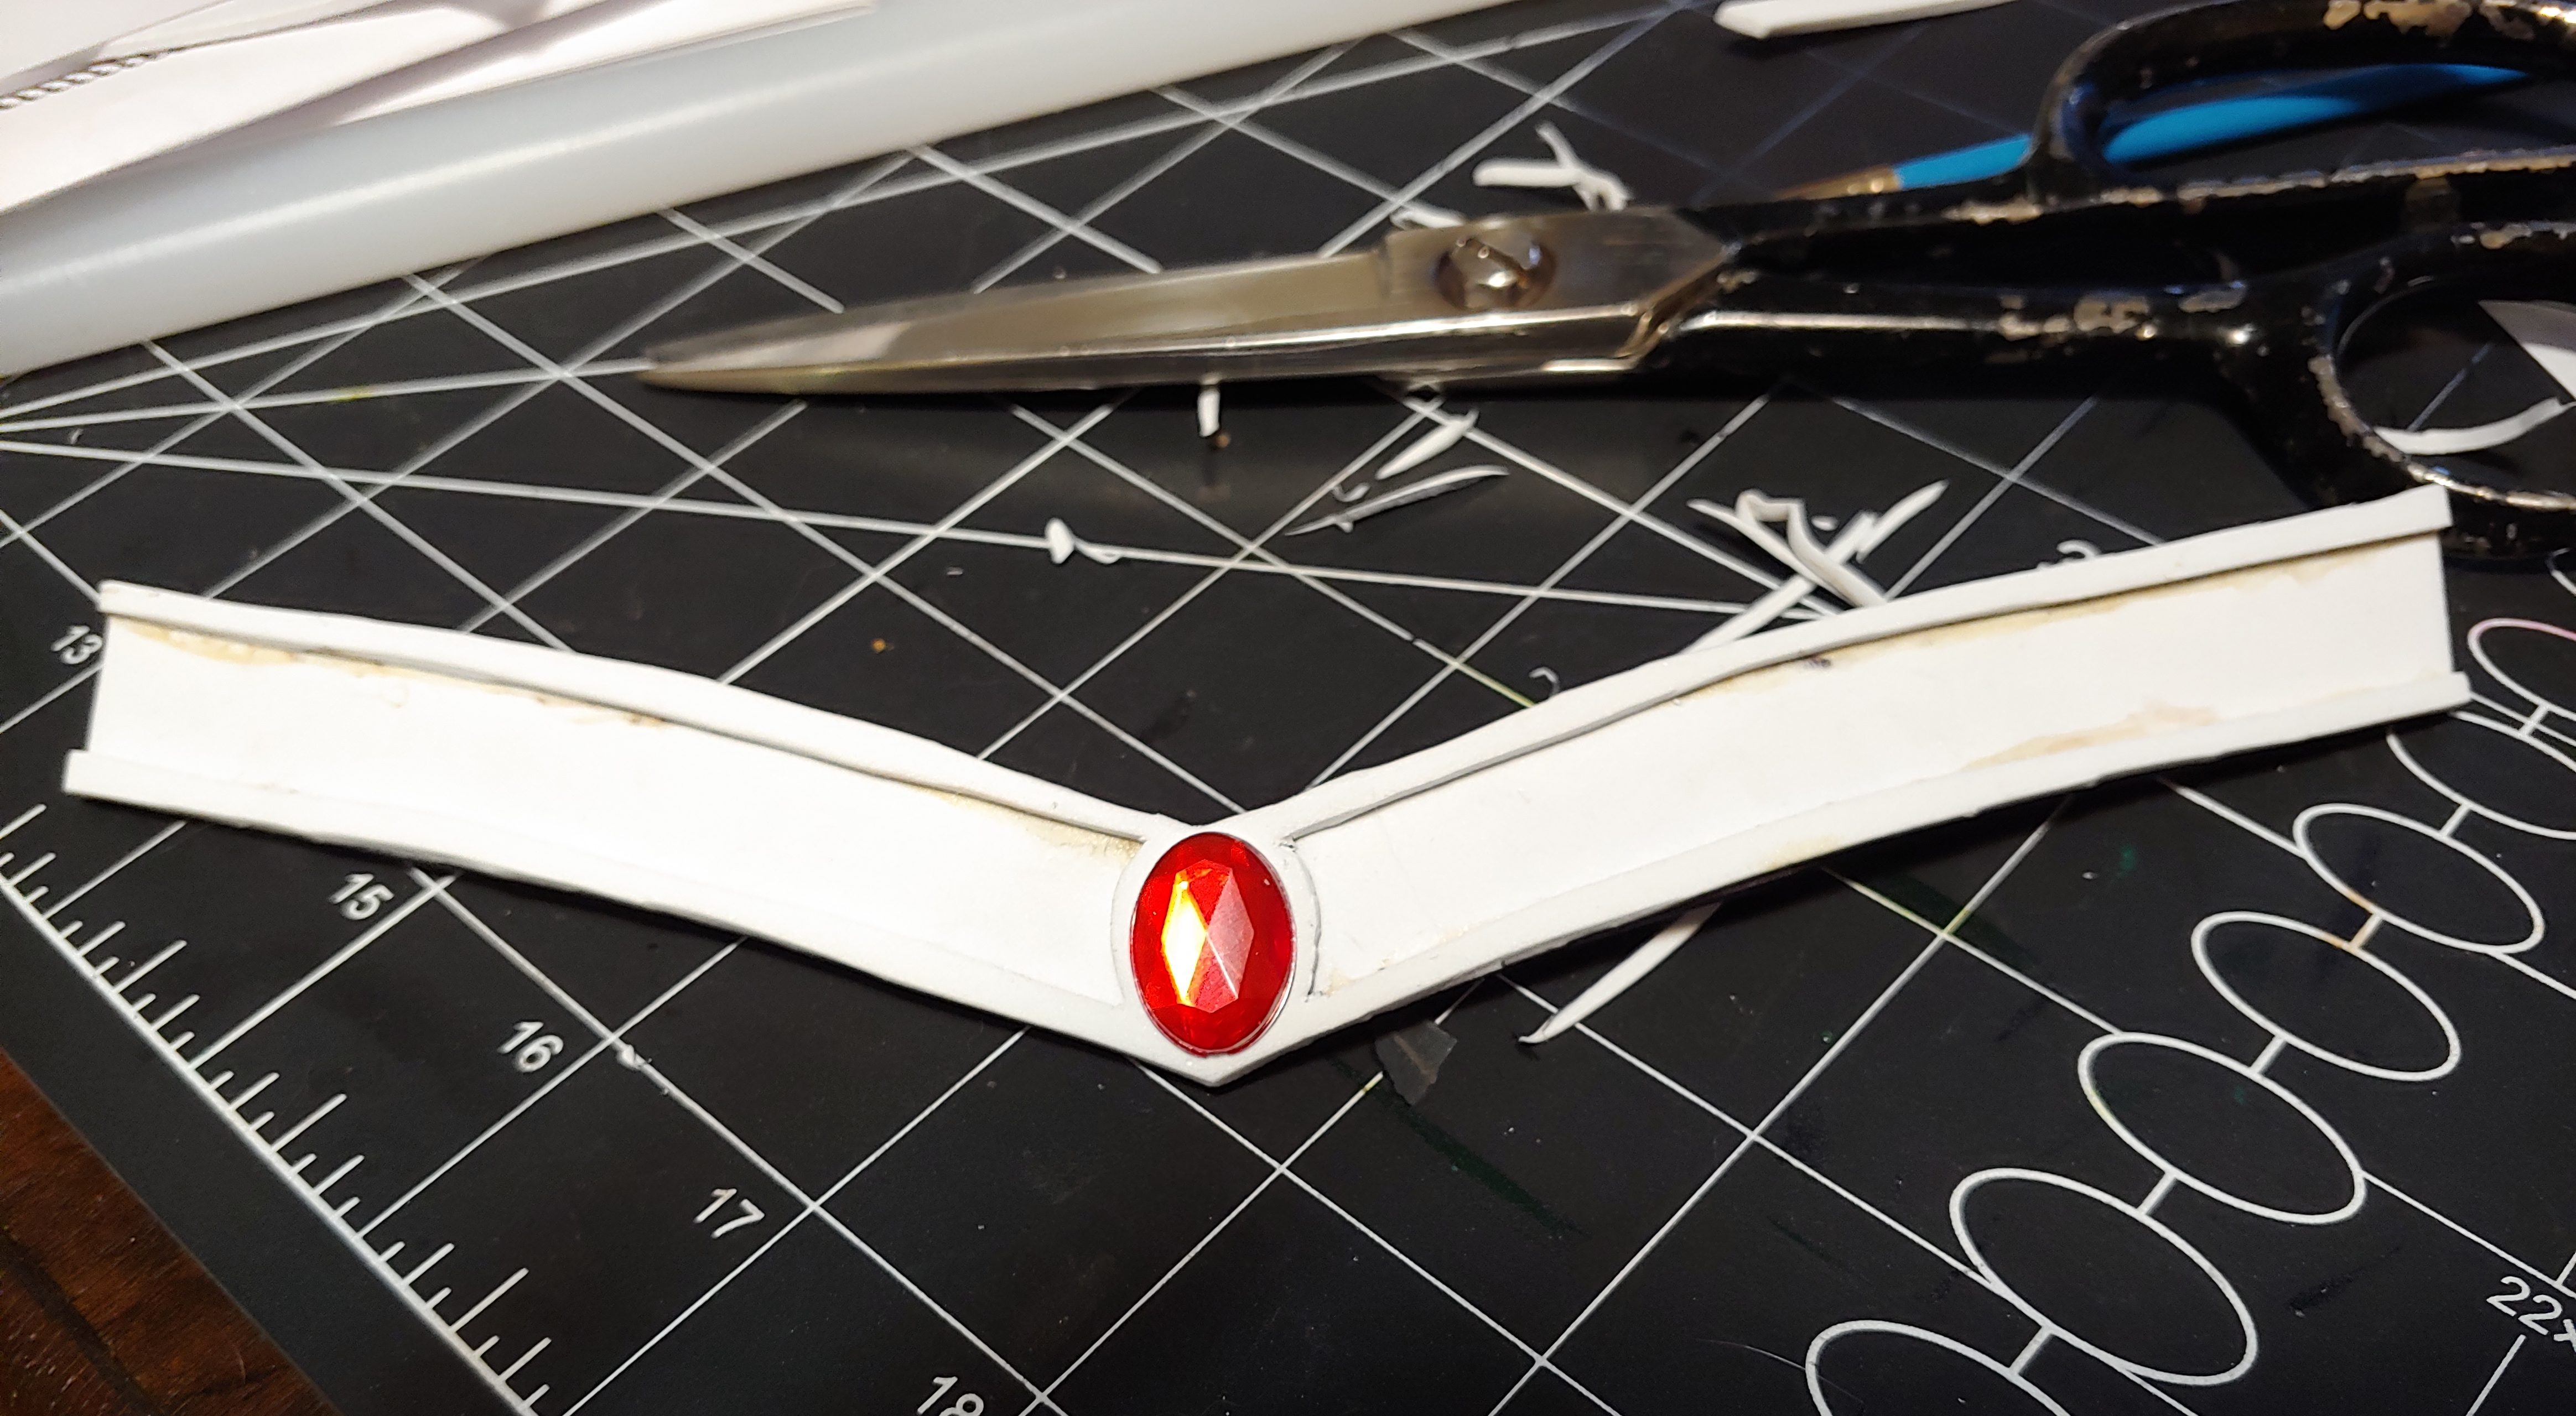
Again the gem is just sitting there for visual effect, gluing it on is one of the last steps. I used plasti-dip as a primer and painted on top of that with acrylic paints.
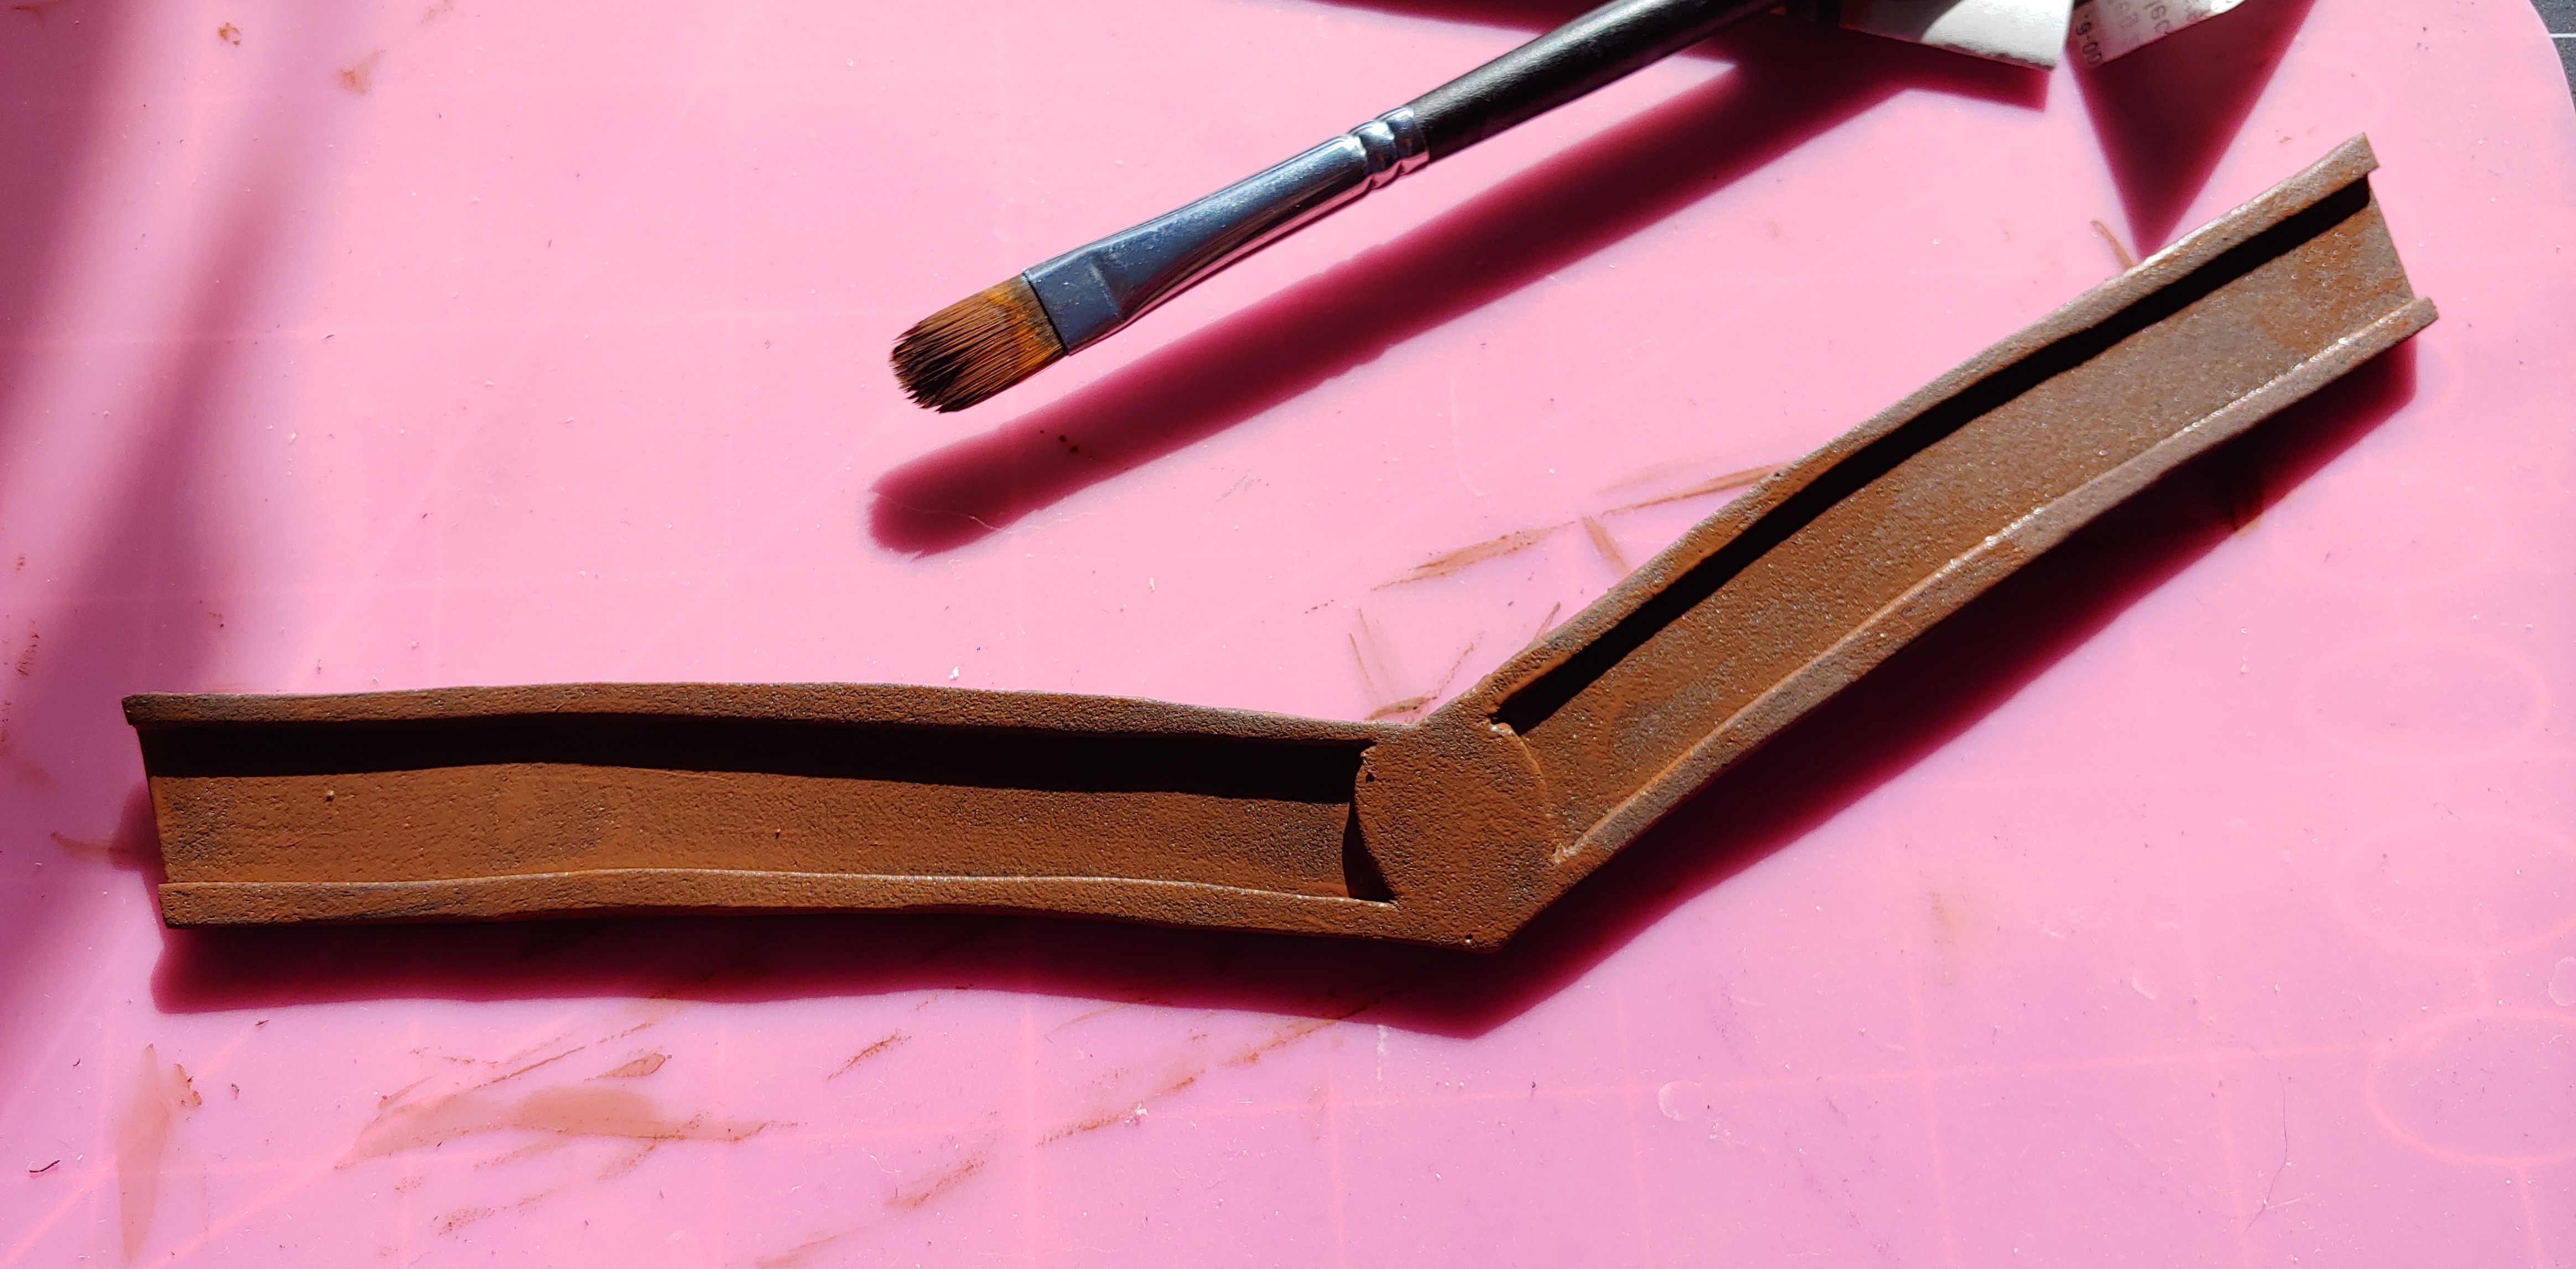
The primer I used was black, and gold paints tend to have poor coverage, so a trick I like to use to save on expensive metallic paints is to do a base coat with a cheaper paint in a close colour. In this instance, I picked a cinnamon brown acrylic paint that I got at the dollar store. It will help the metallic paint appear to cover in fewer coats and give the final finish just a little more depth. Next the whole thing got a couple coats of gold paint, and in spots that I wanted to have a little bit of shading, I mixed the same brown together with my gold. Once you’re happy with the paint job, give it enough time to dry fully and then put a top-coat like mod podge on to protect it.
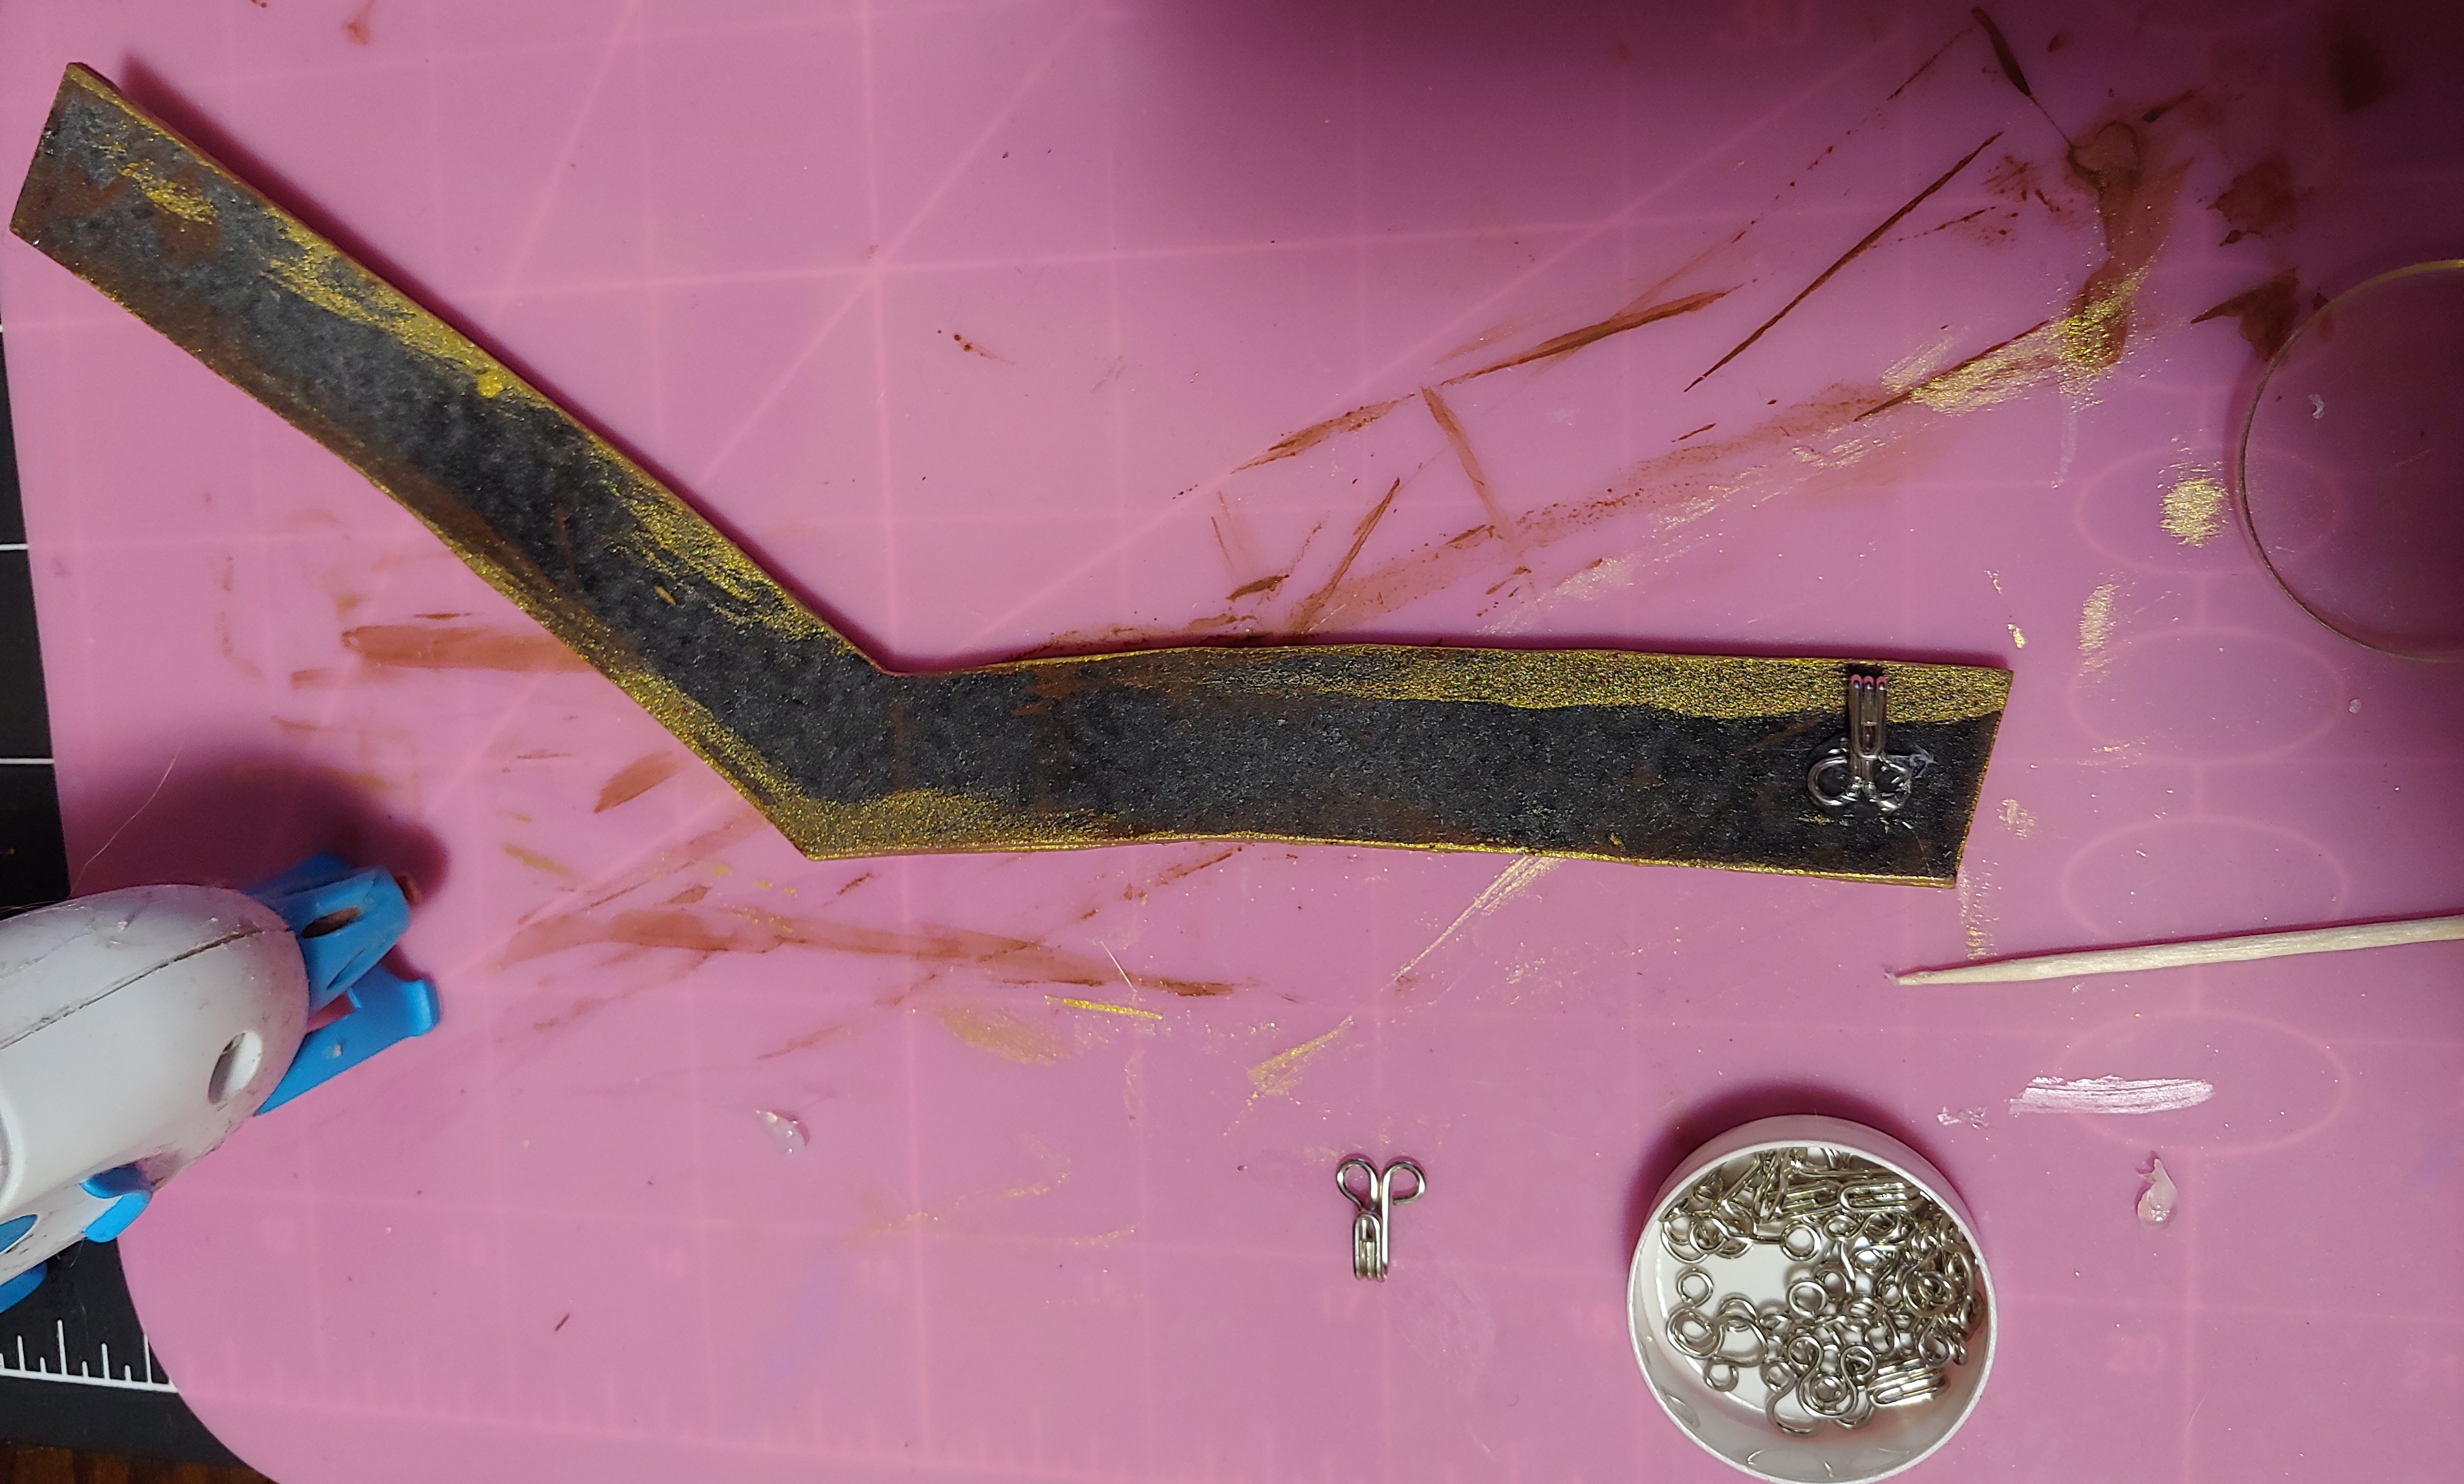
Once everything is dry we can do the finishing touches with a hot glue gun. Use the hot glue to attach the gem, to the front. I like to use the hook side of a couple hook and eye clips to attach the crown to my wig cap. Glue those onto the back near the ends, using a toothpick to make sure the glue isn’t blocking the opening of the hook.
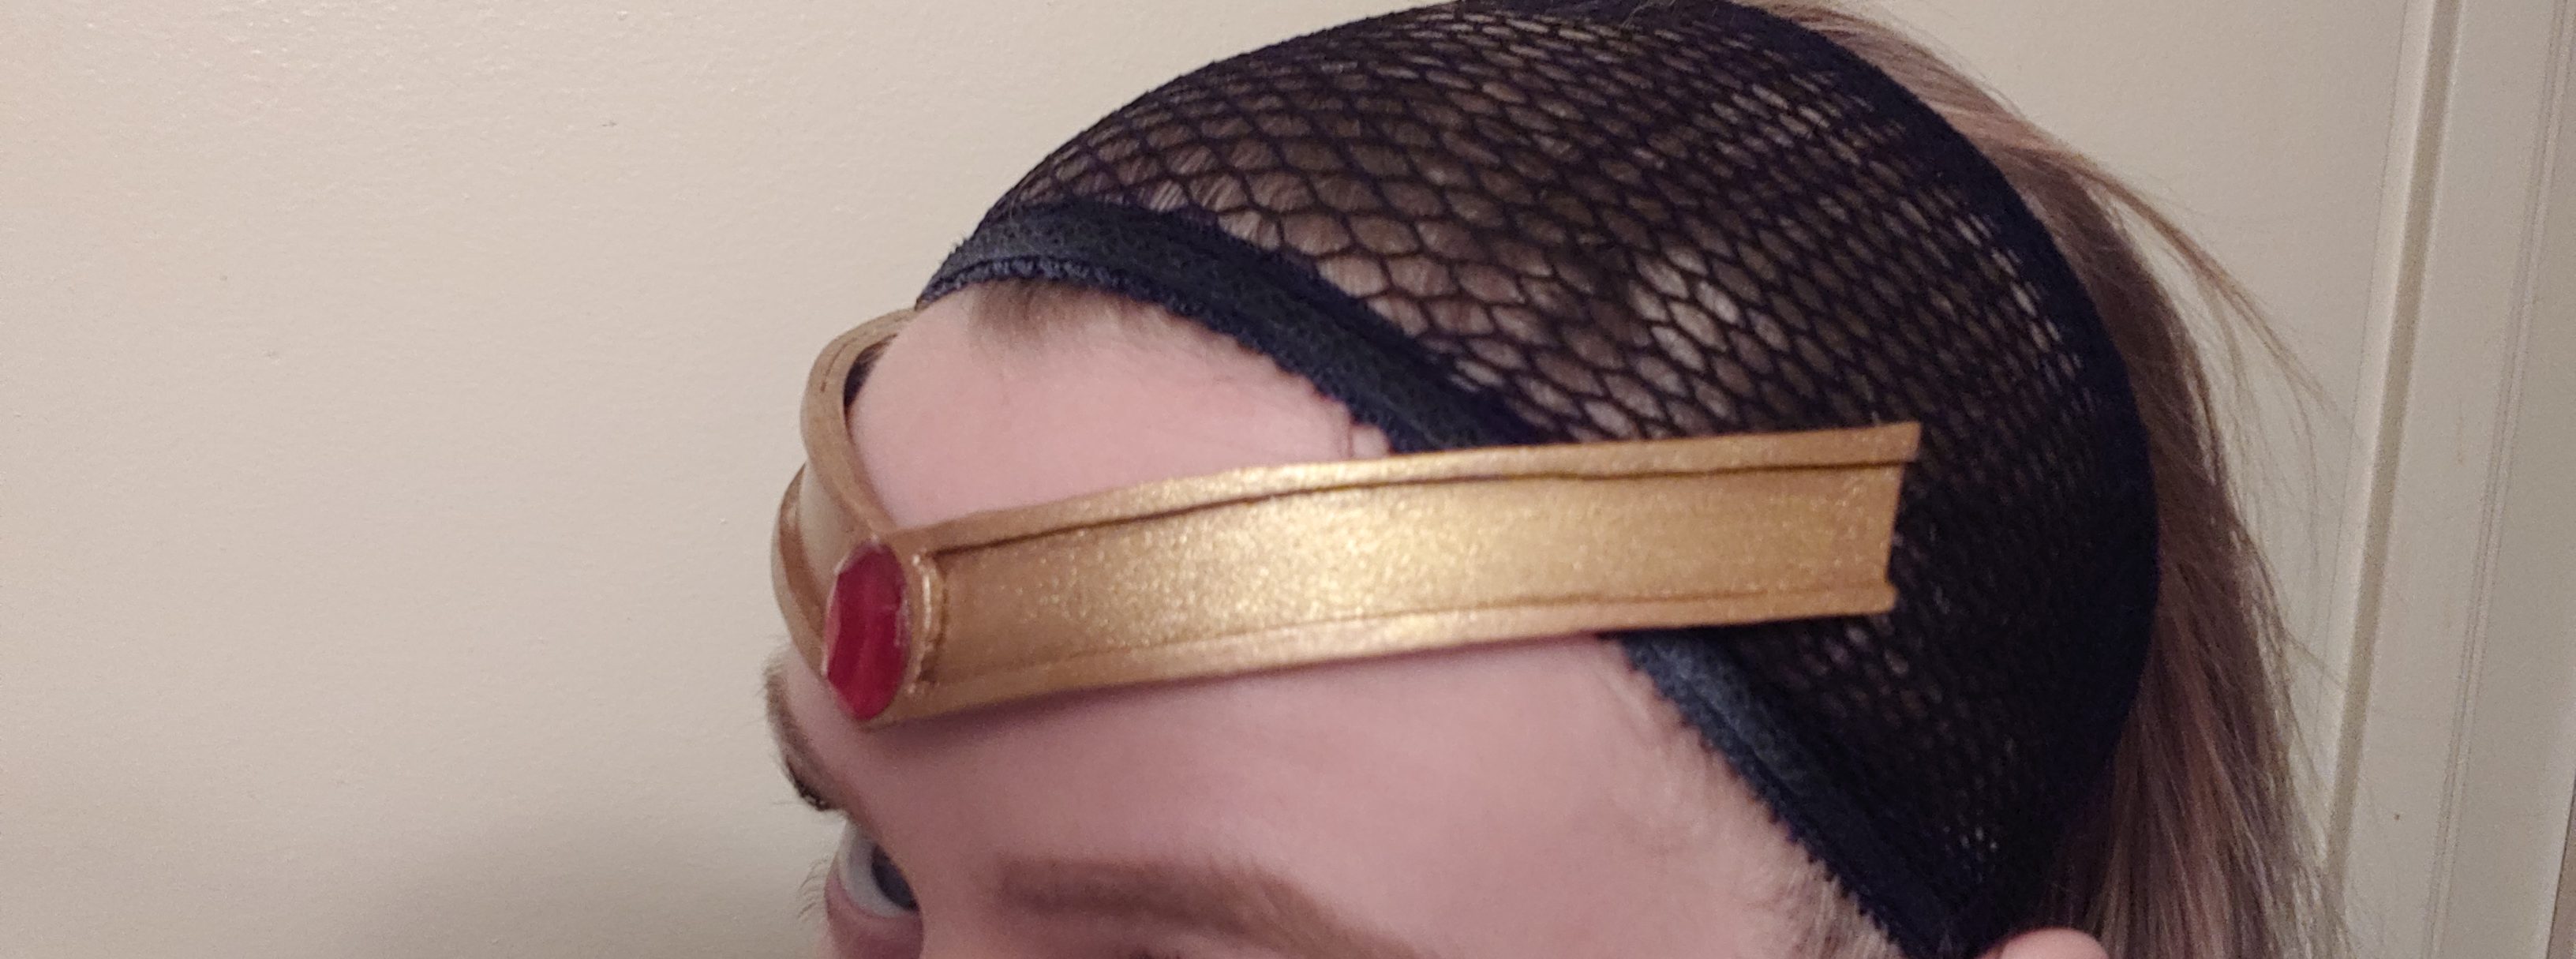
The little hooks can then just poke into your wig cap, it may not feel very secure, but once you’ve got a wig on top of this all you need is something to prevent it from slipping, and they’re enough for that. Do a wear test to see how cute you look and you’re done.

